Tick Mark Symbol Keyboard Shortcut: A Practical Guide
Learn how to reliably insert tick marks (✓ and ✔) using keyboard shortcuts across Windows, macOS, and Linux. This comprehensive guide covers Unicode inputs, Alt codes, and app-specific tricks to speed up writing, forms, and checklists.

A tick mark symbol keyboard shortcut lets you insert a check mark (✓ or ✔) quickly across Windows, macOS, and major apps. This quick definition highlights the most reliable cross‑platform methods, common Unicode inputs, and app‑specific tips to improve accuracy, speed, and consistency. You'll also learn when to paste instead of typing and how to choose the right glyph for your document.
What is the tick mark symbol keyboard shortcut and why it matters
According to Shortcuts Lib, a tick mark symbol keyboard shortcut lets you insert a check mark quickly in documents, forms, emails, and code comments. The two most common glyphs are ✓ (white heavy check) and ✔ (heavy check). Knowing when and how to type or paste these marks reduces time spent on bullet lists, task tracking, and international forms. This section explains what a tick mark is in practical terms and why reliable input matters for readability and workflow consistency. The rest of this guide will cover cross‑platform methods, how to choose the right glyph for the job, and best practices for testing rendering in your target fonts.
Tick mark symbol variants: check marks, approved symbols, and their uses
There are subtle differences between symbols that look similar. The common ✓ is a check mark used to indicate completion or agreement, while ✔ is a heavier glyph for emphasis. Some contexts require a checkbox style, and other symbols like ✓✓ or ✔✔ may be used for emphasis. In programming and international documents, choosing the right glyph helps prevent ambiguity. This section helps you decide which variant to deploy in a given document, ensuring consistency across sections, languages, and fonts. Remember: the shape matters less than the meaning you convey; the glyph should be legible and unambiguous at the intended size and print method.
Windows: insert tick marks quickly (alt codes, clipboard, fonts)
Windows users have several built‑in paths to obtain a tick mark. One approach is to use a font that contains ✓ and ✔ and insert the character via a system tool if you know the code point. Another reliable option is to copy the glyph from a reference source and paste it into the target document. When you want a keyboard shortcut, you can try Alt codes where supported by your font and keyboard layout; if Alt codes are unavailable in your app, the Character Map provides an accessible alternative. Always test rendering in Word, Excel, or your browser since some apps map fonts differently.
macOS: insert tick marks with Character Viewer and shortcuts
macOS offers the Character Viewer (Control-Command-Space) to browse and insert tick marks and related symbols. You can search for "check" or "mark" and insert ✓ or ✔ with a couple of clicks. Some apps support Unicode input by typing the code point and using a compose or input method; others rely on the system clipboard. A practical tip is to add a shortcut to your favorite glyph in the emoji & symbols panel for quick access. Always check how the glyph renders in your target font, as some fonts alter stroke thickness.
Linux and other environments: compose keys and Unicode input
Linux users often have multiple options. The Compose key can produce a wide range of symbols after a few taps; many desktops also support direct Unicode input by typing the hexadecimal code point (for example, U+2713 for ✓) and then pressing a compose or conversion key. If your editor supports it, you can map a custom shortcut to insert the symbol directly. For web apps in Linux, copy‑paste remains a reliable fallback, but setting up a reusable snippet can speed up repetitive usage. Font support and encoding can affect whether the symbol displays correctly.
Common apps: Word processors, spreadsheets, editors, and email clients
In word processors like Microsoft Word or Google Docs, you can insert tick marks via insert symbols or by mapping a single keystroke to the glyph. Spreadsheets such as Excel or Google Sheets may handle the characters differently in cells and formulas; ensure the font supports the character in both display and export. In code editors, prefer the plain text glyphs or inline SVG icons to avoid encoding issues. In email clients, keep in mind that recipient fonts may render differently, so sending a checklist as a separate image can preserve the intended look when fidelity matters.
Accessibility and font considerations
If you rely on tick marks for accessibility (e.g., screen reader users or high‑contrast modes), ensure that alternative text describes the symbol's meaning, not its glyph shape. Some screen readers announce the glyph as “check mark” rather than “tick mark,” depending on the language and platform. Font fallback strategies can mitigate rendering issues; choose fonts with robust Unicode support and test at the small sizes common in forms. When distributing documents, consider providing a plain text outline or a separate legend to avoid misinterpretation.
Quick reference: OS-by-OS cheat sheet
Keep a personal cheat sheet handy with the most reliable methods for your primary OS. For Windows, jot down: use Character Map or Unicode input where available, and copy‑paste as a universal fallback. For macOS, leverage the Character Viewer or Unicode input and keep a saved glyph for quick pasting. For Linux, remember Unicode input and the Compose key as versatile options. Use these patterns to improve speed, accuracy, and consistency across tasks.
Tools & Materials
- Computer or device with keyboard(Any OS (Windows/macOS/Linux) and apps)
- Text editor or target app for testing(Where you'll insert and verify the glyph)
- Character Map / Character Viewer / Emoji & Symbols panel(For finding glyphs when shortcuts aren't known)
- Font with check glyphs (✓, ✔)(Ensure your font supports both glyphs in your document)
- Internet access or reference glyph list(Optional for quick lookup of code points)
- Copy-paste clipboard(Fallback in apps with limited shortcut support)
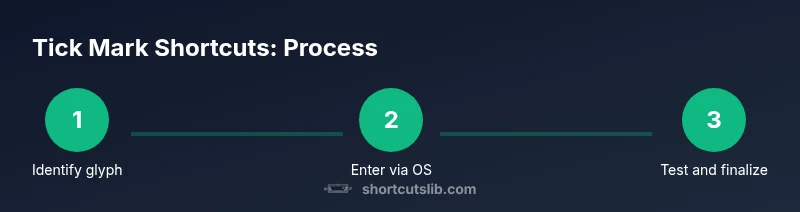
Steps
Estimated time: 25-40 minutes
- 1
Decide which tick glyph you need
Start by identifying the exact glyph you want to use (✓ for a standard check, ✔ for a bold emphasis) and the context where it will appear. This avoids surprises later when you switch apps or platforms. Clarify whether you need a glyph for a form, a document header, or an inline annotation.
Tip: Check your document font in at least two common sizes before committing to a glyph choice. - 2
Open your target app
Open the editor, form, spreadsheet, or email client where you will insert the symbol. Ensure the insertion point is active and within the correct font. If you’re testing across multiple apps, keep a single reference document open for quick comparisons.
Tip: If you’re switching apps, place a test glyph in a small, unobtrusive area first. - 3
Test built-in options first
Before reaching for special codes, try any built‑in method offered by the app, such as Insert > Symbol or a dedicated shortcut. Many apps expose a list of symbols that can be inserted with a couple of keystrokes, which often works more reliably than Unicode input in a busy workflow.
Tip: Document your preferred app’s exact path to the symbol so you can repeat it later. - 4
Try Windows Alt or Unicode input
If you’re on Windows, explore Alt codes or Unicode input where supported. Use the numeric keypad for Alt codes and ensure Num Lock is on. If Alt codes don’t work, switch to the Unicode input option or the Character Map as a fallback.
Tip: Prefer copying the glyph from a trusted source when Alt codes fail. - 5
Try macOS Unicode input/Character Viewer
On macOS, use the Character Viewer (Control-Command-Space) to browse and insert check marks. You can also use Unicode input in apps that support it. Pin the glyph in your favorites to speed future insertions.
Tip: If you frequently insert ticks, add a quick-access glyph to your macOS clipboard history tool. - 6
Try Linux Unicode input or Compose key
Linux users can use direct Unicode input by typing U+2713 (for ✓) and confirming with the compose/return key, or use a Compose key workflow if configured. Test in your editor to ensure consistent rendering across fonts.
Tip: Ensure your environment uses a font with glyph support; otherwise the symbol may appear as a tofu box. - 7
Insert via copy-paste as fallback
If keyboard shortcuts fail or fonts differ, copy the glyph from a reliable source and paste it into the document. This method is the most universally supported across apps and platforms.
Tip: Keep a small clipboard clip of both ✓ and ✔ for quick reuse. - 8
Test rendering in your document
Open print or export previews to confirm the tick marks render correctly at final sizes. Check both screen and printer outputs, and ensure contrast remains legible for readability.
Tip: If output changes between digital and print, adjust the font or glyph weight accordingly. - 9
Create a quick-reference sheet for future use
Compile a short reference with the preferred glyphs, OS inputs, and fallback methods. This saves time on future tasks and ensures consistency across teams.
Tip: Share the sheet with teammates to standardize symbol usage.
Questions & Answers
How do I type a check mark on Windows without external software?
Windows users can insert tick marks using Unicode input or the built-in Character Map. Alt codes are supported by some fonts and apps, but their availability depends on system settings. Copy-paste remains a reliable fallback.
You can insert a check mark using Unicode input or the Character Map. Alt codes may work in some apps, with copy-paste as a reliable fallback.
What is the difference between ✓ and ✔?
✓ is a standard check mark used for completion; ✔ is a heavier glyph for emphasis. Use one consistently in a document to avoid confusion.
A simple explanation: the two marks look different; choose one and stay consistent.
Can I insert tick marks in Google Docs or Sheets?
Yes: use Insert > Special characters to search for check marks, or copy-paste. Google Docs and Sheets render fonts differently; test before finalizing.
Yes, in Google Docs or Sheets you can insert via special characters or copy-paste.
Are there keyboard shortcuts for other symbols like checkboxes?
Some apps support symbol shortcuts; check per-app help. For accessibility, use descriptive text.
Some apps offer symbol shortcuts; check the help menu for each app, and consider alternatives.
Why do tick marks render differently in fonts?
Font design determines stroke thickness; ensure you test at the final print size. Some fonts may distort the glyph.
Fonts affect how ticks look; test in your chosen font.
Is there a universal shortcut that works across all apps?
No universal shortcut exists; cross‑app consistency usually means using copy-paste or a saved glyph.
There isn't a one-size-fits-all shortcut; use copy-paste or a saved glyph.
Watch Video
Main Points
- Master OS-specific tick mark inputs for speed.
- Prefer built-in shortcuts; fallback to copy-paste when needed.
- Test glyph rendering in your document font.
- Keep a quick-reference sheet for frequent tasks.
- Choose the right tick glyph to match meaning.