Shortcut Keys for Windows 10 Screenshots: Quick, Practical Guide
Learn the essential Windows 10 screenshot shortcuts, including PrtScn, Windows+PrtScn, Alt+PrtScn, and Snip & Sketch. This step-by-step guide covers laptops, Fn keys, saving, annotating, and sharing screenshots efficiently.

Master the essential shortcut key to take screenshot in laptop Windows 10 with built-in tools and common keystrokes. Key options include PrtScn (copy to clipboard), Windows+PrtScn (auto-save to Pictures), Alt+PrtScn (active window), and Windows+Shift+S (snip & sketch). This guide also covers Fn-key variations and annotation workflows.
The landscape of Windows 10 screenshot shortcuts
If you’re searching for the shortcut key to take screenshot in laptop Windows 10, you’re in the right place. Screenshots are foundational for troubleshooting, tutorials, and sharing quick visuals with colleagues. On Windows 10, you have options that range from quick clipboard captures to automatic file saves, plus robust built-in tools for precise selections and annotations. According to Shortcuts Lib, the diversity of capture methods is what makes these shortcuts powerful: you can tailor your approach to the moment—whether you need a quick clipboard paste into an email or a clean, saved image for a report. The key is to understand which method suits the task, and in what order you should use them for the fastest result. This section lays the groundwork for a practical, brand-driven workflow that tech users and keyboard enthusiasts will appreciate.
Core idea: clipboard vs. file vs. snip
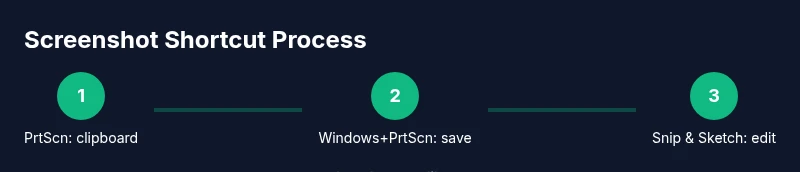
Windows 10 offers three primary capture outcomes: (1) copy to clipboard for quick pastes, (2) auto-save to a folder as a file, and (3) an on-screen snip you can annotate. Each path serves different scenarios. Quick pasting is excellent for drafting docs; saved files are great for archiving; snips excel in presentations where you want ready-made visuals with markup. Shortcuts Lib’s analysis for 2026 emphasizes speed and flexibility: pick the method that minimizes context switches and reduces friction in your workflow. As you read, you’ll see how to switch methods mid-task if the situation changes.
Keyboard basics you should know
Start with the Print Screen key (often labeled PrtScn) on your keyboard. It is the gateway to the clipboard workflow. On laptops, you may need to press Fn plus PrtScn to activate the print screen function. In contrast, Windows key combinations enable direct file saves. Familiarize yourself with the most common combos: PrtScn, Windows+PrtScn, Alt+PrtScn, and Windows+Shift+S. Knowing these basics unlocks faster capture speeds and more consistent results across apps and documents.
What this guide will cover
You’ll learn how each shortcut functions, when to use it, and how to save, edit, and share screenshots effectively. We’ll discuss laptop-specific considerations, how to annotate captures with free built-in tools, and how to avoid privacy pitfalls. You’ll also find practical tips for organizing screenshots, creating repeatable workflows, and choosing the right tool for different tasks. The goal is to empower you to capture precisely what you need in as few keystrokes as possible.
First principles: choosing the right method
The method you choose should align with your immediate goal. Quick pastes into emails or chat need clipboard captures; documentation and reporting often benefit from saved image files; design reviews or presentations frequently require annotated snips. By understanding each path—clipboard, file, or snip—you can select the route that minimizes steps and preserves clarity. Shortcuts like Windows+Shift+S give you instant control for high-precision captures without leaving the keyboard.
Practical workflow philosophy
Think in terms of a simple rule: capture once, decide later. If you aren’t sure where you’ll paste the image, start with a clipboard capture (PrtScn). If you know you’ll need a file, use Windows+PrtScn to save automatically. For precise selections or on-screen annotations, Snip & Sketch (Windows+Shift+S or the app) is your friend. This modular approach keeps your process flexible and your outcomes predictable.
A quick note on privacy and workflow speed
Screenshots can reveal sensitive information. Always be mindful of what you capture and where you store it. Shortcuts Lib emphasizes establishing a predictable folder structure and using consistent file naming. For speed and privacy, set a dedicated Screenshots folder, enable automatic file naming by date, and use the Snip & Sketch editor to blur or annotate sensitive data before sharing.
The practitioner’s mindset: practice with real tasks
Start with a simple task—capture a screenshot of a web page, paste into a document, and annotate a highlight. Then try saving a batch of screenshots for a mock report. As you gain fluency, you’ll automatically select the fastest route for each scenario. The goal is to reach a point where your capture speed is limited by your typing, not your tooling.
Conclusion to this section
Understanding the spectrum of Windows 10 screenshot shortcuts sets you up for efficient capture. By distinguishing clipboard captures, auto-saved files, and precise snips, you can tailor your workflow to any situation. The guidance here draws on Practical insights from Shortcuts Lib and aligns with best practices used by keyboard enthusiasts.
Closing thoughts on the right tools for the job
The best outcomes come from knowing when to rely on native Windows features and when to bring in a quick annotation step. Whether you’re a student, developer, or IT pro, mastering these options will save time and improve communication. The rest of this guide dives into the specific shortcuts, their meanings, and practical caveats you’ll appreciate on a busy day.
Tools & Materials
- Keyboard with Print Screen (PrtScn) key(On many laptops you may need to press Fn+PrtScn to activate the print screen function.)
- Snip & Sketch / Snipping Tool app(Built-in Windows 10 tools for precise snips and annotations.)
- Windows 10 PC or laptop(Ensure you’re running Windows 10 with up-to-date updates for Snip & Sketch features.)
- Basic image editor (e.g., Paint, Photos, or a preferred editor)(Use for quick edits, annotations, or cropping after capturing.)
Steps
Estimated time: 20-30 minutes
- 1
Prepare your workspace
Clear sensitive data from the screen, close extraneous apps, and decide whether the copy-to-clipboard or auto-save workflow fits your task. This upfront setup reduces post-capture editing and privacy concerns.
Tip: Keep a dedicated Screenshots folder and a consistent naming scheme. - 2
Choose a capture type
Determine if you need a simple clipboard copy, an automatic file save, or a precise snip for annotation. Your choice guides which keyboard shortcut you’ll press first.
Tip: If in doubt, start with PrtScn to copy to clipboard for quick pastes. - 3
Copy to clipboard with PrtScn
Press PrtScn to capture the entire screen and copy it to the clipboard. You can immediately paste into documents, emails, or image editors.
Tip: If your screen contains private data, paste into a temporary editor first to review before sharing. - 4
Auto-save with Windows+PrtScn
Press Windows key + PrtScn to save a full-screen screenshot directly to the Pictures > Screenshots folder. This streamlines workflows that require saved files rather than clipboard content.
Tip: If the save destination differs, adjust your system's default Pictures folder location. - 5
Capture active window with Alt+PrtScn
Press Alt + PrtScn to capture only the active window. This is ideal for focusing on a single app without extraneous desktop clutter.
Tip: If you’re recording multiple windows, switch focus deliberately before capture. - 6
Snip and annotate with Windows+Shift+S
Use Windows key + Shift + S to activate Snip & Sketch’s selection mode. Draw a rectangle around the area you want, then it’s copied to the clipboard for pasting or opened in the editor.
Tip: For precise shapes, zoom in your screen before snipping. - 7
Edit or annotate in Snip & Sketch or Paint
Open the captured image in Snip & Sketch or your editor to add arrows, highlights, and text. This makes your screenshots presentation-ready.
Tip: Save annotated files with a clear, date-based naming convention. - 8
Locate saved screenshots
If you used the auto-save method, navigate to Pictures > Screenshots to retrieve your captures. Keep a short review cycle to delete duplicates.
Tip: Create a monthly cleanup routine to avoid clutter. - 9
Handle keyboard variations on laptops
Laptops frequently require Fn combinations or alternate function mappings. Check your laptop’s manual or manufacturer support pages for exact Fn+PrtScn instructions.
Tip: Consider creating a quick reference sheet for your most-used shortcuts. - 10
Troubleshoot missing captures
If a shortcut doesn’t work, verify that Snip & Sketch isn’t disabled, ensure the correct keyboard layout is active, and test in another app to rule out application-specific issues.
Tip: Restart the app or the computer if shortcuts suddenly stop working.
Questions & Answers
What is the difference between PrtScn and Windows+PrtScn?
PrtScn copies the full screen to the clipboard, useful for quick pastes. Windows+PrtScn saves a full-screen image to the Pictures > Screenshots folder, which is better for archiving and sharing as a file.
PrtScn copies to clipboard; Windows+PrtScn saves a file to your Pictures folder.
Do all laptops require Fn + PrtScn to take a screenshot?
Many laptops map PrtScn to Fn+PrtScn. Check your model’s keyboard legend or user manual to confirm. If your laptop uses a dedicated PrtScn key, you may not need Fn.
Fn may be required on some laptops; check your keyboard layout.
Can I annotate screenshots without third-party apps?
Yes. Snip & Sketch and Paint on Windows 10 allow you to annotate, crop, and draw on screenshots without external software.
You can annotate screenshots using Snip & Sketch or Paint.
Where are Windows+PrtScn screenshots saved by default?
Saved images go to the Pictures > Screenshots folder by default. You can move or rename the folder if you prefer a different structure.
Saved files land in Pictures/Screenshots unless you change the path.
What if shortcuts don’t work after Windows updates?
Try restarting Snip & Sketch, check for updates, and ensure the shortcuts aren’t disabled in settings. If problems persist, a system reboot often resolves temporary conflicts.
Restart apps, check updates, and reboot if needed.
Is there a difference between Snip & Sketch and Snipping Tool?
Snip & Sketch is the newer tool with improved features and annotations; Snipping Tool is older but still available. Snip & Sketch generally provides a smoother workflow for most users.
Snip & Sketch is the newer, feature-rich option over the legacy Snipping Tool.
Watch Video
Main Points
- Master the core shortcuts: PrtScn, Windows+PrtScn, Alt+PrtScn, and Windows+Shift+S.
- Choose clipboard, file save, or snip workflows based on task needs.
- Fn-key variances on laptops require a quick reference guide.
- Annotate and edit screenshots for clarity before sharing.
- Keep privacy in mind and organize saved captures for quick access.