How to Screenshot on Windows Keyboard Shortcut
Learn the fastest ways to capture your screen on Windows using keyboard shortcuts. This comprehensive guide covers Print Screen, Alt+Print Screen, Windows+Print Screen, and Win+Shift+S, with saving, editing, and sharing tips for seamless workflows.

According to Shortcuts Lib, you can capture your screen on Windows quickly using a handful of keyboard shortcuts. Mastering these methods—Print Screen, Alt+PrtScn, Windows+PrtScn, and Win+Shift+S—lets you copy to clipboard, save automatically, or snip and annotate. This guide walks you through each method, when to use them, and practical tips for saving and sharing images.
Why Windows shortcuts matter for screenshots
From a productivity perspective, keyboard shortcuts reduce the time between noticing something on your screen and having a usable image in your workflow. Shortcuts also minimize context switching: you don’t need to reach for a mouse, open menus, or pause to name files. According to Shortcuts Lib, these keystrokes work consistently across apps and windows, which helps you capture chat conversations, code, or design work with minimal friction. You’ll also gain flexibility: some shortcuts copy to the clipboard, others save automatically to a folder, and others provide a quick, temporary snip for immediate sharing. Developing a solid habit around these keystrokes can dramatically speed up documentation, bug reporting, and collaboration.
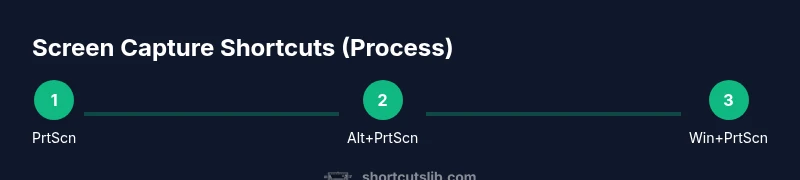
Quick overview of the main methods (PrtScn family and friends)
There isn’t a single “one-size-fits-all” keystroke for every scenario. The four core methods are: (1) Print Screen (PrtScn) copies a full-screen image to the clipboard, (2) Alt+PrtScn copies the active window to the clipboard, (3) Windows+PrtScn saves a full-screen image directly to the Screenshots folder, and (4) Win+Shift+S opens Snip & Sketch to capture a region or a freeform shape. Each method serves different needs: quick clipboard capture for chat messages, a saved file for documentation, or a precise region for a bug report. Keep these four in mind as your baseline toolkit.
Print Screen (PrtScn) and clipboard workflows
The classic Print Screen key captures the entire screen and places the image on your clipboard. You can then paste it into an image editor, a document, or an email. If you repeatedly paste the same screenshot, consider using a dedicated editor to annotate before sharing. In many cases, a quick paste into an email or chat is enough to convey the issue. If you want to save files automatically, move to the Windows+PrtScn method instead.
Alt+Print Screen: capture the active window only
Alt+PrtScn focuses on the foreground window and copies that specific window to the clipboard. This is ideal when you’re working with multiple apps and only need to show a single window. After capturing, paste into your preferred editor or document. This method often produces a cleaner screenshot when the desktop background is busy. If you rely on automatic saving, use Windows+PrtScn or Win+Shift+S instead.
Windows Key + PrtScn: auto-save to the Screenshots folder
Windows+PrtScn saves a full-screen image directly to the default Pictures/Screenshots folder. This method eliminates the extra step of pasting into an editor or document, which is perfect for rapid issue reporting or creating a library of visual references. The saved file is typically named with a timestamp, which makes organization straightforward. If you save many screenshots, you may want to create a dedicated folder structure to keep things tidy.
Win+Shift+S: region or freeform snips
Win+Shift+S triggers Snip & Sketch (or Snipping Tool in some builds) to let you select a region, window, or freeform shape. The captured image goes to the clipboard and, in many configurations, opens a notification to edit or annotate. This is the most flexible option for precise screenshots that highlight a specific UI area. After snipping, you can paste the image into a document or immediate chat, or click the notification to annotate and save.
Choosing the right method for real-world workflows
For quick reports or bug tickets, use Windows+PrtScn to save quickly to a folder and share via file system or cloud storage. For live collaboration or when you need to isolate a particular element, Win+Shift+S provides precise control and immediate editing. If you’re documenting a specific window without desktop clutter, Alt+PrtScn delivers a clean capture of that window. Remember, consistency in your choice helps teammates know where to find screenshots and how to reference them later.
Common differences across Windows versions and devices
While the core shortcuts are stable, some devices with unusual keyboards or regional layouts may label keys differently (for example, PrtScn might be printed as PrtSc, Print Screen, or a combined key). On Windows 11, Snip & Sketch integration is tighter, and notifications for editing are more prominent. If you’re using a tablet or hybrid device, you may need to enable clipboard history or adjust accessibility settings to ensure screenshots capture as expected. Always verify your shortcut results with a quick test screenshot before starting a long task.
Quick-access scenario examples
- You see a dialog box with an error message: Win+Shift+S to snip the dialog, then paste into a report.
- You’re documenting a UI workflow across multiple apps: Windows+PrtScn saves the full screen for a visual log, and Alt+PrtScn captures just the active window for focus.
- You need to share an annotated screenshot with a teammate: use Win+Shift+S, paste into an editor, add marks, and save or export as PNG.
Practical tips for reliability and speed
- Keep your clipboard history in mind: repeated PrtScn captures may be overwritten if you’re not pasting promptly.
- Use the Snip & Sketch editor to quickly annotate and highlight important details.
- If you frequently capture screenshots from different monitors, test whether Windows+PrtScn captures all displays or only the primary monitor on your setup.
Accessibility considerations and troubleshooting
If you have trouble with any shortcut, check that your function keys are enabled (some laptops require Fn to activate function keys). Ensure clipboard permissions aren’t blocked by privacy settings or antivirus software. For users with on-screen keyboards or assistive tech, you can still navigate to the Snipping Tool or Snip & Sketch via the start menu and perform captures with the mouse, then annotate and share.
Quick reference cheatsheet
- PrtScn: copy full screen to clipboard
- Alt+PrtScn: copy active window to clipboard
- Windows+PrtScn: save full screen to Screenshots
- Win+Shift+S: open region/snippet capture
- Then paste into editor or app, or edit/save as needed
Tools & Materials
- Windows PC or laptop(Any Windows 10/11 device with a working keyboard)
- PrtScn/Print Screen key(Labeled Print Screen, PrtSc, or similar)
- Editor or destination app(Where you paste or save screenshots (Word, email, chat, image editor))
- Snipping Tool / Snip & Sketch app(Preinstalled on Windows; use if Win+Shift+S isn’t available)
- External monitor (optional)(Useful if you’re capturing multi-monitor layouts)
Steps
Estimated time: Estimated total time: 15-25 minutes
- 1
Identify the scenario and method
Look at what you need to capture (entire screen, active window, or a region) and choose the appropriate shortcut accordingly. Shortcuts Lib recommends picking the method that minimizes extra editing.
Tip: If you’re unsure, start with Win+Shift+S for precise region capture. - 2
Capture full screen to clipboard
Press PrtScn. The image is copied to the clipboard. You can paste it directly into an editor or document.
Tip: For quick paste, use Ctrl+V immediately after capturing. - 3
Capture active window to clipboard
Press Alt+PrtScn. Only the foreground window is captured and copied to the clipboard.
Tip: Switch to the target app first to ensure accuracy. - 4
Auto-save full screen to a file
Press Windows+PrtScn. The image saves automatically to Pictures/Screenshots.
Tip: Organize saved images by creating subfolders by project. - 5
Capture a region with Snip & Sketch
Press Win+Shift+S. Drag to select a region, window, or freeform shape; the capture goes to the clipboard and offers an edit/annotate option.
Tip: Click the notification to open the editor for quick annotation. - 6
Annotate and save or share
Open your editor or paste into a document, then save as PNG/JPG or share directly.
Tip: Use built-in annotation tools to highlight errors or steps. - 7
Find the saved files later
If you saved a file automatically, locate it in Pictures/Screenshots; if you used the clipboard method, paste to your destination, then save.
Tip: Use consistent naming with timestamps. - 8
Troubleshooting quick wins
If a shortcut doesn’t work, check keyboard layout, Fn key usage, and verify that clipboard history is enabled in Settings.
Tip: Restart Explorer or the machine if shortcuts seem unresponsive.
Questions & Answers
What is the quickest way to take a screenshot for sharing?
For quick sharing, use Win+Shift+S to snip a region, then paste into the destination app or save after editing. This minimizes steps and provides precise control.
Use Win+Shift+S for a quick region snip, then paste or save after editing.
Where do screenshots get saved by Windows shortcuts?
PrtScn and Alt+PrtScn copy to the clipboard, Windows+PrtScn saves to the Pictures/Screenshots folder, and Snip & Sketch saves to the clipboard for later pasting.
Clipboard copies for PrtScn-based methods, and automatic save to Pictures/Screenshots for Windows+PrtScn.
Can I customize the default save location for screenshots?
Windows saves to the default Screenshots folder; you can move the file after saving or create a scheduled task or script to copy newly saved images to a custom folder.
You can move the saved files after capture or automate copying with a script.
Do these shortcuts work on tablets or touch devices?
Yes, most Windows tablet setups support the same shortcuts, though touch-based workflows might favor Win+Shift+S with a stylus for region selection.
The same shortcuts work on tablets, with region snips easy via Win+Shift+S.
What should I do if a shortcut doesn’t work?
Check that the function keys are active (use Fn if needed), verify clipboard permissions, and ensure Windows updates didn’t alter behavior. Restarting Explorer can help in persistent cases.
Check Fn usage, clipboard permissions, and try restarting Explorer if needed.
Is there a difference between Snip & Sketch and Snipping Tool on Windows 11?
Windows 11 integrates Snip & Sketch as a consolidated tool with improved annotation features; Snipping Tool remains for regional captures. Both can be accessed via Win+Shift+S or Start menu.
Win+Shift+S opens Snip & Sketch for region captures and annotations; Snipping Tool is still available for other capture modes.
Watch Video
Main Points
- Master the four core methods for Windows screenshots.
- Choose the method based on whether you want a file or clipboard image.
- Win+Shift+S offers the most control and quick editing options.
- Organize saved screenshots with consistent naming and folders.