Screenshot on Keyboard: Step-by-Step Guide
Learn reliable keyboard shortcuts to capture screenshots on Windows, macOS, and Linux. This guide covers built-in tools, modifier keys, and how to tailor captures for different needs.

In this guide, you will learn how to take a screenshot using keyboard shortcuts across Windows, macOS, and Linux. You will cover built-in tools, modifier keys, and how to tailor captures for different needs. By the end, you can snap high-quality screenshots with a few keystrokes, no extra software required. This will also help you troubleshoot common capture issues, such as capturing the active window vs. the entire screen, and save images in convenient formats.
Understanding Keyboard Screenshot Basics
According to Shortcuts Lib, mastering screenshot shortcuts saves time and reduces reliance on third-party apps. The term screenshot on keyboard describes triggering OS level capture using key combinations instead of mouse clicks. Across Windows, macOS, and Linux, these shortcuts let you grab the whole screen, a single window, or a selected area with minimal effort. As you practice, you’ll notice the speed and consistency improve, which is especially valuable when documenting processes or creating tutorials. In this guide, you’ll learn how to utilize these shortcuts effectively, including edge cases like when the key sequences differ on laptops versus desktops and when screenshots save to clipboard versus a file.
OS-by-OS Shortcut Mapping
Windows users typically rely on PrtScn, WindowsPrtScn, AltPrtScn, or WindowsShiftS to capture the screen. macOS users use CommandShift3 for full-screen captures, CommandShift4 for area selection, and CommandShift5 for an on screen control panel; you can also copy to clipboard using Control modifiers. Linux environments vary by desktop, but common defaults include PrtScn for a file save, AltPrtScn for the active window, and ShiftPrtScn or GNOME screenshot tool for region capture. The exact result usualy depends on OS settings and whether you’ve configured a dedicated screenshot utility.
Practical Scenarios and File Handling
Choosing the right screenshot method matters for your workflow. Full screen captures are ideal for documenting software layouts, while active window captures help focus on a single program. Saved files are usually PNG by default, but JPEG can be preferable for photos or web images. If you paste directly into documents, you will use clipboard buffers. When sharing, consider metadata and file size, and rename files to include the date and a short description to maintain an organized library. The phrase screenshot on keyboard appears often in practice, so repetition helps build muscle memory across OSs.
Common Pitfalls and How to Avoid Them
A frequent pitfall is using the wrong shortcut and ending up with a blank clipboard or an unintended capture. On laptops, the PrtScn key may require Fn; on some Windows devices, you must press WindowsShiftS to invoke Snip and Sketch. macOS captures can default to desktop saves; adjust settings if you prefer clipboard copies. Some Linux setups run Wayland, where screenshot support differs from Xorg; check your session type and install GNOME Screenshot or Flameshot if needed. By anticipating these differences, you can avoid wasted attempts when you need a quick screenshot on keyboard.
Quick Tips to Improve Workflow
- Use the on screen file save location so you can locate screenshots quickly. - Save to PNG for sharp UI images; JPEG can be preferable for photos. - Pair keyboard shortcuts with a clipboard manager for quick pastes. - Learn region capture early to reduce cropping work in post processing. - Consider a system wide hotkey manager to unify shortcuts across apps and contexts.
Tools & Materials
- Keyboard with PrtScn or Print Screen key(On laptops, you may need Fn to activate PrtScn)
- Operating system (Windows/macOS/Linux)(Ensure you know which OS you’re capturing on)
- Clipboard manager or image editor (optional)(Helpful for quick edits and organization)
Steps
Estimated time: 20-40 minutes
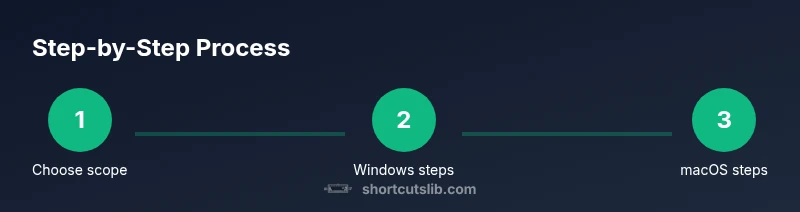
- 1
Choose capture scope
Decide whether you need the full screen, an active window, or a region. This choice determines which shortcut you’ll use and where the image is saved or copied.
Tip: Plan ahead to avoid extra edits later. - 2
Windows full screen
Press Windows key + PrtScn to save a full screen image directly to the default Pictures folder. If you’re on a laptop without a dedicated PrtScn, use Fn + Windows key + PrtScn.
Tip: Check the default save location after capture. - 3
Windows active window
Press Alt + PrtScn to copy the active window to the clipboard. Paste into your editor or document to save as a separate file.
Tip: If nothing pastes, ensure the active window is in focus. - 4
Windows region capture
Press Windows key + Shift + S to trigger Snip and Sketch and drag to select a region. The image goes to the clipboard by default unless you paste it elsewhere.
Tip: Use the Snip and Sketch toolbar to annotate. - 5
macOS full screen
For full screen, press Command + Shift + 3 to save to the desktop. For a region, press Command + Shift + 4 and drag to select the area.
Tip: Add Space to capture a specific window when needed. - 6
macOS clipboard or file
To copy a screenshot to the clipboard instead of saving a file, hold Control while using Command + Shift + 3/4, or use Command + Ctrl + Shift + 4 for a region.
Tip: Clipboard copies are convenient for rapid pastes. - 7
Linux standard shortcuts
Most desktop environments support PrtScn for a file, Alt + PrtScn for the active window, and Shift + PrtScn for a region; results vary by distro and compositor.
Tip: If your environment lacks these, install a tool like Flameshot. - 8
Finalize and share
Organize files, add descriptive names, and share or embed as needed. Consistency beats ad-hoc naming for a professional workflow.
Tip: Create a consistent naming scheme like date_description.png.
Questions & Answers
What is the quickest way to capture a full screen on Windows?
Use Windows key + PrtScn to save a full screen screenshot as a file. If you just need the image in memory, press PrtScn to copy to the clipboard.
Press Windows key plus PrtScn to save a full-screen image, or PrtScn alone to copy it to clipboard.
How do I copy a screenshot to the clipboard on macOS?
Press Command + Control + Shift + 4 to capture a region and copy it to the clipboard, or use Command + Control + Shift + 3 for full screen region copy.
Use Command-Control-Shift-4 to copy a region to the clipboard.
What about Linux and Wayland?
Screenshot behavior on Linux depends on the desktop environment. PrtScn often saves to a file, Alt+PrtScn captures the active window, and Shift+PrtScn captures a region. Wayland users may need additional tools.
Linux screenshots vary by environment; check your distro's docs for key combos.
Can I customize where screenshots are saved?
Yes. In most OSes, you can change the default save folder or choose to save to clipboard. Some environments allow you to specify a default file path.
You can usually set a default save location in system settings.
How do I capture a specific window on Windows or macOS?
On Windows, use Alt+PrtScn. On macOS, use Command+Shift+4 then Space to capture a window. These methods copy or save the targeted window.
Capture a window by using Alt+PrtScn on Windows or Command+Shift+4 + Space on macOS.
What if I want high-quality captures for documentation?
Choose PNG for sharp UI images; consider using a clipboard manager and editing tool to annotate and crop as needed.
Use PNG for crisp UI captures and edit as needed.
Watch Video
Main Points
- Master OS-specific shortcuts
- Choose full screen window or region capture
- Save files with consistent naming
- Clipboard captures save time for quick sharing