Screen Shot Shortcuts: Quick, Precise Captures
Learn practical screen shot shortcuts across Windows, macOS, Linux, and mobile. Step‑by‑step guidance, tips, and workflows to capture, edit, and share images efficiently.

With a reliable screen shot short cut, you can capture your screen precisely and save time. This guide covers cross‑platform shortcuts for Windows, macOS, Linux, iOS, and Android, plus how to save, edit, and share captures using keyboard commands, built‑in tools, and clipboard workflows. Practice and consistency will boost your efficiency.
Understanding the screen shot short cut
A screen shot short cut is a keyboard‑based method to capture all or part of your screen with speed and precision. According to Shortcuts Lib, mastering these shortcuts reduces context switching and makes documentation, bug reporting, and tutorials faster to produce. This section introduces the concept, outlines common capture modes (full screen, window, and region), and explains why reliable shortcuts matter for daily workflows across devices. Whether you’re a developer, designer, or student, learning a core set of sequences will dramatically improve your capture efficiency and consistency. Tip: Start with the three most common modes on your primary device and build from there. Shortcuts Lib’s guidance emphasizes repetition to build muscle memory.
Why keyboard shortcuts save time and effort
Using keyboard shortcuts eliminates the need to navigate through menus or click icons for each capture. Shortcuts Lib analysis shows that consistent hotkeys streamline capture tasks and reduce context switching, making it easier to document steps, share visuals, and maintain a smooth workflow across apps and platforms. By aligning shortcut patterns with your project needs, you can avoid mental fatigue and keep your focus on the content you’re capturing. This isn’t about memorizing every possible command; it’s about mastering a small, reliable set you can apply everywhere. Pro tip: keep a tiny reference sheet near your workspace for quick recall during busy days.
Windows screenshot shortcuts and workflows
Windows provides several built‑in methods to capture screens, from full‑screen to partial selections. The classic Print Screen key copies the entire screen to the clipboard, while Windows + Shift + S opens Snip & Sketch (or Snipping Tool in newer builds) for region, window, or freeform selections. Alt + Print Screen captures the active window only. These shortcuts work in most apps, and you can paste the result into documents, emails, or image editors. For saving to files automatically, you can use the Snipping Tool to save selections, or press Windows + Print Screen to save a PNG file in the Pictures/Screenshots folder. To customize paths or behaviors, explore the tool’s settings and clipboard options. Shortcuts Lib recommends practicing the region capture first to gain quick, repeatable results.
macOS screenshot shortcuts and workflows
macOS relies on a compact set of shortcuts plus a versatile screenshot toolbar. Full screen: Command ⌘ + Shift + 3. Region: Command ⌘ + Shift + 4. Toolbar: Command ⌘ + Shift + 5, which lets you choose capture type (screen, window, or recorded screen), choose a save location, set a timer, and decide whether to show the cursor. You can also copy captures to the clipboard with Control held during the shortcut. The default save location is the desktop, but you can change it in System Preferences. The built‑in Preview and Markup tools provide immediate editing after capture. Shortcuts Lib notes that the macOS approach favors flexibility and quick access to annotations.
Linux and other desktop environments
Linux offers a mix of keyboard shortcuts and utility apps, with behavior often tied to the desktop environment. Common defaults include PrtSc for a full screen, Shift + PrtSc for a regional area, and Alt + PrtSc for the current window. Desktop environments like GNOME, KDE, and XFCE ship their own screenshot utilities (e.g., GNOME Screenshot, Spectacle) that can be invoked via keyboard or quick actions. These tools typically offer clipboard copies, file saves, and basic edits. One practical approach is to pick one primary method for quick captures and a secondary editor for on‑the‑spot annotations. Shortcuts Lib emphasizes consistency across environments to prevent confusion when moving between machines.
Mobile screenshot shortcuts (iOS and Android)
On iOS devices, screenshots are typically captured with the Side button and Volume Up button simultaneously. On iPhone models with a Home button, use the Home button + Side/Top button. After capture, iOS provides quick edit options and direct sharing. Android devices vary by vendor, but the common approach is Power + Volume Down. Some manufacturers add gesture or quick‑menu options. Mobile captures are usually saved in the Photos or Gallery app and can be annotated or shared immediately. Consistency matters here too; learn your device’s default method and practice to speed up repetitive captures.
From capture to usage: editing, saving, sharing
Capturing is only the first step. Most platforms offer built‑in editors for basic tasks like cropping, annotating, and blurring sensitive information. Windows Snip & Sketch, macOS Markup, Android’s editor, and iOS Photos provide quick annotation tools. After editing, organize files with clear naming conventions and archive them in project folders or cloud storage. Copying to the clipboard is helpful when you need to paste into documents or emails without saving a separate file. Shortcuts Lib recommends a small, predictable workflow: capture, annotate, save or copy, and then organize your library for easy retrieval.
Troubleshooting common issues
If a screenshot shortcut isn’t working, check basic causes first: the key combination may be remapped by a running app, the OS may require permissions, or a hardware issue could block the key. On macOS, you may need to grant Screen Recording permission to certain apps before they can capture your screen. On Windows, ensure the function keys aren’t disabled by a hardware switch. For Linux, verify the chosen desktop environment supports the shortcut or rebind it in Settings. Privacy settings, antivirus software, or clipboard restrictions can also interfere with capture‑to‑clipboard workflows. When in doubt, reset to the platform defaults and test with a simple notification.
Advanced automation and shortcuts for power users
For heavy users, automation can dramatically speed up screenshots. Mac users can configure the Shortcuts app to trigger a series of actions after capture (crop, rename, upload). Windows users can leverage PowerToys or AutoHotkey to bind a single key to a sequence that captures, saves, and moves files to a dedicated folder. Linux users can script captures with shell commands and alias shortcuts for repeated tasks. The goal is to minimize manual steps while keeping the results predictable. Shortcuts Lib suggests starting with a simple one‑step automation, then add steps as you grow more confident.
Best practices and quick-reference cheat sheet
To build a reliable screenshot habit, standardize your shortcuts and file organization. Use a consistent naming convention that includes date, project name, and capture type. Create a dedicated folder structure like Projects/YYYY-MM-DD/ScreenShots. Maintain a concise reference sheet for each platform, noting which shortcut performs full capture, region, or window capture. Regularly review and refine your shortcuts as tools update. A small, focused cheat sheet can save minutes every day and improve consistency across devices. Shortcuts Lib’s guidance emphasizes practical, repeatable patterns you can rely on.
Platform cheat sheets and quick lookup (at a glance)
- Windows: PrtSc, Windows + Shift + S, Alt + PrtSc, Windows + Print Screen
- macOS: Command ⌘ + Shift + 3, Command ⌘ + Shift + 4, Command ⌘ + Shift + 5
- Linux: PrtSc, Shift + PrtSc, Alt + PrtSc, GNOME/Spectacle variants
- iOS: Side button + Volume Up (or Home + Side on older devices)
- Android: Power + Volume Down (vendor variations exist)
Use this as a quick reference while you expand your own library of shortcuts. Shortcuts Lib encourages you to annotate these cheats with your preferred save locations and edit tools for faster retrieval.
Tools & Materials
- Keyboard and mouse/trackpad(Used to trigger platform shortcuts (e.g., Print Screen, Cmd+Shift+4).)
- Target device (Windows/Mac/Linux computer or mobile device)(Identify your OS to select correct shortcut sets.)
- Screenshot tool(s) or built‑in utilities(Examples: Snipping Tool, Preview, GNOME Screenshot; choose as needed.)
- Clipboard manager (optional)(Helpful for cross‑app pasting without saving intermediate files.)
- Image editor or annotation app (optional)(Use for quick edits before sharing or archiving.)
Steps
Estimated time: 15-25 minutes
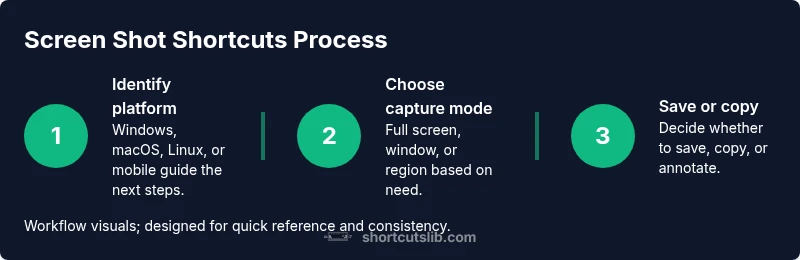
- 1
Identify your platform and target
Clarify whether you’re on Windows, macOS, Linux, iOS, or Android. This decides which shortcut family to use and whether you’ll save to a file or to the clipboard.
Tip: Keep a one‑line reference of your primary platform shortcuts handy. - 2
Choose the primary capture mode
Decide if you need a full screen, a specific window, or a region. This helps you pick the quickest sequence and reduces unnecessary editing later.
Tip: Region captures are great for tutorials and bug reports; use them when context matters. - 3
Execute the shortcut
Press the designated keystroke for your target mode. If you’re unsure, test a simple full‑screen capture first to confirm the shortcut is functioning.
Tip: Make sure no modal dialogs are open that could be captured unintentionally. - 4
Save or copy the result
Decide whether to save as a file in a project folder or copy to the clipboard for quick insertion.
Tip: If you plan to reuse the image, save it with a descriptive name immediately. - 5
Edit or annotate as needed
Use the built‑in editor to crop, annotate, or blur sensitive information before sharing.
Tip: Keep edits minimal to preserve original context. - 6
Organize your library
Move saved captures to a well‑structured folder hierarchy and set a consistent naming convention.
Tip: Automate organization with a short script or shortcut where possible. - 7
Review and refine
Periodically review your shortcut mappings and editing workflow to reduce friction and keep up with software updates.
Tip: Update your cheat sheet whenever a platform adds a new capture feature.
Questions & Answers
What counts as a screen shot short cut and why should I use one?
A screen shot short cut is a keyboard sequence that captures all or part of your screen quickly. Using these shortcuts reduces navigation time and helps you document visuals consistently across apps and platforms.
A screen shot short cut is a quick keyboard sequence for capturing your screen, so you can save or share images without navigating menus.
How do I take a screenshot on Windows?
Common Windows methods include Print Screen to copy the whole screen, Windows + Shift + S for a region or window selection, and Alt + Print Screen for the active window. You can paste into documents or use the Snipping Tool to save a file.
On Windows, you can copy the screen with Print Screen or capture a region with Windows + Shift + S, then paste or save as needed.
How can I copy a screenshot to the clipboard instead of saving it?
Many shortcuts include a modifier (such as Control) to copy directly to the clipboard rather than saving to a file. For example, on macOS, Control combined with a capture copies to the clipboard.
Use a control‑modified shortcut to copy the capture to your clipboard instead of saving a file.
Can I customize shortcuts on macOS or Windows?
Yes. macOS lets you adjust save locations and some options via the Screenshot toolbar settings. Windows can be augmented with third‑party tools or system settings to remap keys; Linux environments often allow rich customization through the desktop environment’s keyboard settings.
You can customize capture settings on macOS and Windows, often with third‑party tools on Windows and built‑in options on macOS.
What tools help annotate screenshots quickly?
Most platforms provide built‑in editors for cropping, marking up, and blurring. Post‑capture apps or quick editing tools in your OS can speed up sharing without switching programs.
Use the built‑in editors after capturing to annotate or blur information before sharing.
How do I capture screenshots on mobile devices efficiently?
On iOS, use the side button plus volume up; on Android, use the power and volume down buttons. Some devices offer gestures or quick menus. After capture, edit or share directly from the photo app.
Mobile captures typically use hardware button combinations; check your device’s gestures and edit options after capturing.
What’s the best way to organize a large library of screenshots?
Adopt a consistent folder structure and naming convention, such as Projects/YYYY-MM-DD_Stage_Type.png. Regular reviews and backups help maintain a clean archive and fast retrieval.
Create a simple, regular naming scheme and folder structure, then back up routinely.
Are there risks to automated screenshot workflows?
Automation saves time but can be brittle if apps change. Start with small automations, test thoroughly, and monitor results to avoid missing or misnamed captures.
Automation can speed things up, but test regularly to ensure accuracy and avoid mistakes.
Watch Video
Main Points
- Master the core shortcuts for each platform
- Use region captures for precise content
- Annotate effectively with built‑in editors
- Organize captures with consistent naming
- Automate repetitive steps where possible