How to Keyboard Shortcut Screenshot: A Practical Guide
Learn to capture screenshots quickly with keyboard shortcuts across Windows, macOS, and Linux. This guide covers exact shortcuts, annotations, and workflows to boost productivity.

According to Shortcuts Lib, mastering keyboard shortcut screenshots across Windows, macOS, and Linux lets you capture, annotate, and share images faster than menus. This quick answer summarizes the core shortcuts and best practices to speed up your documentation tasks and reduce context-switching. Whether you work in software development, content creation, or IT, these shortcuts streamline workflows. Read on for platform-specific steps, tips, and common pitfalls.
Why Keyboard Shortcut Screenshots Matter
Screenshots are a foundational tool for explaining complex ideas, reporting bugs, and sharing step-by-step instructions. Keyboard shortcuts for capturing those screenshots cut down time spent navigating menus, allow you to preserve the exact visual context, and reduce the cognitive load of your documentation process. According to Shortcuts Lib, a disciplined approach to screenshot shortcuts can shave minutes off frequent tasks and minimize context-switching. This translates into faster feedback, clearer communication, and a smoother workflow for tech users and keyboard enthusiasts alike. The core idea is to build a small, repeatable toolkit you can apply across projects, teams, and platforms. As you practice, you’ll notice improvements in accuracy, consistency, and speed when you need to document something quickly.
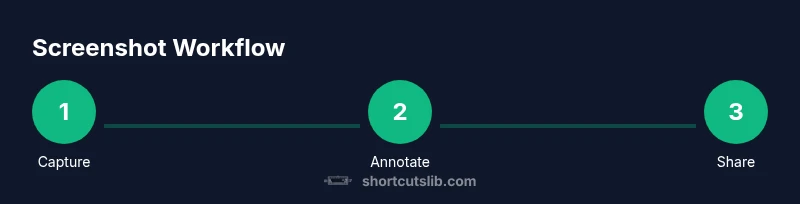
A practical workflow begins with a clear goal: what needs to be captured, where the image will be used, and how you will annotate it. Start with a baseline set of shortcuts that cover full-screen, window, and region captures. This keeps your methods portable and reduces the need to memorize dozens of key combinations. The end result is less time wasted on setup and more time focused on content you want to convey.
Quick Platform Map: Windows, macOS, Linux
The steps you take will depend on your operating system, but the underlying concepts stay the same: identify the target area, trigger a capture with a keyboard shortcut, and then annotate or edit as needed. On Windows, macOS, and Linux, you’ll typically rely on a mix of built-in capture tools and quick-access shortcuts. A key advantage across platforms is consistency: once you’ve memorized a handful of core shortcuts, you can document processes with the same mental model, no matter which system you’re using. Shortcuts Lib emphasizes rehearsing these actions on each platform so you can execute them without hesitation during real tasks. For teams, creating a shared reference of platform-specific shortcuts helps everyone stay aligned and reduces the need for long training sessions.
Cross-platform practice also means thinking about where you store screenshots. A default save location helps prevent lost images and makes it easier to reuse visuals in docs or tickets. Use descriptive filenames that reflect context (project, feature, date) and a predictable folder structure. As you adopt these habits, you’ll notice that your ability to capture precisely what you need—and to share it in the right format—improves markedly.
Windows Shortcuts in Practice
Windows users have several reliable paths to capture screens, each suited to different scenarios. The classic PrtScn (Print Screen) button captures the entire screen to the clipboard, which you can paste into an image editor or document. Alt + PrtScn captures the active window, which is ideal when you want to focus on a single application without the surrounding UI. For region-based captures, Windows + Shift + S invokes the Snip & Sketch tool (built into Windows 10 and 11). This method opens a small overlay that lets you drag to select the desired area and automatically copies the result to the clipboard, ready for pasting or saving. If you prefer a dedicated editor, you can use the Snipping Tool or the built-in Screenshot utility, depending on your Windows version.
To maximize speed, assign consistent workflows: first decide whether you need full screen, window, or custom region; second, capture; third, annotate and export with your preferred file format. Keyboard shortcuts shine when you need to document fast bug reports, feature walkthroughs, or quick UI explanations. Remember to tailor your save paths and filenames for easy retrieval later. If you work with repeated capture tasks, consider combining shortcuts with macros or scripts to streamline multi-step processes. This approach reduces repetitive keystrokes and ensures every screenshot lands in the same folder with a uniform name convention for easier retrieval later.
Tip: If your keyboard lacks a dedicated PrtScn key, you may need to use a function key combination or Fn key in conjunction with PrtScn. Always test to confirm the captured image is stored where you expect.
macOS Shortcuts in Practice
macOS provides a compact, highly reliable set of shortcuts that cover full-screen, window, and region captures via the built-in Screenshot utility. Command (⌘) + Shift + 3 captures the entire screen and saves the image to the desktop by default. For a selected region, Command (⌘) + Shift + 4 allows you to drag a box around the portion you want, with the result saved automatically. If you want to capture a specific window, press Command (⌘) + Shift + 4, then press Spacebar to switch to a camera cursor that lets you click any open window to capture its contents. For longer-term efficiency, you can enable the Screenshot app in macOS to access a toolbar for manual capture options or directly set a timer for delayed captures.
Annotating screenshots after capture is common on macOS as well. Preview, the built-in viewer, provides annotation tools for arrows, text boxes, and shapes. You can also export in multiple formats—PNG, JPG, or PDF—depending on your distribution channel. As with Windows, standardizing your file naming and capture conventions on macOS helps teams keep visuals organized for tutorials, bug reports, and product documentation. If you frequently share screens with teammates, consider setting up a quick export action (Mac Automator) to push files to a shared drive or cloud storage automatically.
Pro tip: If you regularly capture app windows, use the Spacebar-trigger trick to capture exactly the window of interest without extra UI chrome.
Linux and Other Environments: Quick Captures
Linux users enjoy flexibility because desktop environments like GNOME and KDE offer robust screenshot utilities alongside traditional shortcuts. A common approach is to use PrtScn for a fullscreen capture, Shift + PrtScn for a region capture, and Alt + PrtScn for the active window. Some environments provide a dedicated Screenshot tool or a GNOME Shell extension that mirrors Windows-like region capture. The key is to pick a consistent method that works across your most-used distributions and desktop environments, since different flavors may map keys differently.
If you work in containers or headless setups, you may rely on tools like import (from ImageMagick) or scrot for command-line captures. These options are powerful for automation but require a small setup. For daily workflows, a GUI-based approach is usually faster and easier to learn, while still offering options to script repetitive tasks later. Remember to keep a predictable save location and naming convention even on Linux, so your screenshots stay organized across projects.
Linux users often customize keyboard shortcuts at the system level to align with personal preferences. Take time to annotate the shortcuts you choose and document them in a central guide so teammates can adopt the same method. Consistency matters when you’re producing consistent visuals for tutorials and knowledge bases.
Annotating and Saving: Turn Captures into Useful Assets
Capturing is only half the job; meaningful annotations turn a raw screenshot into an actionable asset. After capturing, open the image in your preferred editor (even the built-in options count). Add callouts, arrows, or text labels to highlight the critical parts of the UI. Keep annotations clean and focused; too many arrows or text boxes can obscure the main content and decrease readability. When saving, choose formats that balance quality and file size—PNG for crisp lines and text, or JPEG for photographic content where small details are less important. Establish a consistent naming convention that includes project name, brief descriptor, and date (for example, project-feature-YYYYMMDD.png).
If your workflow demands frequent sharing, consider integrating with a cloud storage or collaboration tool. A centralized location reduces time spent searching for visuals and ensures everyone accesses the same version. For accessibility and localization needs, export to accessible formats like PDFs when appropriate, and add descriptive file names to aid screen readers and search indexing. Finally, always verify that the image does not expose sensitive information—blurring or redaction is a prudent step before sharing externally.
A well-structured screenshot toolkit speeds up documentation, reduces back-and-forth, and supports clearer communication across teams. By employing consistent save paths, formats, and naming conventions, you’ll build a reliable library of visuals that stands the test of time.
Automating and Sharing Workflows
Automation is the friend of a busy knowledge worker. For repetitive screenshot tasks, you can leverage system-level shortcuts paired with scripting to push captures through standardized pipelines. Windows users can explore AutoHotkey for simple macros that trigger a capture, annotate, and save sequence with a single hotkey. macOS users can use Automator or AppleScript to orchestrate a capture, run basic image-editing steps, and deliver to a preferred folder or app. Linux users can script with bash and tools like ImageMagick to batch-capture, annotate, and convert files for distribution.
A practical workflow might look like this: initiate a region capture with the platform shortcut, open the image in your annotation tool, apply a standardized set of callouts, save to a project-specific folder, and then push the file to your task tracker or documentation portal. Automating these steps reduces manual errors and speeds up your release cycles. As you automate, keep a changelog of scripts or macros you’ve added so your team can audit and maintain them over time.
The goal is not to automate everything at once but to build a small set of repeatable actions that you can reuse in multiple contexts. Integrating with your existing tools (project management, version control, or cloud services) ensures a smooth flow from capture to sharing, making screenshots a reliable part of your everyday workflow.
Tools & Materials
- Keyboard with Print Screen and Command keys(Dedicated PrtScn or combination on laptop (Fn may be needed))
- Built-in screenshot utility or OS-specific tool(Windows Snip & Sketch, macOS Screenshot app, GNOME/KDE screenshots)
- Image editor / annotation tool(Examples: Paint, Preview, GIMP, or any preferred editor)
- Clipboard manager (optional)(Helps manage multiple quick captures)
- Cloud storage or note/document hub(For sharing and archiving)
- Privacy checklist(Practice safe sharing; redact sensitive data when needed)
Steps
Estimated time: 15-25 minutes
- 1
Identify capture target
Determine the exact area you need to document, and the level of detail required for your audience. This reduces unnecessary captures and keeps your workflow efficient.
Tip: Decide whether you need a full screen, a window, or a region before you start. - 2
Capture using platform shortcut
Use the platform-appropriate shortcut to capture the target region, whether it’s full screen, a window, or a custom region.
Tip: If you’re unsure which shortcut to use, test on a blank screen to confirm the capture type. - 3
Open the capture in an editor
Open the captured image in your preferred annotation tool to make any necessary edits before saving.
Tip: Choose an editor you’re comfortable with to minimize friction. - 4
Annotate and mark up
Add arrows, callouts, labels, and highlights to focus attention on key UI elements or data points.
Tip: Keep annotations succinct and consistent in color and style. - 5
Save in a consistent format and location
Export the image in PNG or JPEG as appropriate, and save it to a predefined project folder with a descriptive filename.
Tip: Use a naming convention like project-feature-date. - 6
Share or archive the screenshot
Copy the image to clipboard for quick insertion, or upload to your document portal or repository.
Tip: Lock down access if the content is sensitive and ensure the right audience can view it. - 7
Review for privacy and accuracy
Before sharing, verify that no sensitive data is visible and that the screenshot accurately reflects the intended scenario.
Tip: If in doubt, blur or redact sensitive fields.
Questions & Answers
What are the most universal keyboard shortcuts for screenshots across platforms?
The general approach uses a keyboard-based capture first, followed by quick in-app edits. Windows users may rely on PrtScn or Windows + Shift + S, macOS users on Command + Shift + 3/4, and Linux users on PrtScn-based methods. The exact keys vary by OS, but the workflow remains the same: capture, annotate, save, and share.
Common universal steps are capture, annotate, then save and share, with platform-specific keys like PrtScn on Windows, Command-Shift-3 or 4 on Mac, and PrtScn variants on Linux.
How do I crop or annotate after capturing?
Open the image in an editor or the built-in viewer with annotation tools. Add arrows, boxes, and text to highlight important details. Save with a clear, descriptive filename to aid later search.
Open the image, use the annotation tools, then save with a clear name.
Can I automate screenshot workflows?
Yes. On Windows, AutoHotkey can automate capture and save steps. macOS users can leverage Automator or AppleScript. Linux users can script with bash and ImageMagick for batch captures and processing.
Yes, you can automate captures and processing with platform-appropriate scripting tools.
What about screenshots in full-screen apps or games?
Full-screen captures work best with dedicated shortcuts or external tools. Ensure your overlay or UI does not obstruct essential information. Some applications may block standard capture methods; in that case, window or region captures are safer.
Full-screen captures may require region or window methods if apps block standard shortcuts.
Are there accessibility considerations for screenshots?
Yes. Use high-contrast annotations and provide alternative text or descriptive captions when sharing. Ensure text remains legible and provide a text-based summary in your documentation.
Provide high contrast and descriptive captions to aid accessibility.
How do I troubleshoot a missing screenshot shortcut on Windows?
Verify that the shortcut is not overridden by another app. Check the built-in Snip & Sketch tool and ensure the correct hardware keys are functioning. If needed, customize shortcuts in your OS settings or use an alternative capture method.
Check for conflicts, test the key, and adjust settings if necessary.
Watch Video
Main Points
- Learn the core platform shortcuts for screenshots on Windows, macOS, and Linux.
- Annotate captures to clarify purpose and reduce back-and-forth.
- Save with consistent naming and locations to keep your library organized.
- Use automation for repetitive tasks to speed up workflows.
- Always review for privacy before sharing visuals.