How to Repair a Keyboard: A Practical DIY Guide
Learn a practical, safety-focused approach to repairing keyboards at home. Diagnose common faults, clean debris, replace switches, check the PCB, and test thoroughly. Includes tools, step-by-step actions, and maintenance tips.

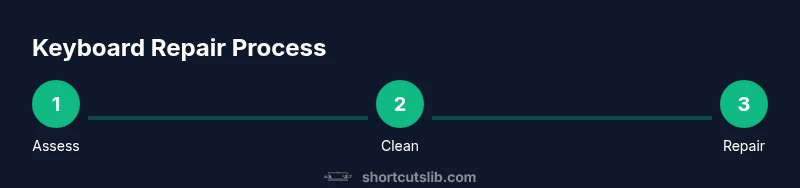
From debris to faulty switches, this guide shows you how to diagnose and repair most keyboard issues yourself. You’ll begin with safe preparation, inspect for grime and loose connections, then clean, test, and replace components as needed. By following the steps, you’ll save money, increase your confidence, and extend your keyboard’s life.
Understanding common keyboard failures
Keyboard problems come in several forms, from sticky or unregistered keys to a full non-responsive layout. The most frequent culprits are debris under key switches, liquid splashes that corrode contacts, worn or loose switches, and bad cable connections to the PCB. Even subtle issues like bent stabilizers or poor solder joints can cause uneven key feel or intermittent failures. According to Shortcuts Lib, starting with a careful inspection and a controlled cleaning routine often fixes many issues without needing to replace parts. This section will map out typical failure patterns and what they indicate, so you know where to focus your attention before disassembling further.
Safety and preparation
Repairing a keyboard safely requires a grounded workstation and the right precautions. Always unplug the device and remove any power sources before you begin. Use an anti-static wrist strap and work on an ESD-safe mat to prevent static discharge from damaging sensitive controller chips. A clean, well-lit workspace helps you track screws and tiny components. Gather your tools in advance and label any screws by location to simplify reassembly. Shortcuts Lib emphasizes that a methodical setup reduces mistakes and speeds up the repair process.
Diagnosing the issue: signs to look for
Begin by observing symptom patterns: does certain keys feel sticky, or do entire rows fail to register? Check keycaps for wear, examine the rubber dome or switch stems, and test the keyboard with a diagnostic tool or software to identify unresponsive keys. Take note of any inconsistent backlighting, unusual graphing on the PCB, or buzzing sounds when keys are pressed. Documenting the exact behavior helps you decide whether cleaning, switch replacement, or PCB repairs are warranted. In many cases, simple reseating connectors or reseating the keyboard cable resolves intermittent faults.
Cleaning and debris removal techniques
Start with a gentle brush and compressed air to remove loose particles from between the keys. For stubborn grime, lightly dampen a microfiber cloth with isopropyl alcohol and wipe the exposed key surfaces, then allow them to air-dry. Do not spray liquids directly onto the keyboard. If keycaps lift easily, remove them one by one and clean beneath with a soft brush. For deeper cleaning of switches, use a plastic pry tool to separate the switch housing from the PCB where safe, avoiding excessive force that could crack the housing. A clean surface improves contact reliability and reduces future failure risk.
Replacing switches or stabilizers
If keys remain non-responsive after cleaning, you may need to replace individual switches or stabilize loose stabilizers. Mechanical keyboards use interchangeable switches; check compatibility with the hot-swap sockets if your board supports it. For boards without hot-swap, you may have to desolder and solder new switches. When replacing stabilizers, ensure they align with the keycap recess and spring tension to preserve even key travel. If soldering is new to you, practice on a spare PCB first to avoid damaging the main board. Shortcuts Lib notes that careful handling of small parts helps prevent misalignment and future failures.
PCB checks and soldering basics
Inspect traces for nicks, lifted copper, or corrosion after a spill. A multimeter can help you test continuity between contacts. If you detect a broken trace, you may need to repair it with conductive trace tape or re-solder a small jumper. For experienced hobbyists, soldering new switches or repair jumpers is a viable option; for beginners, seek out guided tutorials and practice on scrap boards first. Always heat the joint just long enough to form a solid connection and avoid scorching surrounding components. This step confirms whether the problem lies in the PCB itself or in the switches.
Laptop keyboards vs external keyboards: what changes
Laptop keyboards often use membrane or low-profile switches with integrated controllers. Repairing these can be trickier due to tighter housing tolerances and glued-on components. External mechanical keyboards offer easier access to switches and connectors, and many models support hot-swapping, which simplifies replacements. When working with a laptop, you may need specialized tools and a staged disassembly approach to avoid damaging ribbon cables. Shortcuts Lib highlights that the general principles—cleanliness, static safety, and precise reassembly—apply across both types.
After repair: testing and verification
Power the keyboard and run a key-by-key test to verify function. Use online keyboard tester tools or a text editor to confirm all characters print correctly. If backlighting is involved, verify brightness levels and uniformity. Re-check all screws and cable connectors to ensure nothing loosened during reassembly. Finally, reattach keycaps carefully and test the space, enter, and modifier keys to confirm they’re responsive. A thorough test session reduces return visits and ensures reliability after repairs.
The Shortcuts Lib team stresses documenting each repair step to guide future maintenance and to help you troubleshoot quickly if a problem recurs.
Maintenance tips and when to seek professional help
Regular maintenance includes periodic cleaning, avoiding eating over the keyboard, and using a protective cover when not in use. If a repair involves advanced soldering, deep PCB work, or wireless module issues, professional service can prevent further damage. However, many common issues—sticky keys, debris, loose connectors—are well within a DIY skill set with the right guidance. If you’re unsure at any step, pause, consult a video or guide, and seek professional help before proceeding. The goal is a reliable keyboard that lasts longer with minimal downtime.
Tools & Materials
- Precision screwdriver set (PH0/PH1, Torx T5)(Include magnetic driver if possible; keep small bits organized)
- ESD-safe wrist strap(Ground yourself before touching the PCB)
- ESD-safe mat or working surface(Provide background grounding and static protection)
- Microfiber cloth(Lint-free for wiping surfaces)
- Isopropyl alcohol (70-99%)(For cleaning keycaps and contacts; use sparingly)
- Compressed air can(Used to blow out dust without contact)
- Plastic pry tools and spudger(Use to safely lift keycaps and housing parts)
- Soldering iron and lead-free solder(Needed for non-hot-swap boards or board repairs)
- Solder wick(Helpful for removing excess solder)
- Replacement switches (where compatible)(Choose switches compatible with your keyboard model)
- Multimeter(For continuity checks on traces and contacts)
- Keycap puller(Eases safe removal of keycaps without damage)
- Cotton swabs(Penetrating dirt removal in tight spaces)
Steps
Estimated time: 60-120 minutes
- 1
Power down and unplug
Shut off all power to the device and disconnect from any USB or power sources. This prevents shorts and protects you from electric shock while you work on the keyboard.
Tip: Double-check that no power remains in the system before starting. - 2
Prepare your workspace
Set up an anti-static mat, connect your wrist strap, and lay out tools in an organized layout. Label screws and components to simplify reassembly.
Tip: Keep a small tray or magnetic mat to track tiny parts. - 3
Remove keycaps and inspect
Carefully pry off keycaps with a plastic tool and inspect stems, switches, and underlays for wear or debris. This reveals hiding grime and potential mechanical issues.
Tip: Take photos during disassembly to guide reassembly. - 4
Clean and reseat
Blow out dust with compressed air, wipe surfaces with isopropyl alcohol, and reseat any loose connectors. Ensure no moisture remains before reassembly.
Tip: Avoid soaking components; use controlled, light cleaning. - 5
Test individual switches
If you have hot-swap capability, test each switch or replace sticky ones. For non-hot-swap boards, you may need to desolder and swap.
Tip: Test a few switches at a time to isolate faults quickly. - 6
Inspect the PCB and traces
Look for lifted pads, corrosion, or damaged traces. Use a multimeter to check continuity and identify weak spots.
Tip: Work slowly; a tiny solder bridge can create new faults. - 7
Reassemble and verify alignment
Reattach stabilizers and keycaps, ensuring correct alignment and spacing. Verify that screws are snug but not overtight.
Tip: If something feels misaligned, stop and recheck before forcing. - 8
Final testing
Reconnect power and run a full keyboard test with a diagnostic tool. Confirm each key registers and backlighting (if any) functions evenly.
Tip: Document any unusual behavior for future reference.
Questions & Answers
Can I fix a keyboard myself, or should I always go to a pro?
Many keyboard issues can be fixed at home with basic tools and careful steps. Keyboard repairs involving hot-swap switches or PCB soldering may require more experience. Start with cleaning and basic switch checks, and seek professional help if you encounter damaged traces or difficult soldering.
Most fixes can be done at home, but soldering or deep PCB damage should be handled by a professional.
What tools are essential for keyboard repair?
A precision screwdriver set, anti-static equipment, microfiber cloth, isopropyl alcohol, compressed air, and plastic pry tools are the core tools. Soldering gear is only needed for more advanced repairs.
Essential tools include a precision screwdriver, anti-static gear, cleaning materials, and pry tools.
Is soldering always required to replace a switch?
If your keyboard supports hot-swapping, you can replace switches without soldering. On boards that are not hot-swappable, you must desolder old switches and solder in new ones.
Soldering depends on your keyboard’s design; hot-swappable boards don’t require soldering.
How long does a typical repair take?
A routine cleaning and switch check can take about 30-60 minutes. More complex repairs, such as PCB fixes or stabilizer replacements, may take 1-2 hours depending on skill and board design.
Most repairs take under a couple of hours, depending on complexity.
What maintenance helps prevent future keyboard failures?
Regular cleaning, avoiding spills, using dust covers, and storing keyboards properly can minimize debris and moisture exposure. Periodic checks of keycap stability and connector seats also help.
Keep it clean, dry, and properly stored to prevent future issues.
When should I replace a keyboard rather than repair it?
If multiple expensive components fail (PCB, controller, or multiple switches) or the keyboard is outdated, replacement may be more economical than extensive repairs.
If failures are widespread or costly, replacing may be wiser.
Watch Video
Main Points
- Identify root cause before disassembly.
- Use static-safe tools and careful handling.
- Test incrementally to isolate faults quickly.
- Document steps and configurations for future maintenance.
- Know when professional help is warranted.