Windows 10 Maximize Window Shortcut: Quick Guide
Learn the essential Windows 10 maximize window shortcut techniques, snapping, and multi-monitor workflows to boost productivity with practical step-by-step guidance.

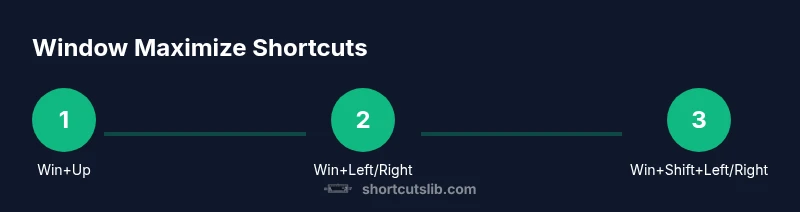
Goal: Maximize the active window in Windows 10 and optimize screen real estate. Core shortcuts include Win+Up to maximize, Win+Left/Right to snap to a side, and Win+Down to restore or minimize. For apps with title bars, Alt+Space then X can maximize. Use Win+Shift+Left/Right for multi-monitor positioning to manage layouts efficiently.
Understanding Window Maximization in Windows 10
Windows 10 provides a practical set of keyboard shortcuts to quickly maximize the active application window and arrange multiple windows. The cornerstone command is Win+Up, which expands the current window to fill its monitor. This is especially valuable when you juggle several tasks and want to focus without sacrificing visibility of other apps in the workspace. Shortcuts like Win+Left and Win+Right enable you to snap windows to the left or right half of the screen, creating a tidy dual-pane view that boosts productivity and reduces time spent resizing with the mouse. If you work across multiple displays, Win+Shift+Left/Right moves the active window to the adjacent monitor while preserving its size. In this guide, we’ll break down the essential actions, explain when to use each, and share best practices to develop fluency with these keystrokes. According to Shortcuts Lib, familiarity with these keystrokes is a keystone habit for power users who want to reduce mouse travel and accelerate task switching.
Core Shortcuts for Maximizing and Snapping
The Windows 10 shortcut ecosystem includes several fast commands for maximizing, snapping, and moving windows. The most important: Win+Up to maximize the active window; Win+Left or Win+Right to snap to screen halves. For full control across monitors, add Win+Shift+Left/Right to move the window between displays, then use Win+Left/Right to position it precisely. If you need to maximize a window from a non-maximized state when a title bar is hidden by the app, Alt+Space followed by X triggers maximize in many standard programs. You can also press Win+D to show the desktop and then re-open the window to bring it back to the foreground. Practice these in combination to learn quick sequences that suit your workflow.
Alt+Space Menu and X for Maximize
Some applications expose their own window controls; when you can’t reach the maximize button, the Alt+Space menu offers a reliable path. Press Alt+Space to open the system menu, then press X to maximize. This is particularly useful for apps with custom borders or when the title bar is obscured by content. The technique is surprisingly dependable across a wide range of Windows 10 programs, including those that resist standard Windows button interactions. If the program is already maximized, pressing the sequence again will toggle a restore to its previous size.
Snap Assist, Drags, and Multimonitor Scenarios
Snap Assist makes it easy to arrange windows by dragging them to the left or right edge, where a visual cue shows possible neighboring windows to snap alongside. Use Win+Left/Right for fast keyboard-based snapping without a mouse. In multi-monitor setups, Win+Shift+Left/Right can shuttle a window between displays. Once snapped, you can adjust the split using the mouse or by continuing to press Win+Left/Right to expand or shrink the snapped region. For large monitors and high-resolution displays, consider using two distinct windows that are each maximized within their own half to reduce switching fatigue. Shortcuts like these help you create a persistent, productive layout across tasks and apps.
Customizing Maximize Behavior with Settings
Windows 10 includes a few user-facing toggles to refine how snapping and maximizing behave. Go to Settings > System > Multitasking. Here you can enable Snap windows and adjust whether windows automatically resize when you snap. You can also choose whether snapping preserves the original size of the window or enforces a uniform split. Enabling the option “When I snap a window, automatically size other windows” helps maintain a consistent grid, which is particularly useful when working with multiple programs at once. If you regularly connect to external displays, ensure that the “Move windows between monitors with Win+Shift+Left/Right” shortcut remains enabled, so you can reposition windows on different screens quickly.
Accessibility and Alternative Methods
Keyboard shortcuts are great, but accessibility options exist for users who prefer different input methods. If you use the On-Screen Keyboard, you can simulate Win+Up by clicking the keys; the same approach works with Voice Control and other assistive technologies. Double-clicking the title bar maximizes or restores a window, a common behavior that remains consistent across many apps. For touch-enabled devices, swipe the window to the top edge to maximize—just be mindful of the app’s responsiveness. Enabling Sticky Keys or Filter Keys can help if you type with a slower rhythm, ensuring shortcuts trigger reliably.
Common Issues and Troubleshooting
If a window refuses to maximize, the culprit is often an app with borderless fullscreen or a program that uses custom window frames. In such cases, try Alt+Space + X, or use Win+Shift+Left/Right to move to another monitor and then maximize. Some outdated or incompatible software may ignore Snap Assist prompts; in these cases, updating the app or using the built-in resize handles is a fallback. Another frequent issue is a keyboard remapping or shortcut conflict created by third-party utilities. Disable conflicting software temporarily to test whether the Windows shortcuts work as intended, and re-map if necessary.
Practical Scenarios: Desktop, Laptop, and Presentation Modes
On a desktop with a large monitor, maximize a primary workspace and keep a secondary window visible by snapping. Laptops with limited screen real estate benefit most from snapping and multi-monitor workflows; use Win+Shift+Left/Right to spread work across displays. When presenting or sharing your screen, maximizing the primary window ensures key content is visible to attendees. If you connect to a projector or external display, remember to cycle windows between screens to maintain context during demonstrations.
Keyboard Shortcuts Cheat Sheet
- Win+Up: Maximize the active window
- Win+Down: Restore or minimize
- Win+Left/Right: Snap to the left or right half
- Win+Shift+Left/Right: Move the window to the previous/next monitor
- Alt+Space then X: Maximize the active window via the system menu
- Win+D: Show the desktop, then return to the window
- Win+M: Minimize all windows to declutter the workspace
Note: This guide emphasizes practical, repeatable steps you can practice daily. The goal is to reduce mouse reliance while maintaining flexible control over window layout across single and multi-monitor environments.
Tools & Materials
- Windows 10-capable computer(Ensure the system is up-to-date with the latest Windows updates.)
- Keyboard and mouse(Must support Windows key and standard modifier keys.)
- External monitor (optional)(Helpful for multi-monitor workflows; ensure display settings allow snapping across monitors.)
- On-screen keyboard (optional)(Useful if testing shortcuts without a physical Windows key.)
- Documentation or notes(For quick-reference of shortcuts during practice.)
Steps
Estimated time: 5-10 minutes
- 1
Prepare the target window
Click or Alt+Tab to bring the desired window to the foreground. This ensures the subsequent shortcuts affect the correct application. If another window is maximized, deselect it first to avoid overlapping actions.
Tip: If the window is minimized, restore it with Alt+Tab before maximizing. - 2
Maximize with Win+Up
Press Win+Up to maximize the active window to fill the screen. This is the fastest way to focus on a single task without manual resizing.
Tip: If Win+Up doesn’t change size, verify the window isn’t already maximized or in a borderless fullscreen mode. - 3
Snap to a side with Win+Left/Right
While the window is non-maximized or maximized, press Win+Left or Win+Right to snap it to half the screen. This reduces overlapping tasks and creates a productive dual-pane layout.
Tip: Use the opposite arrow to swap sides quickly. - 4
Move across monitors with Win+Shift+Left/Right
If you have multiple displays, use Win+Shift+Left or Right to move the active window to the adjacent monitor while preserving size. This lets you distribute work across screens efficiently.
Tip: After moving, you can resize with Win+Left/Right to adjust the snap region. - 5
Maximize from the system menu
If the title bar is hidden or inaccessible, press Alt+Space to open the system menu, then press X to maximize. This works even when the standard maximize button is unavailable.
Tip: This method is reliable for many legacy and enterprise apps with custom frames. - 6
Restore or fine-tune with Win+Down
Use Win+Down to restore a maximized window or minimize it if pressed twice. This gives you a quick way to revert a layout without dragging.
Tip: If you need to adjust the size precisely, snap to a side and then use the arrow keys to nudge the snap region. - 7
Practice a multi-monitor workflow
Repeat the above steps with confidence on a two-monitor or larger setup. Build a mental sequence that moves between apps, maxes the primary window, and then sections the workspace across displays.
Tip: Create a personal shortcut sequence that aligns with your daily routine.
Questions & Answers
What is the quickest way to maximize a window in Windows 10?
The fastest method is Win+Up to maximize the active window. Alt+Space followed by X is a reliable backup for apps that resist standard buttons.
Use Win plus Up to maximize, and Alt Space then X if you need a fallback.
Do these shortcuts work with multiple monitors?
Yes. Use Win+Shift+Left or Right to move the window between monitors, then use Win+Left or Right to snap on the new screen.
They work across multiple monitors; move first with Win+Shift+Left or Right, then snap on the target screen.
What if a window won’t maximize due to a borderless app?
Borderless or fullscreen applications may not respond to standard maximize commands. Try Alt+Space, then X, or use the snap edge technique with Win+Left/Right.
Borderless apps can ignore maximize; use the system menu or snap edges instead.
Can I customize how snapping behaves?
Yes. In Settings > System > Multitasking, you can tailor how windows snap and how they resize in relation to others.
Snap behavior can be customized in Windows settings for your workflow.
Is there a keyboard-only workflow for complex layouts?
Absolutely. Combine Win+Up, Win+Left/Right, and Win+Shift+Left/Right to create and move multiple windows with keyboard control.
Yes—use a combination of core shortcuts to manage complex layouts entirely by keyboard.
What about presentation mode or projection scenarios?
In presentation settings, maximize the main window for clarity and use snapping to keep ancillary apps accessible on a secondary screen.
For presentations, maximize the main content window and arrange helpers on the side screens as needed.
Watch Video
Main Points
- Master Win+Up to maximize quickly
- Snap left/right with Win+Left/Right
- Move windows across displays with Win+Shift+Left/Right
- Use Alt+Space then X for unresponsive windows
- Customize Snap settings for your workflow