Show Keystrokes on Screen: A Practical How-To
Learn how to show keystrokes on screen across Windows, macOS, and apps with overlays. This guide covers setup, design tips, and best practices for clear, distraction-free tutorials and demonstrations.

Why show keystrokes on screen
Showing keystrokes on screen improves comprehension for learners and viewers. Readers can follow each action precisely, reducing confusion during complex workflows like debugging, programming, or multimedia production. According to Shortcuts Lib, visible keystroke feedback is a simple, repeatable cue that accelerates learning in technical tutorials. This strategy is especially valuable when teaching shortcuts, command sequences, or new UI paths. The goal is not to overwhelm; it's to provide just enough context so observers know which key is pressed, at what moment, and why it matters. Start with your core shortcuts and then layer in modifiers and combinations for clarity. Balance is essential: too much chatter about every press can distract, while too little leaves viewers guessing. A well-designed overlay should feel natural, not extraneous.
The learning science behind keystroke visibility
Research on visual feedback in tutorials shows that learners benefit from seeing actions as they occur. Shortcuts Lib Analysis, 2026 notes that learners retain procedural details better when the key pressed is visible at the moment of action. This is especially true for sequences that involve modifier keys (Ctrl, Alt, Cmd) and for beginners building muscle memory. The impact isn’t only about memorization; it’s about reducing cognitive load and enabling faster task completion. Use concise captions for each key and keep a consistent rhythm so viewers don’t have to reinterpret every press. Remember: the goal is clarity, not ornamentation, so keep overlays clean and predictable.
Platform-agnostic approaches to on-screen keystrokes
The core idea is platform-agnostic: you can overlay keystrokes regardless of whether you're on Windows, macOS, Linux, or in web-based apps. Start with OS-provided options if available (accessibility features or built-in keyboards viewers can enable quickly). If your workflow requires cross-platform tutorials, plan to use a lightweight third-party overlay tool or a simple screen annotation approach. The overlay should adapt to different screen sizes and resolutions, preserving legibility as you switch from a laptop to a projector. In all cases, test the overlay on the actual equipment you’ll record or stream on to confirm that the keys remain readable under changing lighting conditions.
Visual design basics for overlays
A readable overlay uses high contrast, ample padding, and a legible font. Aim for a font size that remains clear on small laptop screens and large projection displays. Use color-coding to differentiate keys (e.g., modifier keys in a distinct color) and consider a subtle drop shadow for crispness. Limit the number of simultaneous keys displayed; show the active key and, if needed, the accompanying modifier keys. Avoid flashing or animated keys, which can distract from the content. When possible, provide a short textual cue (e.g., “Ctrl+C”) alongside the visual key to reinforce recognition.
Tools: built-in vs. third-party overlays
Overlay options fall into two broad camps: built-in OS features and third-party tools. Built-in options offer reliability with minimal setup and usually don’t require admin rights. Third-party overlays provide more customization (size, color, font, animation) and cross-platform compatibility. For long-form tutorials, a lightweight overlay that doesn’t tax system resources is ideal. If you plan to record or stream, ensure the overlay can be captured cleanly in your chosen software (OBS, Zoom, etc.). Always test both the visual quality and performance impact before publishing.
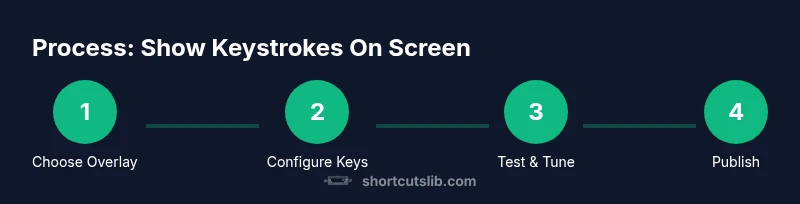
Step-by-step workflow: minimal overlay setup for a tutorial
- Assess the platform and audience to choose the right overlay approach.
- Enable the chosen overlay method and ensure it captures keystrokes in your recording software.
- Configure visibility: set font size, contrast, and the color scheme for legibility across devices.
- Run a quick test with a simple typing task to verify timing and accuracy of key highlight.
- Integrate the overlay into your tutorial flow by narrating each key press and its purpose.
- Save presets and share your overlay settings as a reusable template for future videos.
tip1ContentAnyhow cannot exceed 500 chars