Mac Keyboard Shortcuts Print Screen: Master Screenshots on macOS
Learn comprehensive macOS screenshot shortcuts for full screen, window, and region captures. Save to desktop or clipboard, use the built-in Screenshot app, and annotate with editor-friendly tips. A practical guide by Shortcuts Lib.

By mastering macOS screenshot shortcuts, you can capture full screens, windows, or custom regions in seconds. You can save results to the desktop or clipboard and even open the Screenshot tool for options like timer and on-screen hints. This guide walks through Command-Shift-3, Command-Shift-4, and Command-Shift-5 with practical examples. No extra software required. According to Shortcuts Lib, keyboard-first workflows are the fastest path from idea to shareable image.
Why macOS Screenshot Shortcuts Matter
In professional settings, fast, reliable screen captures support bug reports, design reviews, and knowledge sharing. macOS provides a small set of powerful keyboard shortcuts that cover the most common capture scenarios: entire screens, specific windows, or user-defined regions. Because these shortcuts are keyboard-driven, you stay in flow and minimize context switching, which speeds up feedback loops and documentation workflows. According to Shortcuts Lib, keyboard-first workflows are the fastest path from idea to shareable image, especially when deadlines loom. Consistency across save locations and formats helps teams reuse assets without friction, whether you’re annotating a screenshot in Preview, dropping a file into a ticket, or embedding it in a slide deck. This section frames the practical, repeatable approach you’ll build in the steps that follow.
The Core Shortcuts You Need
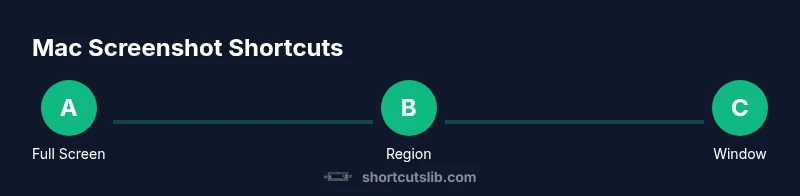
macOS supports several core shortcuts for screenshots. The most common are Command-Shift-3 for a full-screen capture, Command-Shift-4 for region or window captures, and Command-Shift-5 to open the built-in Screenshot toolbar for more options. You can add the Control key to copy to the clipboard instead of saving to disk, making it easier to paste directly into documents or chat. Shortcuts Lib analysis shows that users who rely on these keyboard patterns achieve faster turnaround times and fewer mistaken captures because the system behavior is predictable. Additional variations like Command-Shift-6 capture the Touch Bar (on supported Macs).
Saving to Desktop vs Clipboard
By default, screenshots save to the Desktop as PNG files named with the date and time, like 'Screen Shot 2026-02-26 at 12.34.56 PM.png'. If you prefer the clipboard route, add the Control key to the shortcut: Command-Control-Shift-3 copies the full screen to the clipboard, and Command-Control-Shift-4 copies the selected region. This is particularly useful when you want to paste immediately into documents, emails, or chat apps without creating a file first. Long workflows often benefit from a quick clipboard workflow, then a later batch save to a project folder.
Using the Screenshot Utility (Command-Shift-5)
Open the Screenshot toolbar with Command-Shift-5. The toolbar presents options to capture the entire screen, a selected portion, a specific window, or even a timer delay. You can choose where to save, set a timer (five-second default in some macOS versions), and opt to show or hide the floating thumbnail. For team-wide consistency, set a standard save location and naming convention, so teammates recognize and organize assets quickly.
Capturing a Specific Window
To capture a particular window, press Command-Shift-4, then press Space to turn the cursor into a camera. Move the camera over the target window—your cursor will highlight the window—and click. The resulting image includes only the window, with its title bar and shadows depending on system settings. This approach is ideal for bug reports or tutorials where you want to emphasize the exact app window without surrounding content. If you want the window without the shadow, disable the relevant option in the Screenshot toolbar.
Capturing a Region or Custom Area
Command-Shift-4 lets you drag to select a region. The region’s edges snap to pixel boundaries, helping you obtain crisp screenshots. You can press the Space bar after starting the drag to move the selected region around the screen, or hold the Option key to resize from the center. When you release the mouse, macOS saves the image to your chosen destination. This method is perfect for showing specific UI elements, chat steps, or focused error messages.
Timed Screenshots and Spontaneous Captures
The Screenshot toolbar offers a timer mode, so you can position your cursor, prepare your screen, and trigger a capture after a short delay. Timed captures are ideal for capturing menus or dynamic content that requires time to settle. If you frequently need a countdown, keep the timer option handy in the toolbar and set the delay to the shortest practical interval. Remember to review the captured image to ensure transient UI states (like menus) were captured as intended.
Managing Screenshot Files on macOS
Default naming and organization matter for large projects. Consider creating a dedicated folder like ~/Screenshots to keep all captures in one place, enabling easier search and retrieval. If you’re integrating screenshots into a documentation flow, set a naming convention that includes project name, viewport, and date (e.g., ProjectX_AuthWindow_2026-02-26_1200.png). You can also configure a custom save location using the Terminal or the Screenshot toolbar’s settings in newer macOS versions. Consistency reduces time spent hunting for assets later.
Editing and Marking Up Screenshots
macOS offers lightweight editing through Preview and the built-in Markup tools. Open a captured image in Preview to annotate with shapes, text, or arrows, and use the Markup toolbar to highlight important details. Quick edits like cropping, resizing, or rotating can be done before sharing. If you want to annotate directly after capture, enable the on-screen thumbnail so you can instantly access the Markup options without leaving the Finder. This reduces back-and-forth and keeps your workflow efficient.
Common Pitfalls and How to Avoid Them
A few frequent issues derail screenshot tasks: saving to an unintended location, capturing the wrong window, or forgetting the clipboard option. To avoid these, practice the basic keys until they become second nature, customize your save location, and test your preferred workflow on a boring page to ensure consistency. Also, be aware that certain apps or system dialogs may render captures with different visuals or shadows. If you encounter unexpected results, experiment with the 5 toolbar’s options or use a region capture with precise dragging.
Tips for Power Users and Shortcuts Hosts
- Use Shift to constrain region selection for perfect rectangles. - Combine Command with Control when you want to copy to clipboard and prevent automatic saving. - Enable the Screenshot thumbnail to perform quick edits without leaving your workflow. - Consider a minimal folder structure for ongoing projects and a clear naming convention to simplify asset management. Shortcuts Lib emphasizes regular practice to internalize patterns, then gradually tailor shortcuts to your own tasks.
Advanced Methods: Using Terminal & Third-Party Tools
Advanced users can customize screenshot behavior via Terminal commands, such as changing the default save location or disabling the shadows in window captures. Example commands let you point outputs to a dedicated folder and adjust system UI behavior for repeated tasks. If you need features beyond macOS native options, trusted third-party tools can extend editing, cloud sharing, and batch processing. When evaluating tools, ensure they respect privacy and security policies.
Tools & Materials
- Mac computer with macOS (Mojave or newer for full Screenshot app features)(Ensure the system is up to date for best results with Command-Shift-5.)
- Keyboard and mouse/trackpad(No special hardware required; shortcuts rely on standard keys.)
- Accessible save location (e.g., Desktop or dedicated Screenshots folder)(Sets where images are stored by default; adjust to team needs.)
- Preview or another image editor(For annotations and quick edits after capture.)
- Clipboard management (optional)(Useful if you frequently paste screenshots directly into documents.)
- Terminal access (optional)(Allows advanced customization of save location and capture behavior.)
Steps
Estimated time: 60-90 minutes
- 1
Prepare your Mac and workspace
Make sure macOS is up to date and the area you want to capture is ready. Open the target app or document so the content you need is visible, then decide whether you want a full-screen, window, or region capture.
Tip: Test a quick full-screen capture first to confirm default save behavior. - 2
Capture the full screen (desktop full image)
Press Command-Shift-3. The screenshot is saved to your default location unless you’ve customized it. If you want it on the clipboard, add Control: Command-Control-Shift-3.
Tip: For large displays, note that a full-screen shot may include the Dock or menu bar depending on settings. - 3
Capture a selected region
Press Command-Shift-4, then drag to select the region you want. Release to capture. You can press Space to move the selection or hold Option to resize from the center.
Tip: Drag starting at corner anchors to control aspect ratio precisely. - 4
Capture a specific window
Press Command-Shift-4, then Space to switch to window mode. Hover over the window and click to capture just that window with its chrome.
Tip: If you want to exclude window shadows, disable the shadow option in your system preferences or use the terminal for tweaks. - 5
Open the Screenshot toolbar (more options)
Press Command-Shift-5 to reveal the on-screen toolbar. Choose full screen, window, or region and optional timer. Set save location if needed.
Tip: Use the timer for menus or transient UI elements that require a moment to settle. - 6
Capture with a delay when needed
If you need to time your capture, use the timer option in the toolbar to delay the shot by a few seconds.
Tip: Position the cursor exactly where you want to capture before the delay expires. - 7
Annotate and adjust after capture
Open the image in Preview or your editor of choice to annotate, crop, or resize before sharing.
Tip: Keep a consistent annotation style across assets for professional documents. - 8
Change default save location (advanced)
If you routinely store screenshots elsewhere, use Terminal commands to set a new path and apply it system-wide.
Tip: Back up your settings before making changes and test after applying. - 9
Practice and refine your workflow
Run through the steps on different apps and screen sizes to ensure your process remains reliable across scenarios.
Tip: Create a short checklist to speed up repetition and reduce mistakes.
Questions & Answers
What is the quickest way to take a full-screen screenshot on a Mac?
Press Command-Shift-3. The image saves to your default save location; you can copy to clipboard with Command-Control-Shift-3 if needed.
Press Command-Shift-3 to capture the full screen. Use the clipboard option if you want to paste it directly.
How do I capture a portion of the screen on macOS?
Press Command-Shift-4, then drag to select the area. Release to save. Use Space to move the region or Option to resize from the center.
Use Command-Shift-4 and drag to select the area you want.
Can I capture a window without the title bar?
To capture a window with no extra chrome, use Command-Shift-4, then Space, and click the window. The result includes the window with its title bar by default, but you can adjust settings for less chrome.
Capture a window with Space after Command-Shift-4, then click the window.
How can I capture screenshots to the clipboard only?
Add the Control modifier to any shortcut: Command-Control-Shift-3 copies full screen to clipboard; Command-Control-Shift-4 copies the selected region.
Hold Control with the shortcut to copy to clipboard instead of saving.
What about saving timing or delays?
Use Command-Shift-5 to access a timer option and delay captures by a few seconds, useful for menus or dynamic content.
Use the timer in the Screenshot toolbar for delayed captures.
Where can I edit a screenshot after capture?
Open the image in Preview or a preferred editor to annotate, crop, or resize before sharing. The on-screen thumbnail offers quick edits.
Annotate in Preview right after capturing.
Watch Video
Main Points
- Master the core shortcuts: 3, 4, and 5 for quick captures
- Choose save vs clipboard based on your sharing needs
- Use Preview/Markup for fast annotations
- The Shortcuts Lib team recommends consistent naming and locations for assets