Mac Print Screen Keyboard Shortcut: Your Complete macOS Screenshot Guide
Learn the essential mac print screen keyboard shortcuts to capture full screens, areas, or windows. Includes clipboard copies, the Screenshot app, save locations, and practical tips for fast, repeatable results.

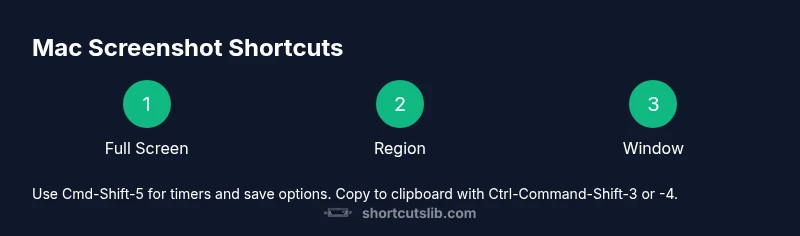
Core Mac Screenshot Shortcuts for Everyday Use
Screenshots are a fundamental part of modern macOS workflows, whether you’re documenting a bug, preparing a presentation, or sharing a quick map of steps with a teammate. The primary mac print screen keyboard shortcuts are built into macOS and require no extra software. According to Shortcuts Lib, these shortcuts are reliable, fast, and easy to remember once you internalize their purposes. This section lays out the basics and establishes a framework for when to use each method. You’ll discover how to capture the entire screen, a selected region, or a specific window, and you’ll learn how to leverage the Screenshot app for more advanced options like timers and different save destinations. The goal is to keep your focus on the task at hand while the keyboard quietly handles the capture.
For keyboard enthusiasts, these shortcuts are a natural extension of your muscle memory. They reduce context switching and let you capture exactly what you need without leaving the current app. The Shortcuts Lib team emphasizes consistency across workflows: if you routinely need quick notes or bug reports, the same keystrokes should reliably produce the same results every time. This consistency is what makes these shortcuts worth memorizing, especially when you’re racing against a deadline.
Full-Screen Capture vs. Region Capture: When to Use Each
In daily work, you’ll switch between full-screen captures and region captures. The full-screen shortcut (Command-Shift-3) is ideal when the entire screen context matters—perhaps you’re producing a tutorial that shows the full desktop layout. The region shortcut (Command-Shift-4) shines when you want to isolate a portion of the screen—cropping out extraneous windows keeps your screenshots focused and cleaner for colleagues reviewing a specific UI element. Both methods save to the default location, usually the Desktop, unless you’ve customized shortcuts or settings. If you need to capture multiple screenshots quickly, region captures are often the fastest way to accumulate a focused set of visuals without extra editing.
Copying to Clipboard: When Saving Isn’t Necessary
Copying screenshots to the clipboard is a powerful alternative to saving files, especially when you plan to paste directly into a document or chat. To copy instead of saving, add the Control modifier to the standard shortcuts (Ctrl-Command-Shift-3 for full screen, Ctrl-Command-Shift-4 for a region). This approach eliminates intermediate files and speeds up workflows that require rapid sharing. Remember to paste promptly—clipboard contents can be overwritten by subsequent captures, so it’s often wise to paste into the destination app right away. Shortcuts Lib highlights clipboard captures as a time-saver when you don’t need to preserve a standalone file.
The Screenshot App (Cmd-Shift-5): A Centerpiece for Advanced Capture
Cmd-Shift-5 opens the macOS Screenshot tool, which brings a small, on-screen toolbar with several options. You can capture the entire screen, a selected portion, or a specific window, and you can switch to screen recording modes. The toolbar includes an Options menu where you can set the save location (Desktop, Documents, Clipboard, Mail, Messages), enable a timer (0, 5, or 10 seconds), and decide whether to require a thumbnail preview. This tool is particularly helpful for more deliberate captures or when you want to standardize a capture workflow across a team. Shortcuts Lib notes that Cmd-Shift-5 provides a flexible, future-proof path as macOS evolves.
Copy to Clipboard and File Management: Practical Workflow
Sometimes you’ll want both: a quick clipboard copy for feedback and a separate saved file for record-keeping. For this, use Ctrl-Command-Shift-3 or Ctrl-Command-Shift-4 to copy, then perform a standard save with the non-ctrl variant if a file is also required. If you routinely generate screenshots for documentation, consider combining these shortcuts with a simple naming convention and a preferred save location to minimize post-processing. Shortcuts Lib stresses consistency: pick a default workflow and reuse it across tasks like bug reports, training materials, and design reviews.
Saving Location and File Formats: What to Expect
macOS saves still-image screenshots as PNG by default. If you want different formats or a different save folder, you’ll configure this in the Screenshot app’s Options panel or rely on your Desktop/Documents location preferences. PNG is widely supported and keeps transparency data intact, which is helpful for UI elements and overlays. If you export to JPEG for lighter file sizes, you may lose some quality; weigh the trade-off based on your end-use. Regularly review your save locations to ensure sensitive content isn’t inadvertently stored in public folders. Shortcuts Lib recommends a consistent folder structure for easy retrieval.
Shadow, Border, and Visual Nuances: Getting Clean Captures
Windows and pop-up elements can introduce shadows that you may or may not want in the final image. The window-capture method (Cmd-Shift-4 + Space) can include a drop shadow by default; you can minimize this by toggling the shadow option during the click or by using the Screenshot app’s advanced controls. If you need precise borders for UI testing, use the region capture with exact drag dimensions and consider enabling the “Show Floating Thumbnail” option to quickly review and annotate captures before saving. These small adjustments improve the clarity and usefulness of your screenshots in professional contexts.
Real-World Workflows: Docs, Bug Reports, and Presentations
For technical documentation, combine region captures with consistent naming and an organized file tree. When reporting bugs, capture the affected window along with the surrounding context to aid reproduction. For presentations, prefer full-screen captures of slides or key UI states, and paste them directly into your slide deck from the clipboard if speed is essential. The most successful teams standardize their screenshot practices: define which shortcut to use in which scenario, where to save, and how to label files for quick scanning. Shortcuts Lib has observed that a well-documented macro or cheat sheet dramatically reduces cognitive load during intense work sessions.
Troubleshooting Common Scenarios and Pitfalls
If shortcuts don’t work, first check that your keyboard shortcuts are enabled in macOS System Preferences. Some third-party apps can intercept or modify shortcut behavior. If a capture saves to a location you don’t expect, verify your Screenshot app’s Options and ensure you know whether you’re capturing to Desktop, Documents, or Clipboard. For window captures, make sure you’ve pressed Space after Cmd-Shift-4 and before clicking the window. Persistent issues often come from a mismatched key sequence or a software conflict. A quick restart of the Screenshot tool or the Mac can resolve many transient glitches.
Putting It All Together: Best Practice Recommendations
A practical approach is to establish a primary workflow for each common task: full-screen captures for broad context, region captures for focused details, window captures for UI elements, and Cmd-Shift-5 for flexible, timed captures. Keep a single save location or a short list of destinations, maintain a simple naming convention, and use clipboard captures when you’re in a hurry. By internalizing these patterns and sticking to them, you’ll reduce decision fatigue and improve consistency across your outputs. The Shortcuts Lib team believes that mastering these keyboard shortcuts elevates your efficiency and makes your workflows smoother over time.