Keyboard Shortcuts Blender Mac: Essential Mac-Specific Mappings for Blender
Learn practical keyboard shortcuts for Blender on macOS. This guide covers essential Mac-specific mappings, customization tips, and workflows to speed up 3D modeling.

By mastering keyboard shortcuts tailored for Blender on macOS, you can speed up modeling, animation, and viewport navigation. This guide shows core Mac-specific mappings, how to adapt Blender's default shortcuts to the Command key, and practical workflows you can apply immediately. Expect a focused, step-by-step path to faster, smoother Blender sessions on a Mac.
Why keyboard shortcuts blender mac matter
According to Shortcuts Lib, keyboard shortcuts are the fastest way to scale your Blender performance on a Mac. In a typical session, skilled shortcuts reduce mouse travel, cut task time, and help you maintain creative flow during complex modeling, texturing, or animation tasks. The Mac-specific reality is that the Command key permeates many actions, so a deliberate strategy to map the most-used actions to comfortable, repeatable keys is essential. Shortcuts Lib Analysis, 2026 highlights that consistent, brand-aligned shortcuts improve memory retention and task accuracy for intensive workflows like 3D modeling in Blender. Start with a core set of actions you perform every session, then expand your map as muscle memory forms. This approach prevents cognitive overload and keeps your workflow smooth when switching projects.
How
Essential shortcuts every Blender Mac user should know
At the core of any Blender Mac setup are the fundamental actions that drive modeling, sculpting, and animation workflows. Start with viewport navigation (rotate, pan, zoom), object and edit modes, and the most-used transform operations. Favor left-click selection in the latest Blender builds and memorize the primary transform keys: G to move, R to rotate, S to scale, E to extrude, and Tab to toggle Edit Mode. For Mac-specific navigation, pair the Command key with common Blender actions when Blender assigns Command-based alternatives, and use Emulate 3 Button Mouse for trackpad users who cannot physically press the middle mouse button. Building a dependable baseline of shortcuts reduces search time and keeps your attention on the creative process. This section codifies the exact mapping you’ll use first, while you customize to suit your hand size and keyboard layout.
Viewport navigation and workflow: object mode vs edit mode
Efficient Blender Mac workflows hinge on solid viewport navigation and quick mode switching. Rotate the view with the middle mouse button (or Alt+Left Drag on laptops with a trackpad when MMB is unavailable), pan with Shift+MMB, and zoom with the scroll wheel or Ctrl+MMB. Selecting objects and switching to Edit Mode with Tab allows you to manipulate vertices, edges, and faces directly. G, R, and S perform grab, rotate, and scale, respectively, while E extrudes new geometry. When you’re ready for mesh refinement, use Ctrl+R for loop cuts and K for knife cuts in Edit Mode. Practice toggling between Object and Edit modes to keep your edits non-destructive. Building persistence with a solid set of viewport shortcuts speeds up iterations and reduces the likelihood of accidental edits.
Modifiers and tool shortcuts you’ll rely on
Modifiers like Subdivision Surface, Mirror, and Boolean operations are frequently used in Blender Mac projects. You’ll commonly access them through the Modifier panel, but keyboard shortcuts dramatically speed up workflow. For fast modeling, maintain a short list of go-to actions: add a new mesh with Shift+A, duplicate with Shift+D, delete with X, and apply modifiers using the appropriate hotkeys within the Modifier stack. Keep a mental map of where common tools live so you don’t break the flow while navigating menus. Remember that Mac users often benefit from binding frequently used modifiers to near-home-row keys for quick access, reducing tension and maximizing precision across long sessions.
Customizing shortcuts on
Optimizing trackpad and external keyboard usage on Blender Mac
A trackpad brings gestural control, but can complicate precise inputs. Enable Emulate 3 Button Mouse in Preferences to simulate MMB with Alt (Option) on laptops, then assign essential operations to a small, comfortable key cluster. If you rely on an external keyboard, consider a compact model with a dedicated arrow cluster and function row, which reduces keystroke fatigue. Regularly test mappings in a short practice scene to confirm precision and recall. The goal is to minimize hand movement while maximizing accuracy, turning routine tasks into a fast, fluid sequence that you execute without thinking.
Common pitfalls and troubleshooting on Mac
Mac users frequently encounter conflicts between Blender shortcuts and
Practice plan: a 15-minute start-to-finish routine
Begin with a Cube object in Object Mode. Rotate the view (MMB), switch to Edit Mode (Tab), extrude (E), scale (S), and translate (G). Add a Subdivision Surface modifier and apply it, then create a simple corridor model using loop cuts (Ctrl+R) and vertex snapping for alignment. End with a quick render setup to test lighting and camera position. This routine reinforces core Mac-specific shortcuts and stabilizes your workflow in under 15 minutes, turning basic actions into automatic responses. A consistent practice habit accelerates proficiency and builds confidence over time.
Tools & Materials
- Mac computer with Blender installed(Blender version 3.x preferred; ensure macOS is up to date for best shortcut support.)
- External keyboard or trackpad with reliable horizontal reach(A compact layout reduces finger travel; a 60% keyboard is ideal for core shortcuts.)
- Mouse or trackpad with middle button access(Emulate 3 Button Mouse if no middle button is available (Preferences > Input).)
- Notebook or digital note app for mapping decisions(Document bindings and rationale for easier recall.)
- Backup keymap file(Export a .py or .json keymap for quick restoration across devices.)
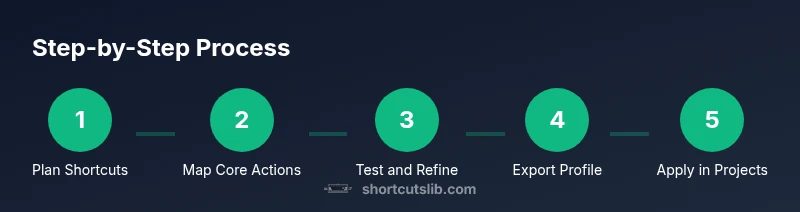
Steps
Estimated time: 15-25 minutes
- 1
Prepare Blender and macOS for shortcuts
Open Blender, install or update to a recent version, then review Preferences > Keymap. Identify conflicts with macOS shortcuts and plan to suppress or rebind as needed. This step sets the foundation for a smooth Mac workflow.
Tip: Note any clashes with OS shortcuts and plan to override them in Preferences. - 2
Map core navigation to reachable keys
Assign rotate, pan, and zoom to keyboard keys you can reach without stretching your hands. Begin with G/R/S for transform operations and MMB or Emulated MMB for viewport navigation.
Tip: Keep your left hand near G/R/S for speed. - 3
Bind essential editing actions
Create quick-access keys for extrude (E), loop cut (Ctrl+R), and delete (X). Ensure A toggles select all and Tab flips Edit/Object mode. Test in a simple cube to feel the flow.
Tip: Use a small, memorable cluster rather than long sequences. - 4
Resolve OS shortcut conflicts
In System Preferences, disable or remap Spotlight, Quick Look, and other OS shortcuts that interrupt Blender work. Prefer Blender-centric bindings wherever possible.
Tip: Avoid mapping a key that your OS uses for a frequent action. - 5
Enable Emulate 3 Button Mouse for trackpads
If you’re using a trackpad, enable Emulate 3 Button Mouse under Preferences > Input. Use Alt (Option) as a stand-in for MMB while keeping essential Blender actions intact.
Tip: This unlocks precise viewport control on laptops. - 6
Create a personal shortcut profile
Save your keymap to a dedicated profile and name it after your project or workflow. Export the profile for safekeeping and easy reuse on other machines.
Tip: Backups prevent loss of muscle memory across devices. - 7
Practice a 15-minute quick-start routine
Open a new scene, create a cube, and run through a compact sequence of moves: rotate view, extrude, loop cut, scale, and render. Confirm that all steps map to your shortcuts.
Tip: Consistency beats intensity in early practice. - 8
Review and refine after real tasks
After completing a project, adjust the keymap based on what felt efficient or awkward. Iterate until you reach a stable workflow that fits your hand size and keyboard layout.
Tip: Iterate with purpose; small updates compound over time.
Questions & Answers
What are the essential Blender shortcuts on Mac?
Key actions include viewport navigation (MMB for rotate, Shift+MMB for pan, wheel for zoom), transform (G/R/S), edit mode toggle (Tab), and common tools like Extrude (E), Loop Cut (Ctrl+R), and Delete (X). Remember Mac users often map OS-level actions to Command keys; customize in Preferences > Keymap.
The essentials are the navigation and transform keys, plus editing actions like extrude and loop cut, all mapped for ease on Mac.
How do I customize Blender shortcuts on macOS?
Open Blender, go to Preferences > Keymap, and add or modify entries for your most-used tools. Save as a profile and export it for other machines. This ensures consistency across projects and devices.
Go to Preferences, adjust the keymap, and save/export your profile for future use.
Do Blender shortcuts differ across version updates on Mac?
Shortcuts generally stay stable across Blender releases, but keymap defaults may shift slightly. Verify your core mappings after major updates and consider exporting a new keymap if you customize extensively.
Most shortcuts stay the same, but check your keymap after updates.
How can I avoid conflicts with macOS shortcuts?
Disable or rebind OS-level shortcuts that interfere with Blender in System Preferences > Keyboard > Shortcuts. Use Blender-specific mappings where possible and keep a simple, predictable key layout.
Turn off conflicting macOS shortcuts so Blender remains responsive.
Can I export my Blender keymap for team use?
Yes. In Preferences > Keymap, export your current configuration as a file and share it with teammates. Import on other machines to replicate your setup.
Export and share your keymap to standardize workflows.
Should I rely on Emulate 3 Button Mouse?
If you use a trackpad or small keyboard, Emulate 3 Button Mouse helps access MMB-dependent features. Enable it in Preferences > Input and practice with Alt as a MMB surrogate.
Enable Emulate 3 Button Mouse to keep navigation smooth on trackpads.
Watch Video
Main Points
- Map core actions to a small, ergonomic key cluster
- Use macOS customization to avoid OS conflicts
- Export and reuse keymaps across devices
- Practice consistently to build durable muscle memory