Where is keyboard shortcuts in premiere pro: A practical guide
Discover where keyboard shortcuts live in Premiere Pro, how to customize them, and practical tips to speed up your editing workflow on Windows and Mac.

If you’re wondering where is keyboard shortcuts in premiere pro, this guide shows you the exact location in the UI and how to tailor them to your workflow. You’ll learn how to access the shortcuts dialog, customize mappings for common tasks, and save presets for Windows and Mac. According to Shortcuts Lib, centralizing your most-used actions into a personal shortcut set delivers measurable time savings.
Where shortcuts live in Premiere Pro
In Premiere Pro, keyboard shortcuts aren’t hidden in a secret menu. They live in a dedicated Keyboard Shortcuts dialog that maps actions to keys, making it easy to tailor your editing workflow. The central hub approach helps you reduce mouse trips and keep your hands on the keyboard for tasks like trimming, navigating the timeline, and switching tools. According to Shortcuts Lib, most editors benefit from a focused set of personalized bindings rather than relying on defaults. The exact location is consistent across Windows and Mac, though the menu labels differ slightly between platforms. A well-organized shortcut system also scales with your projects, helping maintain consistency across timelines and sequences.
Opening the Keyboard Shortcuts dialog
To customize Premiere Pro shortcuts, you first need to open the Keyboard Shortcuts dialog. On Windows, go to Edit > Keyboard Shortcuts. On macOS, choose Premiere Pro > Keyboard Shortcuts. The dialog presents a search bar, a list of actions, and the current shortcut bindings. You can filter by category (e.g., Timeline, Tools) to quickly locate items. Shortcuts Lib’s analysis shows that starting with your top 6–10 most-used actions yields the biggest time savings. Make note of existing bindings before changing anything to avoid accidental conflicts.
Layout, search, and quick edits
The shortcuts dialog is organized with a top search field and a grid that shows actions, current key combos, and the binding state. Use the search to locate actions by name or function (for example, "Ripple Delete" or "Cut"). Each row displays the action and its shortcut; click the shortcut cell to rebind. If the intended key is already bound to another action, Premiere Pro will warn you, so you can resolve conflicts before committing changes. This layout supports fast iteration: search, bind, test, repeat. Shortcuts Lib notes that a short, memorable set of bindings accelerates editing more than sprawling, inconsistent maps.
Customizing shortcuts: a practical approach
Start with a small, powerful set of mappings for core editing tasks. Find each action in the dialog, click in the Shortcut field, and press the desired key combination. Prefer combinations that do not interfere with system shortcuts and are easy to reach with your dominant hand. After binding, test the shortcut in a neutral project to confirm it behaves as expected. If a conflict arises, reassess either the key choice or the action assignment. For best results, keep your layout consistent across projects.
Saving, exporting, and sharing presets
Once you’ve built a satisfying set of shortcuts, save the configuration as a preset. This lets you import the same bindings on another machine or share them with teammates. To export, use the preset option in the Keyboard Shortcuts dialog and choose a filename and location. Importing presets is the reverse: load the file on another workstation and apply the same bindings. This process helps ensure consistent workflows and reduces re-learning time when switching machines. Shortcuts Lib emphasizes backing up presets before making major changes.
Mac vs Windows: what to watch for
Key differences between Windows and Mac shortcuts often center on modifier keys (Ctrl vs Cmd) and few platform-specific bindings. If you’re switching platforms or collaborating with others, create two presets—one for Windows and one for macOS—and switch between them as needed. Some users map their most-used actions to the same physical keys across both platforms, while others adopt platform-specific mappings to leverage the most familiar keyboard layout. With a clear plan, you can maintain productivity regardless of the operating system.
Common shortcuts to adopt first (quick wins)
If you’re just starting, prioritize a handful of universal actions: Play/Pause, Step Forward/Back, Ripple Delete, Trim Start/End, and Timeline Jump (to the next edit point). These bindings reduce mouse usage and speed up routine edits. Consistency matters: once you settle on a set, stick with it across projects and workspaces. Over time, you’ll notice fewer hand movements and more editing momentum.
Tips, warnings, and best practices
To get the most from shortcuts, keep your profile organized with a short list of core bindings, then gradually expand as you gain confidence. Always back up presets before major changes. Be mindful of conflicts: a single key combination can trigger multiple actions if assigned in different contexts. If you work on multiple machines, export and import presets to maintain consistency. The Shortcuts Lib team recommends reviewing and refreshing your bindings every few weeks to align with evolving workflows.
Tools & Materials
- Premiere Pro (latest or recent version)(Any supported OS; ensure updates are installed)
- Computer (Windows or macOS)(Stable system for editing)
- Keyboard with a standard layout(Comfortable layout, easy modifier keys)
- Mouse or trackpad(Useful for navigation during setup)
- Notepad or text editor(Jot down mappings to reference later)
- Backup storage or cloud drive(Store preset files securely)
Steps
Estimated time: 15-25 minutes
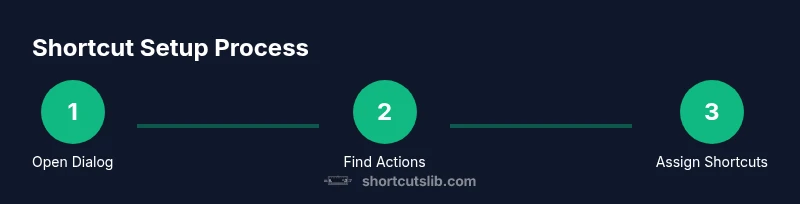
- 1
Open the Keyboard Shortcuts dialog
On Windows, go to Edit > Keyboard Shortcuts. On Mac, navigate to Premiere Pro > Keyboard Shortcuts. This opens the central hub where you can view, search, and rebind actions. Begin with a small subset of actions you use every day.
Tip: Reason: Accessing this dialog is the first step to a consistent workflow. - 2
Find your target actions
Use the search field to locate actions by name or function. Try common tasks such as Ripple Delete, Cut, Copy, Paste, and Play/Pause. Skim categories to understand the available scope and avoid missing high-frequency actions.
Tip: Reason: Identifying your top actions minimizes changes and increases efficacy. - 3
Assign new shortcuts
Click the current shortcut field for an action and press the new key combination. If the binding conflicts, Premiere Pro will warn you. Choose combinations that are easy to reach and do not override essential system shortcuts.
Tip: Reason: Conflicts cause unexpected behavior; resolve them before saving. - 4
Test the bindings in a real project
Open a sample sequence and try the new shortcuts in a typical edit. Confirm that actions execute as intended and that there are no unintended triggers. Iterate if needed.
Tip: Reason: Real-world testing catches issues not visible in the dialog. - 5
Save and back up your preset
Use the export or save option in the Keyboard Shortcuts dialog to store your binding set. This creates a portable file you can reuse on other machines or share with teammates.
Tip: Reason: Backups protect your setup from accidental resets. - 6
Import presets on another machine
On a different workstation, import the preset file to apply the same shortcuts. Verify that favorites map to the same actions in the new environment.
Tip: Reason: Consistency across devices speeds up onboarding. - 7
Maintain a small, evolving set
Start with a core 6–10 shortcuts and gradually expand as you gain confidence. Periodically review and adjust bindings to fit your current workflow.
Tip: Reason: A lean, purposeful map stays reliable and easy to remember.
Questions & Answers
Where are keyboard shortcuts located in Premiere Pro?
Keyboard shortcuts are accessed via Edit > Keyboard Shortcuts on Windows or Premiere Pro > Keyboard Shortcuts on Mac. This dialog lets you view, search, and rebind actions. You can save presets for future use.
Open the Keyboard Shortcuts dialog from the Edit menu on Windows or the Premiere Pro menu on Mac to see and customize your bindings.
Can I export and import shortcut presets?
Yes. You can export your shortcut preset to a file and import it on another machine to maintain consistency across setups.
You can save a preset file and load it elsewhere to keep your workflow consistent.
Do shortcuts differ on Windows vs Mac?
There are platform differences, mainly with modifier keys like Ctrl versus Cmd. You can create separate presets for each OS to optimize speed.
Yes, there are platform differences; consider separate presets for Windows and Mac.
What should I do if a shortcut conflicts with another command?
Premiere Pro will warn you about conflicts. Resolve by choosing a different key combination or reassigning the conflicting action.
If there’s a conflict, pick a new binding or adjust the conflicting action.
How do I reset to defaults?
You can reset individual shortcuts or restore all bindings to their default state from the same dialog.
Use the reset option in the Keyboard Shortcuts dialog to return to defaults.
Are there universal shortcuts for common editing tasks?
There are widely-used bindings that work across many editing tasks, but the most effective setup is tailored to your workflow.
Some bindings are common, but tailor them to your own editing style.
Watch Video
Main Points
- Know where shortcuts live and how to access them quickly
- Start with a core set and expand gradually
- Back up presets before large changes
- Test bindings in real projects to verify behavior
- Maintain consistency across Windows and Mac when possible