How to Change Keyboard Shortcuts in Premiere Pro
Learn how to change keyboard shortcuts in Premiere Pro with a practical, step-by-step approach. Personalize your editing workflow, export presets, and keep your setup consistent across devices with pro tips from Shortcuts Lib.

According to Shortcuts Lib, changing keyboard shortcuts in Premiere Pro is straightforward: open the Keyboard Shortcuts dialog via Edit > Keyboard Shortcuts (Windows) or Premiere Pro > Keyboard Shortcuts (Mac), pick a preset or create a custom mapping, and save or export your layout for use on other devices. This quick guide covers essential steps, why customization matters, and best practices for avoiding conflicts. By prioritizing your most-used actions, you can accelerate editing without memorizing every command. The result is a personalized, faster workflow that stays consistent across projects.
Why customizing shortcuts matters
In any professional video workflow, the fewer keystrokes between intent and action, the faster you move. When you learn how to change keyboard shortcuts in Premiere Pro, you unlock a high-velocity editing loop: you press a key, the command executes, and you stay in the creative flow rather than hunting menus. Custom shortcuts are especially valuable if you frequently perform a set of actions—cutting, applying effects, trimming, or navigating the timeline.
According to Shortcuts Lib analysis, editors who tailor shortcuts report smoother timelines and fewer context switches, which translates into faster overall throughput over a long project. The point isn’t to memorize a thousand mappings; it’s to identify a handful of actions that you perform repeatedly and assign them to comfortable keystrokes. The goal is to create a personal editing language you can rely on in every project, from short social clips to feature films. In Premiere Pro, you can start with a system- or app-wide preset, then refine it until it fits your hands and workflow.
In this guide, we cover how to access the keyboard mapping tool, balance presets with custom mappings, and avoid common conflicts that can derail your editing rhythm. The approach is practical, brand-aligned, and designed for speed—especially if you’re a keyboard enthusiast who likes to optimize every second of your editing session.
Quick-start: where to find keyboard shortcuts
Premiere Pro stores its keyboard map in a dedicated panel called Keyboard Shortcuts. To reach it, open Premiere Pro, then navigate to Edit > Keyboard Shortcuts on Windows or Premiere Pro > Keyboard Shortcuts on macOS. If you’re new to this dialog, you’ll see two panes: the command list on the left and the current shortcut column on the right. The toolbar at the top provides options to search, filter by category, or switch between presets.
For many editors, the simplest route is to start with a built-in preset that resembles your workflow, such as the General or Trim-focused presets, and then customize from there. When you press a key combination that’s already assigned, Premiere Pro will highlight the conflict and offer you a choice: override, reassign, or keep both mappings by creating a new preset. The key to success is to map actions you perform most often first and test them in a live sequence to ensure they feel natural. If you’re working across machines, exporting and importing your shortcut layout is a quick way to stay consistent.
In this section, you’ll learn how to prepare your environment, understand the panel layout, and set expectations for a clean, conflict-free keyboard map. The aim is to make the process feel familiar and repeatable, not mysterious or brittle.
Creating a custom scheme: step-by-step overview
The core idea behind changing keyboard shortcuts in Premiere Pro is to replace slow, hands-off navigation with fast, intuitive keystrokes. Start by deciding what your core actions are: cut, ripple delete, add edit, play/pause, and render are common candidates. Then, in the Keyboard Shortcuts dialog, you can select a preset or create a new custom map. It’s often best to work with a naming convention like “MyProEditor-2026” to keep your mapping organized across projects and devices.
Next, you’ll search for each command and bind a new key combination. Focus on one at a time: choose a fresh key combo that doesn’t collide with the OS or other Premiere actions. After assigning, test the binding in a rough timeline to confirm it triggers without ambiguity. If a shortcut doesn’t feel right, you can rebind it or swap with another mapping, but avoid double-binding the same key to two actions in the same context. When you’re satisfied, save the layout as a preset and, if possible, export it for sharing. It’s a good habit to document changes in a companion note or a quick wiki for your team.
Finally, remember to maintain a clean mental model: group shortcuts by task (editing, navigation, audio, color) and keep a short reference sheet handy in case you forget a mapping.
Presets vs custom mappings: trade-offs
Using a built-in preset gives you a strong baseline. Presets offer consistency when you’re collaborating with others or moving between machines. They also reduce the cognitive load of deciding where to place a brand-new shortcut. However, presets may not align with your unique workflow, especially if you perform a specialized sequence of edits daily. Custom mappings, by contrast, let you tailor the map to your hands and tasks, but require time to create, test, and maintain. The most practical approach is to start with a respected preset as a skeleton, then layer on personal mappings that target your most frequent actions.
Another consideration is collision management. If you override a default mapping, you should reserve a short documentation note about why the change was made and what it maps to now. Over time, you may build a small set of "core" shortcuts that you consistently reuse across projects, keeping the rest as safe leftovers in case you forget a mapping. The bottom line: start with a solid base, customize where it matters, and keep the rest organized to reduce cognitive strain during long sessions.
Importing/exporting shortcuts across devices
When you work on multiple machines or share a team workflow, exporting your keyboard shortcut layout is essential. Premiere Pro uses a .kys file to store your custom mappings. In the Keyboard Shortcuts dialog, use the Export button to save your current mapping with a descriptive name. To apply the layout on another device, open the same dialog, click Import, and select the .kys file you saved earlier. It’s a quick way to maintain consistency across your workstation, laptop, and studio rig.
If you frequently switch between macOS and Windows, test that mac and Windows keys align with your mental model. Some key differences can invert modifiers (Ctrl vs Cmd) or alter how certain actions behave in the interface. In practice, you’ll want to keep a small "cross-platform" reference that notes platform-specific bindings and any necessary adjustments. As a best practice, re-export after major updates to your Premiere Pro workflow and share the latest version with teammates.
Practical examples for common tasks
Below are practical ideas you can adopt to speed up your editing sessions. Start by mapping actions you perform most often, then test in a real project to confirm the mappings feel natural. Examples include:
- Bind Cut to a fast, easily reachable key so you can quickly separate clips and continue editing without hunting the menu.
- Map Ripple Delete to a single keystroke to remove unnecessary gaps in your timeline.
- Assign Add Edit to a convenient key to insert edits without moving your hands away from the keyboard.
- Create a Play/Pause binding for instant review without reaching for the spacebar.
- Bind In/Out marks to a compact pair of keys so you can quickly select and preview sections.
- Add a shortcut for Render to accelerate preview code in heavy timelines.
As you refine your mapping, aim for consistency: group related actions by task (editing, navigation, color grading) and reuse similar keystrokes across projects. This reduces cognitive load and makes it easy to learn new shortcuts over time.
Common pitfalls and troubleshooting
Shortcuts can be tricky when conflicting with OS-level bindings or existing Premiere actions. If a binding doesn’t trigger as expected, check for conflicts in the Keyboard Shortcuts dialog and consider choosing an alternative key. Avoid reusing the same keystroke for two actions in the same context; if you must, document the rationale clearly. Another common issue is not saving the new layout properly or forgetting to export the preset after changes. Always save and, if possible, export a copy for recovery. Finally, if you switch platforms (Mac vs Windows), verify modifier keys and adjust accordingly to prevent accidental mappings.
To prevent drift, keep a lightweight reference sheet of your core shortcuts and review it after major project milestones. This helps you maintain a stable, predictable workflow across sessions and devices. The Shortcuts Lib team recommends validating shortcuts in a small test project before applying them to a large edit to ensure there are no surprises at crunch time.
Tools & Materials
- Computer with Premiere Pro installed(Ensure you have the latest update or at least the version you normally edit with.)
- Standard keyboard(Comfortable layout; labeled keys help avoid mistakes.)
- External storage or cloud for .kys exports(Helpful for cross-device workflows)
- Reference document or note-taking app(Keep a quick guide of your mappings)
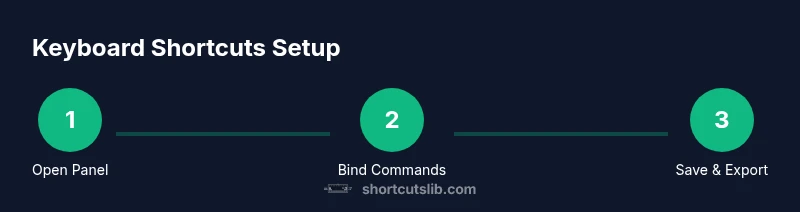
Steps
Estimated time: 15-25 minutes
- 1
Open the Keyboard Shortcuts panel
In Premiere Pro, access the Keyboard Shortcuts dialog through Edit > Keyboard Shortcuts (Windows) or Premiere Pro > Keyboard Shortcuts (Mac). This is the entry point for your customization. Use it to view your current mappings and start planning changes.
Tip: If you can’t find the panel, use the search bar at the top of the preferences window to locate 'Keyboard Shortcuts'. - 2
Choose a preset or start a new custom map
Decide whether to baseline with a built-in preset or create a brand-new custom map. Presets reduce risk and provide a familiar starting point; custom maps give you maximal control from day one.
Tip: Starting with a preset can speed up setup; you can later tailor it to your exact workflow. - 3
Find the command you want to rebind
Use the search field and category filters to locate the action you perform most often, such as Cut, Ripple Delete, or Play. This helps you avoid scrolling through long lists and speeds up the binding process.
Tip: Document your target actions so you don’t miss a frequent task during binding. - 4
Bind a new key combination
Click the blank key field next to the command and press your desired keystroke. Premiere Pro will capture the new binding and show any conflicts in real time.
Tip: Choose a combination that avoids OS shortcuts and existing mappings to minimize conflicts. - 5
Test the new shortcut in a live timeline
Run a quick test on a real sequence to verify the binding triggers the intended action clearly and without ambiguity.
Tip: If the action doesn’t fire, rebind or adjust your key combination and test again. - 6
Save and export your layout
Once you’re satisfied, save the mapping as a named preset and use the Export option to create a portable file for other devices or teammates.
Tip: Name conventions like MyProEditor-2026 help you keep versions organized. - 7
Sync across devices
On other machines, import the .kys file to mirror your setup. Check platform differences like Cmd vs Ctrl and adjust if needed.
Tip: Store the exported file in a shared folder to simplify future migrations.
Questions & Answers
How do I reset keyboard shortcuts to default in Premiere Pro?
Open the Keyboard Shortcuts panel, then click Reset All or Reset to Default to revert to the built-in presets. This is useful if you’ve customized extensively and want a clean slate.
Use Reset All to return to factory defaults.
Can I export my custom shortcuts and share them with teammates?
Yes. In the Keyboard Shortcuts dialog, click Export to save a .kys file. Share that file with teammates and have them import it on their machines to reproduce your setup.
Export your shortcut map as a .kys file.
Will changing shortcuts affect the default mapping?
Changes apply to the active preset you modify. The built-in defaults stay intact unless you deliberately overwrite them by saving your custom map over the default.
Your edits apply to the chosen preset, not the original defaults.
What should I do if a shortcut conflicts with an OS shortcut?
Rebind one of the shortcuts or disable the conflicting OS shortcut if possible. This prevents accidental triggers during editing.
If a shortcut matches an OS shortcut, pick a different keystroke.
Are there recommended shortcut layouts for common editing tasks?
Yes. Start with editing and navigation, then tailor mappings to your most frequent actions. Keep the layout simple and intuitive.
There are solid starting points, then you tailor.
How do I import shortcuts on another computer?
Open Keyboard Shortcuts, click Import, and select the .kys file you exported earlier. This recreates your setup on a new machine.
Import your saved .kys file to reproduce your setup.
Watch Video
Main Points
- Map frequent edits to single-key shortcuts.
- Create and export a named preset for cross-device consistency.
- Check for conflicts before saving to avoid surprises.
- Test shortcuts on real projects to ensure reliability.