Customize Keyboard Shortcuts in Anki: A Practical Guide
Learn how to customize keyboard shortcuts in Anki using built-in options and add-ons. Step-by-step guidance, safety tips, and practical workflows from Shortcuts Lib.

By the end, you will know how to customize keyboard shortcuts in Anki to speed up reviews across decks. You’ll learn when to use built-in options versus add-ons, how to map actions safely without causing conflicts, and how to test and refine mappings in a dedicated practice deck. This guide from Shortcuts Lib ensures a practical, repeatable workflow.
Why customize keyboard shortcuts in Anki matters
According to Shortcuts Lib, customizing keyboard shortcuts in Anki can dramatically speed up reviews and reduce friction during long study sessions. When you tailor shortcuts to your workflow, you spend less cognitive energy hunting for commands and more time reviewing cards. This is especially valuable for power users who navigate large decks daily. A thoughtful shortcut layout can also minimize repetitive finger movements and help you maintain a steady rhythm during sprints. In this section, we’ll explore the core benefits and set the stage for a step-by-step customization process that respects your study style and device setup.
Understanding the landscape: built-in options vs add-ons
Anki provides some keyboard controls out of the box, which can cover common actions like flipping cards or advancing to the next card. However, built-in options vary by platform and version, and they may not support every action you want to map. For broader customization, add-ons are often used. A reputable add-on can extend the editor, expose a dedicated shortcut editor, and let you rebind keys with fewer conflicts. Start with the built-in controls if your needs are simple, and consider add-ons when you hit gaps or want per-action specificity. Your goal is a clean, consistent layout that reduces brain-load while studying.
What to map: choosing which actions to shortcut
Prioritize actions you perform most often during reviews and cloze work. Typical targets include: showing the answer, grading (Again/Hard/Good/Easy), moving to the next card, retrying a card, opening the card editor, and navigating decks. Avoid clutter by limiting mappings to a handful of high-impact actions first. If you study multiple decks, create a core set of shortcuts that work across decks, and reserve extra mappings for specialized tasks (e.g., tag editing or deck switching). The right set will feel intuitive and cut overall review time.
Safety and conflicts: backup, OS shortcuts, and add-on conflicts
Before changing shortcuts, back up your Anki profile. This gives you a safe rollback point if a remapping interferes with essential actions. Also consider conflicts with your operating system or other applications (for example, common OS shortcuts like Ctrl+C might overlap with an action in Anki). Some add-ons introduce global hotkeys or alter key behavior; in mul-ti-step setups, document each change to avoid confusion. If a conflict appears, reassign one of the competing keys to a less-used character or modifier combination.
Installing and selecting add-ons to customize shortcuts
If you decide to use an add-on, start from Anki’s add-on manager and search for keyboard-shortcut tools that match your version. Read reviews and check compatibility with your Anki build. After installation, enable the add-on and navigate to its configuration screen. Most editors expose a list of actions you can remap, plus the key you currently have bound. Keep a minimal approach: enable only what you need and disable optional extras that add noise or complexity.
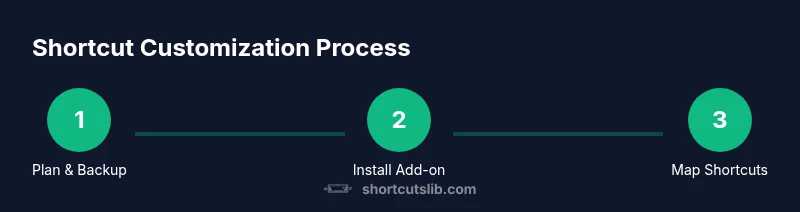
Step-by-step: prepare, install, and configure
- Prepare: Back up your profile and note which actions you plan to map. Clear goals reduce scope creep. - Install: If you’re using an add-on, install it from Anki’s add-on manager and restart Anki if required. - Configure: Open the add-on’s keyboard editor (or the built-in editor if available) and map each target action to a comfortable key or key combo. - Validate: Close and reopen Anki, then test each mapped shortcut in a controlled deck. - Document: Create a quick reference map (a small cheatsheet) so you can reproduce the setup later. - Refine: After you’ve used the mappings in real study sessions, adjust any mappings that cause conflicts or slow you down.
Step-by-step: remapping a specific action
Remapping a single action, such as revealing the answer, is the most common starting point. Open the shortcut editor, select the action, press the new key combination, and save. If the new key is already in use by another function, the editor will warn you. Choose a different combo or disable the conflicting shortcut. Always test the new mapping in a closed environment before relying on it in a live review session.
Step-by-step: test, refine, and document your mappings
Test each shortcut with a handful of cards in a sandbox deck. Note any conflicts and adjust as needed. Keep a running document that lists the mapped keys, the action they trigger, and the platform where they apply. This practice helps you restore a known-good configuration if you ever upgrade Anki or switch devices. A well-documented mapping also makes it easier to share your setup with teammates or fellow learners.
Case studies: common workflows for Anki users
- Case A: A daily reviewer who wants fast navigation and quick reveal. The user maps Next Card, Show Answer, and Easy/Again to easy-to-remember keys, then keeps the rest on a few modifier combinations. This reduces time spent hunting for buttons and maintains cadence during sessions. - Case B: A cloze-focused user who edits tags and card properties frequently. They create keys for opening the editor, filtering by tag, and toggling bold or underline in notes. The setup streamlines edits while preserving study flow. - Case C: A multi-deck learner who jumps between decks often. They map deck switching and search actions to keys that feel natural, keeping cross-deck switching fast and consistent.
Tools & Materials
- Anki Desktop (Windows/macOS/Linux)(Ensure you have the latest stable version before starting.)
- Profile backup/export(Create a full backup before changing shortcuts.)
- Add-on manager access (optional)(Use when you need extended keyboard customization beyond built-in options.)
- Test deck or practice deck(A small, controlled deck to safely test mappings.)
Steps
Estimated time: 45-90 minutes
- 1
Back up your Anki profile
Create a full backup of your Anki profile so you can revert changes if something goes wrong. This protects your study data and customizations.
Tip: Store the backup in a separate location or cloud drive in case of hardware failure. - 2
Decide what to map first
Identify the handful of actions you perform most during reviews (e.g., Show Answer, Next Card) and plan mappings for those. Avoid overloading with too many mappings at once.
Tip: Start with 2–4 high-impact shortcuts to keep things manageable. - 3
Install or locate the shortcut editor
If your version has built-in editor, locate it in the Preferences or Settings. If not, install a reputable add-on that adds a keyboard editor and supports your OS.
Tip: Read add-on notes for compatibility with your Anki version before installing. - 4
Remap the first action
Open the editor, select the target action, press the new key combination, and save. Check for conflicts with existing shortcuts.
Tip: Choose a combination that uses at least one modifier (Ctrl/Alt/Cmd) to reduce conflicts. - 5
Test in a sandbox deck
Run a quick review in a test deck to verify the new shortcut behaves as expected. If it triggers other actions, adjust accordingly.
Tip: Test across different deck contexts (new cards, review cards, edits). - 6
Document and reflect
Update your shortcuts cheatsheet with the new mappings and platform scoping. Review every few weeks and adjust as needed.
Tip: Keep a single source of truth to prevent drift between devices.
Questions & Answers
Can I customize keyboard shortcuts in Anki for macOS, Windows, and Linux?
Yes. The process is largely OS-agnostic, but paths to the shortcut editor and add-ons may vary slightly by platform. Always verify after changes and test across your devices.
Yes. You can customize shortcuts on macOS, Windows, and Linux. Check platform-specific steps and test after changes.
Will changing shortcuts affect Anki Web?
Desktop shortcut changes usually don’t carry over to AnkiWeb. Web interfaces have their own set of controls, so keep desktop customizations within the desktop app for consistency.
Desktop changes typically don’t apply to AnkiWeb; use desktop-specific shortcuts when studying offline.
How do I revert to the default shortcuts?
If your add-on supports it, use the built-in reset option or uninstall the add-on to restore default shortcuts. Always re-test after a reset.
Use the reset option in the shortcut editor or reinstall the add-on to return to defaults.
How can I share my shortcut setup with others?
Export your add-on configuration or cheatsheet and share it with teammates. They can import the configuration to mirror your setup.
Export the config or cheatsheet and share it so others can import the same shortcuts.
What should I do if two shortcuts conflict?
Identify the conflicting actions, choose unique keys or adjust modifiers, and re-test in several deck contexts.
If two shortcuts collide, reassign one to a different key combo and test again.
Watch Video
Main Points
- Back up before changes and document mappings.
- Start with essential shortcuts to avoid clutter.
- Test mappings in a controlled deck and adjust as needed.