Keyboard Shortcut to Extend Display: A Practical How-To
Learn practical keyboard shortcuts to extend displays on Windows and macOS, optimize multi-monitor setups, and troubleshoot common issues. A comprehensive, brand-driven Shortcuts Lib guide for tech users and keyboard enthusiasts.

To extend your display quickly, use OS shortcuts and a quick settings path. On Windows, press Win+P and select Extend; on macOS, open System Settings > Displays and turn off Mirror Displays. Make sure all monitors are connected and detected, with a primary display set. This guide shows step-by-step methods for both platforms.
What extending a display means and why it matters
Extending a display creates a single desktop across two or more screens, enabling you to drag apps and windows between monitors. This setup boosts productivity by providing more workspace for coding, design, or content creation, and it helps categorize tasks—one screen for reference material, another for code, and a third for chat or monitoring dashboards. According to Shortcuts Lib, mastering display extension reduces task switching friction and keeps your hands on the keyboard, increasing speed and accuracy. If you regularly compare documents, design assets, or dashboards side by side, an extended workspace provides a tangible speed advantage. The concept is platform-agnostic, but the exact shortcuts and steps vary by operating system and GPU configuration. A well-configured extended display can dramatically improve your workflow without requiring expensive hardware investments.
Windows vs macOS: a quick mental model
On Windows, the primary day-to-day control for a multi-monitor setup is the Windows Display Settings and the Win+P shortcut family. You can mirror, extend, or disconnect displays with a few keystrokes. On macOS, the Display preferences control arrangement and mirroring; Apple’s ecosystem emphasizes consistent window management and seamless drag-and-drop across screens. While the end goal—an extended desktop—remains consistent, the path to achieve it differs. Shortcuts Lib notes that knowing the default OS behaviors helps you predict how your system will respond when you plug in a new monitor or return from sleep.
Windows: keyboard shortcuts you’ll actually use
Windows provides a fast route to switch display modes via the Win+P menu. The common option you’ll want is Extend, which expands your desktop across all connected screens. If you frequently swap between modes (e.g., extending for work, mirroring for presentations), consider creating a small macro or script to cycle through modes with a single key. This reduces the cognitive load of remembering multiple steps and keeps you in a flow state. Don’t forget to verify display order in Settings > System > Display; you can drag displays to match their physical arrangement, ensuring smooth cursor movement.
macOS: extending your desktop with minimal friction
macOS doesn’t have a universal one-key Extend shortcut like Windows, but you can achieve the same outcome by turning off Mirror Displays in System Settings > Displays. Once Mirror is disabled, your desktop extends across all connected displays. A practical approach is to arrange displays in the same order as your physical monitors, which makes cursor movement feel natural. For power users, Apple keyboard shortcuts can be augmented with third-party utilities to speed up toggling between display configurations, though you should ensure compatibility and maintain system security.
How to check that your displays are detected
If a monitor doesn’t appear, start with the simplest checks: verify power, ensure cables are firmly connected, and confirm you’ve selected the correct input source on each monitor. Use the OS-provided Detect Displays option (Windows) or the Detect Displays button in macOS Displays settings to force recognition. If a monitor is still missing, test with a different cable or port, check driver updates, and review GPU documentation for port compatibility. Shortcuts Lib emphasizes that a failed detection is rarely a unique fault; it’s typically a signaling issue or a driver quirk that can be resolved with cable re-seating and re-detection.
Advanced tips: optimizing performance and reliability
To minimize lag and maximize reliability when extending displays, use standardized cables (prefer HDMI 2.0/DisplayPort 1.4 or newer) and avoid mixed-refresh-rate scenarios across monitors. Set equal resolutions where possible, and ensure power-saving features on displays don’t trigger mid-work. Enable HDR only if all monitors support it and you’re comfortable with color profile adjustments. Regularly update GPU drivers and OS patches; a stale driver can cause detection delays or unstable extensions after wake-from-sleep cycles.
Practical workflow: aligning productivity with your layout
A practical workflow pairs hardware with mental maps: keep reference materials on one screen, active work on another, and conversations or monitoring tools on a third. This alignment makes window snapping, keyboard navigation, and app switching faster. Use keyboard shortcuts to nudge windows between displays, or drag-and-drop with precision using the extended canvas. Shortcuts Lib’s guidance centers on repeatable patterns: create a predictable grid layout, rehearse the movement of windows, and maintain consistent monitor order in system settings to avoid cursor drift over time.
Quick-start checklist you can print
- Confirm all monitors are powered and connected.
- Open Windows Win+P or macOS Displays settings to configure Extend.
- Verify display order and resolution alignment.
- Test dragging a window across screens and adjust sensitivity.
- Save or memorize a preferred configuration for daily use.
- Keep a simple hotkey plan for quick reconfiguration if needed.
Expanding beyond two displays
If you add more than two screens, repeat the detection and arrangement steps for each new display. Consider a layout that places the primary work screen at the center, with secondary displays to left and right in the order you physically arrange them. For complex workflows, advanced users may script display layouts or utilize GPU control panels to lock arrangements, ensuring consistent behavior after reboot.
Tools & Materials
- Two or more displays (HDMI/DisplayPort-capable)(Ensure each monitor supports your GPU’s outputs)
- Compatible cables/adapters(Use HDMI/DisplayPort cables of equal or better spec across monitors)
- Computer or laptop with multi-monitor output(Graphics driver up-to-date; supporting GPU)
- External keyboard or macro-capable keyboard(Optional: map hotkey to Extend or cycle modes)
- Access to OS display settings(Admin rights may be needed for certain configurations)
- Printed shortcuts cheat sheet(Helpful for quick reference during setup)
Steps
Estimated time: 30-45 minutes
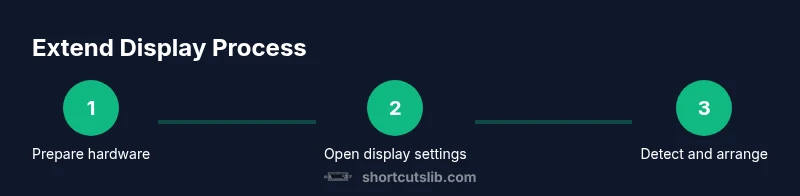
- 1
Prepare your hardware
Power off your computer, connect all displays, and power them on in sequence. Confirm each monitor shows a usable input and that you can see basic output from your GPU. This ensures cables and adapters aren’t the bottleneck during setup.
Tip: Test each cable individually and label ports to avoid confusion when expanding later. - 2
Open the display settings
Navigate to your OS display settings. On Windows, open Settings > System > Display; on macOS, go to System Settings > Displays. This is your hub for detection, arrangement, and mode selection.
Tip: Use a dedicated keyboard shortcut to reach the display settings quickly if you customize a macro. - 3
Detect and identify displays
Use the Detect Displays (macOS) or Identify (Windows) feature to verify each monitor is recognized. This helps you map physical positions to on-screen indexes.
Tip: If a monitor isn’t detected, unplug and replug its cable while the settings page is open. - 4
Enable Extend mode on Windows
Press Win+P and choose Extend. This expands the desktop across all connected displays, rather than mirroring content.
Tip: If Extend isn’t showing, update graphics drivers and re-run the Detect Displays step. - 5
Disable Mirror on macOS
In Displays, uncheck Mirror Displays to allow the desktop to extend across monitors. Arrange screens to match your physical setup.
Tip: Drag the white menu bar to designate the primary display. - 6
Rearrange displays for workflow
Drag the on-screen monitor icons to reflect your real-world placement (left-to-right, top-to-bottom). This ensures the cursor moves predictably.
Tip: Keep the primary display centered if you frequently reference content while typing. - 7
Test extension with windows
Open windows and drag them across screens. Verify that taskbars, docks, and shortcuts function as expected in each location.
Tip: Test a large spreadsheet, a code editor, and a reference browser to simulate real tasks. - 8
Create a quick hotkey for extension
If you frequently reconfigure the layout, map a hotkey or a macro to cycle through Extend/mirror or to open a quick display settings panel.
Tip: Keep the macro simple to avoid conflicts with existing system shortcuts.
Questions & Answers
What is the quickest way to extend my display on Windows?
The quickest way is to press Win+P and choose Extend from the sidebar. Ensure your monitors are connected and detected, then adjust the display order in Settings > System > Display.
Press Win plus P, select Extend, and verify each monitor is detected; adjust order in Display settings.
Can I extend displays on a Mac without mirroring?
Yes. Open System Settings > Displays, then uncheck Mirror Displays. Arrange the monitors to reflect their physical layout for a seamless extension.
Open Displays in System Settings and turn off Mirror Displays, then arrange the layout.
What should I do if a second monitor isn’t detected?
Check power and cables, try a different port, update graphics drivers, and use Detect Displays in Windows or the Detect Displays button on macOS. If still missing, test with another cable or adapter.
Verify connections, test another port or cable, and refresh display detection.
Is there a universal keyboard shortcut to extend across platforms?
There isn’t a single universal shortcut across Windows and macOS. Windows uses Win+P to extend; macOS requires turning off Mirror Displays in the Displays preferences. You can map custom shortcuts for quicker access.
Windows has Win+P to Extend; macOS uses Display settings to disable Mirror; you can map your own shortcuts.
How can I optimize performance when using multiple displays?
Use matching resolutions and refresh rates where possible, keep cables uniform, and keep graphics drivers up to date. Disable HDR if not supported by all displays to avoid color and latency issues.
Match resolutions, keep cables uniform, and keep drivers up to date for smoother performance.
Can I automate the extend workflow with scripts?
Yes, advanced users can script display layouts or create macros to switch modes. Ensure scripts respect OS security settings and don’t introduce conflicts with existing shortcuts.
You can script display layouts, but confirm compatibility and security implications.
Watch Video
Main Points
- Connect all displays before configuring.
- Win+P (Extend) or macOS Display settings enable extension.
- Arrange displays to match physical layout for smooth cursor flow.
- Test by dragging windows across screens and adjust as needed.
- Consider hotkeys or macros to streamline the routine.