How to Use Snipping Tool Keyboard Shortcut
Master the Windows Snipping Tool keyboard shortcut to capture, edit, and share screenshots quickly. This step-by-step guide covers the primary shortcut, clipboard workflow, saving snips, and best practices for fast, reliable screen captures.

This guide shows you how to use the Snipping Tool keyboard shortcut to capture screenshots quickly on Windows. You’ll learn the primary shortcut, how to paste snips into documents or emails, and how to save or edit snips for fast sharing. By mastering these steps, you’ll streamline your screenshot workflow and reduce interruptions.
Why keyboard shortcuts save time with the Snipping Tool
In modern workflows, every keystroke matters. The Snipping Tool keyboard shortcut lets you capture exactly what you need without wading through menus. According to Shortcuts Lib, intentional use of keyboard shortcuts for routine tasks reduces cognitive load and speeds up the capture-to-share cycle. The Shortcuts Lib team found that users who learn a compact set of reliable shortcuts become more consistent and less frustrated when assembling screenshots for reports, tutorials, or bug reports. With Windows 10 and Windows 11, the primary shortcut to trigger a snip is Windows key + Shift + S, which activates a screen-capture overlay while your current app remains in focus. This approach helps you keep your flow intact—continue typing in a document or chat while you prepare the screenshot. Practice will make you instinctive about framing the capture area and deciding where to paste or save the image. This section builds the mindset of efficient screen capture, not just the how-to.
The core Windows shortcut to start a snip
The most efficient way to begin a snip is the Windows key + Shift + S combination. This shortcut opens the overlay that lets you choose the capture mode (rectangular, freeform, window, or full screen) and immediately copies the result to your clipboard. This behavior is consistent on Windows 10 and Windows 11, making it a dependable starting point for everyday screenshot tasks. If you’re on an older machine or a setup where this shortcut isn’t responding, you can still launch the Snipping Tool app directly and press Ctrl+N to begin a new snip. Shortcuts Lib emphasizes using the overlay shortcut as your default, then falling back to the app’s own commands when needed.
How the Snipping Tool integrates with clipboard and notifications
After you take a snip with Windows+Shift+S, the image typically lands on your clipboard, ready to paste into any document, email, or image editor with Ctrl+V. A small notification bubble may appear, offering quick access to open the captured image in the Snipping Tool editor for minor edits or annotations. This notification is your fast gate into cropping, highlighting, or saving the snip. If you miss the notification, you can still paste the image into another program and continue working. Shortcuts Lib notes that this clipboard-first model speeds up sharing since you don’t have to save before using the image.
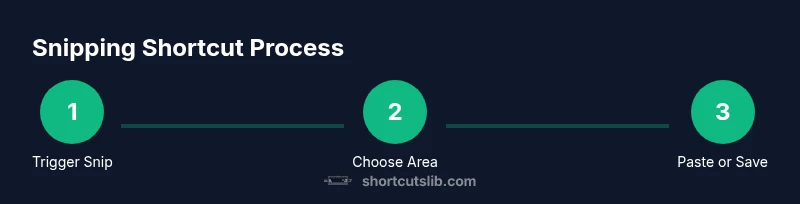
Step-by-step workflow: from shortcut to saved image
This section outlines the general flow you'll follow, from triggering the shortcut to storing your final snip. First, position your screen so that the content you want is clearly visible. Then press Windows+Shift+S to begin the snip overlay. Next, drag to select the desired region and release to capture. Finally, paste the snip into your destination app or open the notification to edit and save in the Snipping Tool editor. This workflow minimizes context switching and keeps your task momentum high.
Customizing your workflow with the Snipping Tool app
Beyond the global shortcut, the Snipping Tool app provides additional control for more complex tasks. You can start new snips with Ctrl+N, switch between capture modes in the editor, and use the save option (Ctrl+S) to store the image to disk. If you frequently need annotated screenshots, explore the built-in markup tools that let you draw, highlight, or add text before sharing. Pinning the Snipping Tool to your taskbar or creating a dedicated keyboard workflow can further reduce friction. Shortcuts Lib highlights that consistent habits matter as much as any single shortcut.
Real-world scenarios: quick captures for docs, emails, and code
Screenshots are common across many tasks: documenting software bugs, preparing how-to guides, or sharing UI feedback. The Snipping Tool shortcut keeps you in context and reduces back-and-forth. For a documentation task, snip the relevant UI, paste into a document, and add brief captions. For email, capture the relevant message or error dialog and paste it into your reply with minimal disruption. For developers, snip a code block or console output and annotate as needed before sharing with teammates. The speed of capture translates into faster iterations and clearer communication.
Accessibility and reliability: ensuring you can capture even on a busy screen
Accessibility considerations include keeping text legible in captured images and ensuring the capture area doesn’t clip important content. If you’re using high-contrast mode or screen magnification, test the shortcut to confirm the overlay remains visible. Reliability comes from consistent key mappings and clear target content. If your shortcut fails, verify OS updates, ensure the Snipping Tool is enabled, and try the direct app method (Ctrl+N) as a fallback. A stable workflow reduces the cognitive load during critical moments.
Common pitfalls and how to avoid them
Common issues include forgetting to save the snip, capturing the wrong region, or losing a snip due to not pasting before moving on. To avoid these, use the clipboard as your first destination, verify the capture area before releasing the mouse, and use the editor to annotate or crop as soon as possible. If you’re sharing sensitive data, blur or redact before saving. Finally, keep the Snipping Tool up to date and practice the flow so the shortcut becomes second nature.
Security and privacy considerations when using screenshots
Screenshots can inadvertently reveal sensitive information. Always review what you’re about to capture and crop or blur anything private. Use the editor to remove or mask sensitive data before sharing, and consider saving screenshots to a secure folder with appropriate access controls. The fastest workflows are also the most careful ones; balance speed with privacy to maintain trust with colleagues and clients.
Tools & Materials
- Windows PC (Windows 10 or Windows 11)(Snipping Tool is included by default.)
- Keyboard(Used for Windows+Shift+S and other shortcuts.)
- Destination app for pasting(Word processors, email clients, image editors, etc.)
- Internet access (optional)(For checking updates or online help if needed.)
Steps
Estimated time: 15-25 minutes
- 1
Prepare the screen
Clear the content you don’t want shared and position the target content in a clean view. This reduces the risk of accidental data exposure and makes the capture precise. Have the window you need to capture in focus so a quick snip yields exactly what you want.
Tip: Close sensitive tabs or blur anything you don’t want in the screenshot. - 2
Trigger the snip with the keyboard
Press Windows + Shift + S to activate the snipping overlay. The screen dims and a crosshair appears, letting you choose the capture mode. If nothing happens, try a quick restart of the Snipping Tool or use the app’s New command (Ctrl+N).
Tip: If the shortcut doesn’t respond, press Esc to cancel and retry. - 3
Select the capture area
Click and drag to define the capture region. Release the mouse to finalize the snip. You can switch between capture modes in the overlay if you realize you need a different shape of capture.
Tip: Be precise; start by outlining the essential area and adjust if needed before releasing. - 4
Paste into a destination app
Open the target application (document, email, or image editor) and press Ctrl + V to paste the snip. If you opened the notification, you can jump straight into the editor for quick edits before pasting or saving.
Tip: If you need to reuse the image elsewhere, keep the snip in the clipboard and switch apps quickly. - 5
Save or reuse the snip
If you choose to save, use the editor’s Save option (Ctrl + S) to store the image to your preferred folder. If you’re primarily pasting, rely on clipboard history (Win + V) once enabled to reuse previously captured snips.
Tip: Organize saved snips in a dedicated screenshots folder with meaningful names.
Questions & Answers
What is the primary keyboard shortcut to start a snip?
The primary shortcut is Windows+Shift+S, which opens the snipping overlay and copies the capture to the clipboard for quick pasting. A notification may offer quick edits in the Snipping Tool editor.
Use Windows plus Shift plus S to start the snip; the image goes to your clipboard for fast pasting, with an optional edit via the notification.
Can I customize Snipping Tool shortcuts?
Windows does not offer built-in customization for the Windows+Shift+S combo. You can rely on the Snipping Tool app’s own commands like Ctrl+N to start a new snip and Ctrl+S to save.
Shortcut customization isn’t built into Windows for this tool; use the app’s own shortcuts like New or Save.
Where is the snip stored and how do I save it?
By default, snips land on the clipboard. You can paste into a destination app, or click the notification to open the editor and save to disk.
Snips go to the clipboard by default; paste where needed or open the editor from the notification to save.
Is there a Mac equivalent for this workflow?
macOS provides its own screenshot utility with different keyboard shortcuts. The Snipping Tool is Windows-specific, so Mac users should use macOS screenshots instead.
On Macs, use the built-in screenshot shortcuts; Snipping Tool is not available on macOS.
How can I annotate snips after capturing?
Open the Snipping Tool editor from the notification or after pasting, then use the built-in markup tools to draw, highlight, or add text before saving or sharing.
Open the editor and use markup tools to annotate your snip before saving or sending.
Watch Video
Main Points
- Master Windows+Shift+S to start snips quickly
- Clipboard-first workflow speeds paste-and-share
- Annotate and save snips in the editor for professional use
- Protect privacy by reviewing content before sharing