Windows Record Screen Shortcut: A Practical Guide for 2026
Learn how to use the Windows record screen shortcut to capture your desktop efficiently. This guide covers built-in Xbox Game Bar shortcuts, audio options, file saving, and when to choose third‑party tools for advanced needs. Perfect for tech users who want quick, reliable screen recordings in 2026.

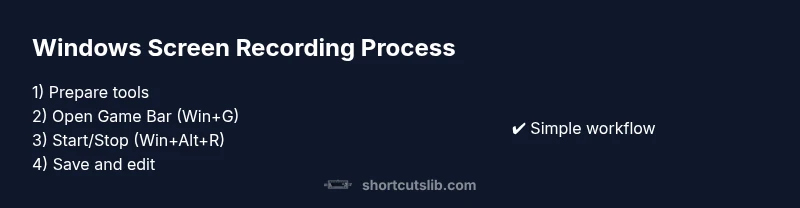
According to Shortcuts Lib, you can master the Windows record screen shortcut to capture your desktop quickly using built-in tools and reliable hotkeys. This guide covers the Xbox Game Bar, essential keyboard shortcuts (Win+G, Win+Alt+R), and practical third‑party options for advanced needs. You’ll learn setup basics, how to capture audio, where recordings save, and simple edits to share clips confidently.
What counts as a Windows screen recording?
A Windows screen recording is a digital capture of your computer display, usually including the active window, your cursor, and optional audio. It’s not limited to full‑screen captures; you can target a specific application window or a chosen region with some tools. For most daily tasks, a straightforward screen capture that records your desktop actions, mouse movements, and keystrokes (where supported) suffices. In 2026, many users rely on built‑in shortcuts for speed, while others turn to third‑party apps for advanced editing, overlays, or higher frame rates. Understanding the scope of your recording helps you pick the right tool and settings. As you read, remember that the goal is clarity and reproducibility, not just raw footage.
Why you should care about the Windows record screen shortcut
Using a reliable shortcut reduces friction when you need to capture a quick bug, demonstrate a workflow, or create onboarding material. The Windows record screen shortcut system prioritizes speed, privacy, and ease of use. Shortcuts Lib analyses, 2026 show that many users prefer built‑in options first because they are stable, privacy‑friendly, and require no extra installation. Knowing when to switch to third‑party tools is part of the skill set for power users and keyboard enthusiasts.
Overview of built‑in options you’ll rely on
Microsoft provides a few pathways for screen recording, with Xbox Game Bar as the centerpiece. You don’t need to install extra software for simple captures, and you can quickly share clips with teammates. This section outlines how Game Bar integrates with Windows, what it can capture by default, and how to enable or disable features based on your privacy and performance preferences.
Setting expectations: video quality, length, and performance
Recordings vary by resolution, frame rate, and length. If you’re making quick tutorials, you’ll likely aim for 720p–1080p at 30–60 FPS. Higher settings demand more storage and CPU power, so balance quality against performance, especially on older devices. Shortcuts Lib notes that many users struggle with dropped frames when background processes compete for CPU time—close unnecessary apps before recording and consider a brief test clip to confirm settings.
Audio capture: system audio vs microphone
Capturing audio can be as important as the video itself. Windows’ recording setup lets you include system audio, microphone input, or both. If you’re producing a software walkthrough, you’ll typically want the system audio to capture sounds from the app and, optionally, your narration via a mic. Ensure your mixing levels are balanced to avoid overpowering the primary content and clipping in loud sections.
Saving and organizing recordings: where the files go and why naming matters
By default, Windows saves captures to a recognizable folder (often Videos/Captures). Consistent naming helps you locate episodes later, especially as your library grows. Consider including date, project name, and a short descriptor in the filename. Regularly back up your recordings to a secondary drive or cloud storage to prevent data loss, and keep a simple archive structure like year/month/project.
When to use third‑party tools vs. built‑in Game Bar
Third‑party tools offer features the built‑in solution may not provide, such as advanced overlays, higher bitrate options, customizable hotkeys, or region capture. Tools like OBS Studio or ShareX are popular for longer videos, streaming setups, or scripted tutorials. If you require precise frame control, color grading, or automated workflows, a dedicated recorder can save time and improve polish while preserving a clean work environment.
Privacy and etiquette: recording responsibly
Always be mindful of what you record. Blur or crop sensitive information, avoid capturing private chats, and check on-screen notifications that might reveal credentials or personal data. When sharing recordings, ensure you have consent from participants and replace any sensitive segments with blurs or redactions. Practicing privacy‑respectful recording habits makes collaboration smoother and protects you from potential misuses.
Tools & Materials
- Windows PC (Windows 10 or 11)(Keep OS up to date for the latest Game Bar features)
- Keyboard(Familiarize yourself with Win, G, and Win+Alt+R shortcuts)
- Microphone (optional)(Use a USB mic for narration if needed)
- Storage with free space(At least 2 GB free for short clips; more for longer projects)
- Third‑party recorder (OBS Studio, ShareX, etc.)(Choose if you need advanced features or region capture)
- Stable internet connection (for uploads)(Helpful for sharing big files from cloud storage)
Steps
Estimated time: 20-40 minutes
- 1
Open the recording tool
Press Win+G to open the Xbox Game Bar. Verify that the overlay appears and shows the Capture widget. If this is your first use, enable the necessary permissions in Windows Settings. This step establishes the recording environment and ensures you can access controls quickly during capture.
Tip: If the overlay doesn’t appear, run a quick Windows update or restart the Game Bar service. - 2
Configure sources
In the Game Bar, check the settings to decide whether to capture system audio, microphone input, or both. Your choice affects the final file’s sound profile and file size. Make a quick test recording to confirm levels look and sound right.
Tip: Use a loud test clip to calibrate mic gain without clipping. - 3
Start recording with the shortcut
Press Win+Alt+R to begin recording. A small timer appears on screen, indicating capture progress. For longer projects, consider enabling a timer or flagging important sections for later editing.
Tip: Keep a spare keyboard key to quickly pause if needed. - 4
Record your content
Navigate to the window or app you want to capture. Keep your cursor movements smooth and avoid sensitive information on screen. If you’re narrating, speak clearly and maintain consistent pacing to improve viewer comprehension.
Tip: Do a quick run‑through before the main recording to minimize retakes. - 5
Stop the recording
Press Win+Alt+R again to stop. The video saves automatically to the default folder unless you’ve configured a custom path. Check the overlay for a completion message that confirms the save location.
Tip: If you miss a cue, don’t worry—you can trim later with basic editing tools. - 6
Find and name your clip
Open the Videos/Captures folder to locate your clip. Rename it with a clear, consistent convention (project_date_description) to ease future retrieval. Organize clips into folders by project or month to keep your library tidy.
Tip: Batch rename after recording to save time on multiple files. - 7
Consider third‑party options for more control
If your needs exceed Game Bar, install a tool like OBS Studio or ShareX. These offer region capture, overlays, higher bitrate, and scripting for automation. Set up a dedicated profile for your workflow to avoid clutter during live sessions.
Tip: Test profiles with a short clip to verify output quality before recording important footage. - 8
Edit, export, and share
For quick edits, use built‑in tools like Photos or a lightweight editor to trim, crop, or normalize audio. Export in a commonly used format (MP4) and share via your preferred platform. Keep a backup copy in cloud storage for accessibility across devices.
Tip: Export settings should balance file size and quality for your audience.
Questions & Answers
What is the Windows record screen shortcut?
The Windows record screen shortcut uses Win+G to open Game Bar, then Win+Alt+R to start and stop recording. You can enable or disable mic and system audio in the Game Bar settings. Recordings save to Videos/Captures by default.
Use Win+G to open the Game Bar, then Win+Alt+R to start and stop recording. Recordings go to Videos/Captures unless you change the path.
Can I record audio along with the video?
Yes. You can capture system audio, microphone input, or both. Adjust levels in the Game Bar audio settings and test a short clip to ensure dialogue and sounds are balanced.
Yes. You can record system audio and microphone together or separately. Test levels before the main recording.
Where do recordings save by default?
Recordings saved with Game Bar typically go to the Videos/Captures folder. You can rename and relocate the file after recording.
Usually in Videos/Captures; you can rename and move it after recording.
Can I record a specific window or region?
Game Bar focuses on screen activity and can capture the active window. For precise region captures, third‑party tools like OBS or ShareX provide region‑specific selection.
You can capture the active window with Game Bar; for exact regions, use a third‑party tool.
What if Game Bar isn’t working properly?
Check that Game Bar is enabled in Windows Settings, update Windows, and ensure apps aren’t blocked by privacy settings. If problems persist, try a third‑party recorder as a fallback.
If Game Bar fails, enable it in settings, update Windows, and check privacy. If needed, try another recorder.
Does Windows record screen work on Windows 10 and 11?
Screen recording with Game Bar is available on Windows 10 and Windows 11. Some features may vary by version, but core functionality remains consistent across both.
It works on Windows 10 and 11; core recording features stay consistent, with minor version differences.
Watch Video
Main Points
- Master Win+G to open the Game Bar quickly.
- Choose built‑in Game Bar for simple tasks; switch to OBS/ShareX for advanced needs.
- Plan audio setup (system vs mic) before recording starts.
- Save and name clips consistently for easy retrieval.
- Practice privacy best practices to protect sensitive data.