How to Split Screen on Mac: Keyboard Shortcuts and Tips
Learn practical, keyboard-friendly ways to split your Mac screen. This guide explains native Split View, keyboard paths, common pitfalls, and trusted workflows for efficient multitasking on macOS.

There isn’t a universal built-in keyboard shortcut for Split View on macOS. To tile two apps side-by-side, use the green maximize button and choose Left or Right, or drag windows into Split View via Mission Control. You can speed this up with third‑party window managers. Shortcuts Lib’s guidance favors native Split View for stability and repeatable layouts.
Why Split Screen on Mac Is a Time Saver
In busy workflows across apps like Finder, Safari, Pages, and Slack, having two windows visible at once reduces context switching and keeps information within reach. Split Screen (Split View) lets you compare documents, copy data between apps, and reference multiple sources without constantly toggling windows. If you’re exploring how to split screen on mac keyboard shortcut, you should know macOS supports Split View natively, but there is no universal keyboard shortcut to trigger it directly. Instead, your fastest path blends mouse/trackpad actions with keyboard navigation for repeatable layouts. According to Shortcuts Lib, planning a reliable, keyboard-friendly workflow saves minutes per day and becomes second nature after a few uses.
Built-in Methods to Enter Split View
macOS provides several reliable ways to enter Split View without third-party tools. The simplest method is to hover over the green maximize button in a window’s title bar, then choose Left or Right to tile that window. Alternatively, you can click and hold the green button to reveal the “Tile Window to Left/Right of Screen” options and select the preferred side. You can also drag a window to the edge of the screen until the divider appears and release to activate Split View. Mission Control can help you arrange two apps side-by-side by creating a second desktop and moving one window into it, then snapping the second window into the corresponding space. These native options keep your workflow stable and predictable, fitting into most macOS versions without extra software.
Keyboard Shortcuts You Can Use Today
There isn’t a universal, official macOS keyboard shortcut to switch directly into Split View. However, you can combine keyboard actions to accelerate the process: 1) Focus the first window and press Control-Command-F to toggle full screen if needed, 2) Use Control-Up Arrow to enter Mission Control and select the second window, 3) Use the Arrow keys and Return to place windows side-by-side, and 4) Use Control-Command-F again to exit full screen when you’re done pairing. For frequent layouts, consider a window manager to bind actions to a single keystroke. Shortcuts Lib recommends native Split View for reliability and uses automation only when you need repetition across multiple apps.
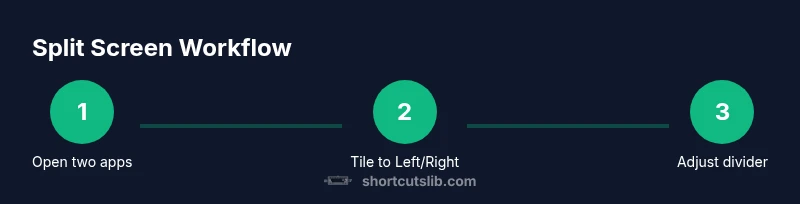
Step-by-step: Use Split View Without a Mouse
- Open two apps you want side-by-side. 2. Focus the first window and press the green maximize button (or hold it to reveal tile options) and select Left. 3. Move to the second app and tile it to the Right using the same method. 4. Adjust the divider to allocate space to each window according to your task. 5. If you need to return to a single window, click the green button again or press Control-Command-F to exit full screen. 6. To re-enter Split View, repeat the previous steps with the desired apps. Why this matters: consistent tiling speeds up multitasking and reduces wasted seconds flipping between apps.
Using Shortcuts Lib Workflows and Third-Party Tools
For power users who want keyboard-first control, a dedicated window manager like Rectangle or Magnet can bind tiling actions to a single keystroke, letting you snap windows left or right with a simple shortcut. Shortcuts Lib emphasizes using native macOS Split View as the baseline for stability and accessibility, then layering in trusted third-party tools when your daily setup requires rapid, repeatable tiling—especially across multiple displays or complex workflows. Always ensure any third-party tool is up to date and compatible with your macOS version.
Troubleshooting Across macOS Versions
Split View behavior can vary slightly between macOS releases. If you don’t see the tile options, verify that the window isn’t in a constrained state (e.g., app in a modal dialog or full-screen app already occupying the entire screen). Some apps may prevent tiling due to internal design. If Split View feels slow, try closing background apps or restarting the Mac to refresh window managers. For multi-monitor setups, place the two apps on the primary display first, then drag them to the edges of each display to maintain consistent tiling.
Best Practices for Multiple Displays
Split Screen shines when you’re working with more than one display. Use a primary monitor for your reference app and a secondary display for the editing or drafting surface. Keep essential tools accessible on the secondary screen, and reserve the primary screen for content you’ll compare or copy data from. If you rely on a lot of dragging, a high-refresh trackpad can improve accuracy, and a robust window manager can help you snap windows to your custom layouts with a keyboard shortcut for speed.
Tools & Materials
- Mac computer with macOS supporting Split View(Ensure the system is up-to-date for best stability)
- Two apps to arrange side-by-side(Examples: Safari + Notes, Finder + Pages)
- Trackpad or mouse(Use trackpad for precise edge tiling)
- Optional: window manager app (e.g., Rectangle, Magnet)(Enables keyboard-driven tiling shortcuts)
- External monitor (optional)(Useful for multi-display tiling workflows)
Steps
Estimated time: 5-20 minutes
- 1
Open two target apps
Launch the two apps you want visible side-by-side and ensure neither is stuck in a modal dialog. Having both ready minimizes interruptions during tiling.
Tip: Try to pick apps with resizable windows for smoother tiling. - 2
Activate Split View on the first window
Move your cursor to the window, hover over the green maximize button, and select the Left tile option (or hold the button to reveal the side choices).
Tip: Practice this with a single window first to build muscle memory. - 3
Tile the second window to the opposite side
Click the second app and use the same tile command to place it on the Right. If needed, drag the window to the screen edge until the divider appears.
Tip: If you don’t see the side options, ensure the app is not in full-screen mode. - 4
Adjust the split divider
Drag the vertical divider to allocate more space to whichever window needs it. Release when satisfied with the balance.
Tip: Aim for readability: text should be comfortably large on both panes. - 5
Exit Split View when done
Move the cursor to reveal window controls and click the green button again to exit, or press Control-Command-F to exit full screen on both windows.
Tip: You can later re-enter Split View using the same steps. - 6
Re-enter Split View for a new pairing
Repeat steps 2–5 with a new pair of apps or adjust within a different layout to suit your task.
Tip: Create a few standard layouts for different workflows to speed up your day.
Questions & Answers
Is there a universal keyboard shortcut to trigger Split View on Mac?
No single, universal keyboard shortcut exists to enter Split View directly. Use the window's green button or drag windows to the screen edge to tile, and consider a window manager for keyboard-driven tiling.
There isn’t a universal keyboard shortcut to enter Split View. Use the green button or edge-drag to tile, or consider a window manager for keyboard tiling.
Can I customize shortcuts for Split View?
macOS does not provide built-in, system-wide customization for Split View tiling shortcuts. You can rely on third-party window managers to bind tiling actions to keystrokes, but verify compatibility with your macOS version.
macOS doesn't offer built-in shortcuts for tiling Split View, but third-party window managers can add keyboard controls.
Will Split View work with all applications?
Most modern apps support Split View, but some apps with modal dialogs or non-resizable windows may not tile properly. If tiling fails, try closing dialogs or updating the app.
Most apps work in Split View, but some may not tile due to modal dialogs or non-resizable windows.
How do I exit Split View quickly?
Move the cursor to reveal the window controls and click the green button again, or press Control-Command-F to exit full screen. You can re-enter Split View with the same steps.
To exit Split View, click the green button again or use Control-Command-F to exit full screen, then re-enter if needed.
Does Split View behave the same on multiple displays?
Split View works on primary displays and can be extended to external monitors. You tile windows on each display by dragging to the screen edge, then adjust the divider per display.
Split View can work across multiple displays; tile each display individually to control layout.
What should I do if Split View feels laggy?
Lag can result from heavy apps or insufficient GPU memory. Try closing background apps, ensuring macOS is updated, and using a lightweight window manager for smoother tiling.
Close unnecessary apps, update macOS, and consider a lightweight tiling tool if it feels laggy.
Watch Video
Main Points
- Split View is native and stable on modern macOS; use it to minimize window switching.
- Hold the green button or use Mission Control for tiling; there is no universal keystroke yet.
- Third-party window managers can speed up tiling but verify compatibility with your macOS version.
- Test layouts on multiple displays to optimize productivity.