The Ultimate Guide to the Shortcut Key to Increase Brightness
A practical guide to brightening your screen quickly with keyboard shortcuts across Windows, macOS, and Linux. Learn built-in keys, how to map custom shortcuts, troubleshoot issues, and craft workflows that keep your eyes comfortable in 2026.

Learn how to quickly brighten your screen using keyboard shortcuts across Windows, macOS, and Linux. This guide covers built-in shortcuts, how to map custom shortcuts, and practical tips to improve readability in different environments. Discover universal patterns and OS-specific variations to execute a reliable shortcut key to increase brightness.
Understanding brightness control: what it does and where it lives
Brightness is more than a cosmetic change; it affects readability, eye comfort, and battery life. According to Shortcuts Lib, mastering the shortcut key to increase brightness reduces friction and keeps your focus on the task. Brightness is typically controlled at three levels: hardware keys on your keyboard, software brightness sliders in the operating system, and advanced backlight controls on laptops. On desktops, you rely on monitor OSD menus or GPU control panels. This section covers how these layers interact, how to identify which layer you’re adjusting, and how to implement reliable shortcuts that work across apps and windows. You’ll learn to differentiate incremental brightness steps from broad changes, understand how brightness interacts with color temperature, and discover how to test changes to ensure consistent legibility in different lighting conditions. We’ll also explore accessibility considerations for users with photophobia or low-vision needs, where a consistent brightness baseline matters for speed and comfort.
Default shortcut keys across major operating systems
Across Windows, macOS, and Linux, there are instinctive patterns for brightness control. On laptops, the top-row keys usually carry brightness icons, and you often press them with the Fn key. On Windows, you’ll commonly find brightness controls on the keyboard or in the Quick Settings panel, while macOS exposes brightness adjustments via the dedicated brightness keys on the keyboard. Linux offers several options, from hardware backlight interfaces to software tools that hook hotkeys. This section lays out typical defaults and the caveats you should anticipate when using external displays. For clarity, we’ll differentiate what happens at the keyboard level versus what happens in the OS, and explain how external monitors can affect the visible brightness even when the system slider is moved. Finally, we’ll provide quick mapping ideas you can adopt immediately in your daily workflow.
How to locate brightness controls in hardware and software
Finding the brightness controls is the first step to building reliable shortcuts. Hardware controls live on many laptops as dedicated sun icons or as secondary functions on the F-keys. If your device lacks dedicated keys, you can adjust brightness through the OS control panel or system settings. On external monitors, brightness is often controlled via the monitor’s own OSD (on-screen display) menu, sometimes independent of the computer. In Windows, look under Settings > System > Display to adjust the brightness slider. On macOS, use the brightness keys (F1/F2) or the Display preferences for more advanced options. In Linux, you may use backlight interfaces in /sys/class/backlight or command-line utilities. The goal is to identify the layer you’ll target with your shortcut—hardware, OS, or monitor—so you can keep changes consistent across apps and contexts. This knowledge also helps when troubleshooting dimming behavior after sleep or when connected to multiple displays.
Mapping a custom shortcut: Windows, macOS, Linux
Creating a reliable custom shortcut to increase brightness requires choosing a toolset that supports hotkeys and brightness changes. Windows users can leverage third‑party utilities that expose hotkeys to brightness levels and optionally a script to ramp brightness up by a fixed step. macOS users can use built‑in keyboard shortcuts and, if needed, third‑party apps to map additional hotkeys. Linux users typically rely on backlight interfaces, utility packages, or desktop environment shortcuts. Practical steps: 1) pick a brightness control tool that supports hotkeys; 2) install it with the required permissions; 3) create a hotkey combination that calls the “increase brightness” action; 4) test in common apps and with different lighting; 5) adjust the step size to avoid sudden jumps. With any mapping, ensure the shortcut remains available after reboots and across user profiles.
Testing and validation: ensuring reliability across apps
Once you’ve set a shortcut, test its reliability in real-world scenarios. Start in a bright room, then dim the environment and verify that the brightness steps feel comfortable. Check that the shortcut works when a full-screen app is active, in a browser, and in a video call app where legibility matters. Validate that the OS brightness, monitor brightness, and any color temperature tools stay synchronized. If you notice delays or inconsistent brightness increments, review the tool’s permissions, confirm it’s not overridden by power-saving features, and verify that the display you’re targeting is the one in focus. Logging a few test cases and keeping a small changelog helps you refine the mapping over time.
Accessibility considerations and best practices
Brightness is a core accessibility factor. A stable baseline improves reading speed, reduces eye strain, and makes color contrast more consistent for users with low vision. When designing shortcuts, prefer small, predictable brightness increments (e.g., steps of 5–10%) rather than abrupt changes. Provide a visible on-screen indicator when a shortcut is used, so users know the effect immediately. Consider color temperature as well; warmer light tends to be easier on the eyes in low-light environments. For keyboard-centric users, ensure that your brightness shortcut is discoverable via OS help or a tooltip in a helper app. Finally, document your setup so teammates can replicate the configuration and maintain consistency across devices.
Practical examples and workflows
In daily workflows, you’ll often toggle brightness based on task and environment. For spreadsheet work in a dim room, a moderate increase can improve readability without color distortion. In video calls from a bright room, a quick nudge toward higher brightness reduces glare on your face while keeping text legible. Gamers may prefer a slightly higher brightness for better contrast, while photographers calibrate brightness in post‑production and keep a separate workflow. A simple two-hotkey setup—one for increase, one for decrease—often covers most needs, and you can extend with a macro that toggles between a few preset levels for dedicated tasks. Pair these with a quick-access brightness slider in your OS to fine-tune on the fly.
Troubleshooting common issues and caveats
If brightness changes don’t take effect, check for conflicting hotkeys from other software, ensure the brightness control tool has permission to modify display settings, and verify you’re adjusting the correct display in multi-monitor setups. Some external monitors do not propagate brightness changes from the OS; in that case, use the monitor’s own controls or enable DDC/CI when available. If Sleep or Hibernate reverts brightness unexpectedly, adjust power management settings to keep the chosen level stable during transitions. Finally, recheck driver updates, as outdated graphics or monitor firmware can disrupt backlight control.
Next steps and practice exercises
Practice by setting up a baseline brightness level and work through a sequence of adjustments in different apps. Create a quick checklist for evaluating legibility in various lighting conditions, and record how each change affects glare and contrast. Expand your toolkit with a second shortcut that adjusts color temperature or a dedicated accessibility tool for high-contrast viewing. Over time, you’ll build muscle memory for brightness tweaks that keep you productive across tasks and environments, which aligns with Shortcuts Lib’s goal of mastering keyboard shortcuts for real-world work in 2026.
Tools & Materials
- Keyboard with function keys (F1–F12)(Look for dedicated brightness icons or the ability to invoke Fn+brightness combo.)
- Operating system with standard display controls (Windows/macOS/Linux)(Ensure you can access brightness settings quickly via shortcuts or menus.)
- Display monitor that supports DDC/CI (optional but helpful)(Allows software to adjust brightness independently of the OS.)
- Brightness control utility or app with hotkey support(Choose one that can map an “increase brightness” action to a keyboard shortcut.)
- Documentation or help resources for your hardware(Keeps consistency when settings differ between devices.)
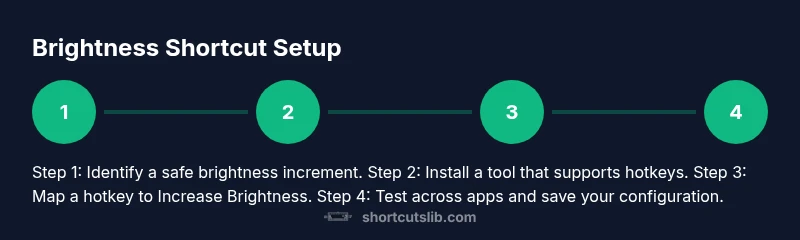
Steps
Estimated time: 30-60 minutes
- 1
Identify your baseline brightness target
Decide the starting brightness that feels comfortable in your typical lighting. Note how much you’ll increase during work and how this feels during late-night use. This helps determine your step size for the shortcut.
Tip: Start with a 5–10% step and adjust if you notice sudden brightness jumps. - 2
Open your OS brightness controls to confirm current level
Navigate to your display settings in Windows, macOS, or Linux to confirm the current brightness before adding a shortcut. This ensures your automation ramps correctly from the chosen baseline.
Tip: If you use external monitors, verify which display is active before testing. - 3
Install a hotkey utility with brightness support
Choose a reputable tool that exposes a command or API to increase brightness. Install it according to the developer’s instructions and grant any required permissions.
Tip: Prefer tools that offer per-user and per-device profiles for reliability. - 4
Create the brightness-increase hotkey
Configure a keyboard combination (for example, Ctrl+Alt+Up) to trigger the “increase brightness” action. Set the step to your chosen increment.
Tip: Avoid common hotkeys that clash with other apps (e.g., system shortcuts like Alt+Tab). - 5
Test across apps and scenarios
Try the shortcut in a document, video call, and full-screen app. Confirm the brightness change is visible and consistent.
Tip: Check both OS-level brightness and monitor brightness if using an external display. - 6
Refine step size and feedback
If the brightness changes are too subtle or jarring, adjust the increment and add a visual on-screen indicator to confirm the change.
Tip: Small, predictable steps improve muscle memory. - 7
Document and back up your configuration
Save a quick guide for teammates or future you, and create a backup of your shortcut setup so it survives OS resets.
Tip: Store the guide in a shared workspace or notes app for easy reference.
Questions & Answers
What is the fastest way to brighten my screen on Windows without installing anything new?
Use the built-in keyboard brightness keys if your laptop has them (often Fn + the brightness key). If not, use the Windows Quick Settings brightness slider or Settings > System > Display to raise brightness.
On Windows, try the brightness keys first. If your machine lacks them, use the Quick Settings brightness slider for a quick adjustment.
Can I map brightness adjustments to custom keyboard shortcuts on macOS?
Yes. macOS supports brightness control via the dedicated F1/F2 keys and you can use third‑party apps to map additional shortcuts if you need more options.
You can map extra brightness shortcuts with helper apps if you want more than the built‑in keys.
Is it possible to control brightness with scripts on Linux?
Yes. Linux often exposes backlight interfaces (like /sys/class/backlight) that you can target from scripts or desktop shortcuts to increase brightness.
Linux supports brightness changes via scripts and desktop shortcuts that call those interfaces.
What should I do if brightness changes but the monitor looks too dark or too bright?
Check both OS brightness and monitor settings. Some monitors have their own brightness control independent of the OS; adjust accordingly and verify a single source of truth for brightness.
If the monitor is off, adjust the monitor’s own brightness control to match your preference.
How can I test my brightness shortcut for reliability?
Test in different apps and lighting conditions, verify it doesn’t conflict with other shortcuts, and ensure it stays consistent after reboot or power state changes.
Test the shortcut across apps and after reboots to ensure it holds up.
Watch Video
Main Points
- Identify the brightness control layer (hardware, OS, monitor)
- Use built-in shortcuts first, then add a custom hotkey
- Test consistently across apps and displays for reliability
- Document setup for teammates and future devices