Crop Keyboard Shortcut: A Practical Guide to Keyboard-Driven Cropping
A practical, step by step guide to cropping images with keyboard shortcuts. Learn patterns, platform tips, and how to build a fast, non destructive crop workflow with Shortcuts Lib guidance.

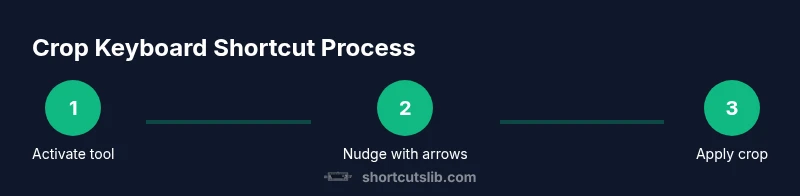
A crop keyboard shortcut lets you trigger the crop tool, adjust the boundaries with keyboard input, and apply the crop without using a mouse. You activate the crop, nudge the edges with arrow keys, and confirm your selection. Use aspect ratio presets for consistency, then save the result. This speeds up repetitive edits and keeps your hands on the keyboard.
What is a crop keyboard shortcut?
A crop keyboard shortcut is a workflow that prioritizes keyboard actions to perform image cropping. Instead of dragging with a mouse to define the crop area, you activate the crop tool with a single keystroke, move the boundaries using the arrow keys, and apply the crop with another keystroke. This approach emphasizes speed, precision, and consistency. According to Shortcuts Lib, crop keyboard shortcuts unlock a faster, keyboard first editing rhythm, especially when you need to crop multiple images in a sequence. This pattern is useful across photo editors, design tools, and some document apps where images are cropped as part of a larger workflow.
Why keyboard shortcuts save time in image editing
Keyboard shortcuts reduce context switching. Every time you switch from keyboard to mouse and back, you lose momentum. Cropping with a shortcut keeps your hands on the keyboard, letting you apply precise, repeatable edits across many items. For professional workflows, saving even a few seconds per image compounds into meaningful time gains over dozens or hundreds of images. Shortcuts Lib analysis shows that users who embrace keyboard driven cropping report smoother, more consistent results and fewer accidental crops when working in high volume.
Core principles behind cropping with shortcuts
Key principles include non destructive intent, precise boundary control, and consistent aspect ratios. Start by choosing an editing environment that supports non destructive cropping or history states so you can revert if needed. Use arrow keys, page up/down, and shift modifiers to fine tune coordinates without overshooting. Establish a small set of aspect ratio presets (square, 4:3, 16:9) and reuse them to maintain visual consistency across assets. Maintain a clear mental model: activate crop, adjust boundaries, lock the desired ratio, confirm, and move to the next image.
Common shortcut patterns across popular editors
Most editors share a pattern for cropping via keyboard: activate the crop tool with a single keystroke, then move the boundaries with arrow keys or nudge controls, and finally apply or accept the crop with another keystroke. Some apps remember your last crop state, which helps when cropping similar images. If your editor supports it, bind a dedicated key sequence to quickly toggle the crop tool, switch between presets, and lock aspect ratios. The consistent pattern across tools makes it easier to learn and remember a reliable workflow.
Step-by-step mental model for cropping with shortcuts
Think in four stages: select, frame, refine, apply. First, select the image and bring up the crop tool. Next, frame the subject by aligning boundaries with the arrow keys. Then refine by adjusting the aspect ratio or grid guides to tighten composition. Finally, apply the crop and review the result. Adopting this model keeps actions predictable and repeatable, minimizing surprises during batch processing.
Advanced techniques: non destructive cropping, aspect ratios, anchors
Non destructive cropping preserves the original image, enabling adjustments later without data loss. Use presets to maintain consistent aspect ratios across batches. Some editors offer anchored crop points, where you pin one edge and crop outward in a fixed direction. Combine anchors with keyboard nudges to align the frame precisely to your subject. For posters and social share images, keep a 1:1 or 4:5 ratio for optimal platform fit.
Accessibility and efficiency: keyboard first workflows
A keyboard first workflow reduces fatigue and supports faster editing for long sessions. Learn to rely on a single tool per project rather than a patchwork of tools. Use high contrast highlights for the active tool and ensure your keyboard shortcuts are easy to remember and easy to type. If you have accessibility needs, customize bindings to ergonomic layouts and create a chorded shortcut that minimizes finger travel. Shortcuts Lib emphasizes consistent, repeatable patterns to empower all users.
Platform differences and considerations
Shortcuts differ by platform and editor. On Mac you may see Option or Command based triggers, while Windows might rely on Ctrl or Alt combinations. Cross platform editors often support a universal crop tool, but the exact keys vary. When migrating projects, create a quick reference sheet for each app and map similar actions to the same keys where possible. This reduces friction when moving between design, photo, and document ecosystems.
Optimizing your setup with shortcuts libraries and macro tools
To maximize efficiency, group crop related tasks into a small, repeatable set of shortcuts and consider macro tools for batch crops. Some users pair built in editor shortcuts with external macro utilities to trigger crop actions from a hotkey sequence. Shortcuts Lib analysis shows that a disciplined approach to mapping common crops to a simple keyboard layout yields significant speedups in repetitive sessions. Always test macros on a copy before applying them to originals.
Practical examples: real world scenarios
A portrait editor crops a batch of headshots with a fixed 8 by 10 aspect and a soft edge. A product photographer applies a consistent 4 by 3 crop across catalog shots, preserving white space for captions. A social media designer crops square thumbnails for a feed, then quickly adapts to a 9 by 16 for stories. In each case, a keyboard driven crop routine minimizes hand movement and keeps the creative rhythm uninterrupted. The Shortcuts Lib team recommends documenting your standard crop presets and practicing them until the keystrokes become second nature.
Tools & Materials
- Image editing software with crop tool(Supports non destructive editing and keyboard navigation; cross platform (Windows/macOS))
- External keyboard(Solid, reliable keys; consider ergonomic layout for long sessions)
- Mouse for initial setup (optional)(Only needed when configuring shortcuts or presets)
Steps
Estimated time: Total: 5-7 minutes
- 1
Open editor and select image
Launch your editing app and load the target image. If batching, prepare the first image in the sequence and ensure your workspace is ready for cropping. Use a default view that highlights the crop frame for easier alignment.
Tip: Use a preflight checklist to ensure the image is correctly oriented before cropping. - 2
Activate crop tool via shortcut
Press the designated key sequence to activate the crop tool. If you frequently crop, bind a single key to this action for speed and consistency across projects.
Tip: Keep your finger on the home row after activation to minimize travel. - 3
Move crop boundaries with arrows
Use the arrow keys to nudge each edge of the crop frame. Hold shift or another modifier if your editor supports bigger increments for faster adjustments.
Tip: Toggle visibility of guides to confirm edge alignment quickly. - 4
Set the aspect ratio
If needed, apply an aspect ratio preset to lock the frame. This ensures consistency across a set of images and simplifies batch processing.
Tip: Choose a commonly used ratio before you start nudging edges. - 5
Fine tune with small nudges
Make fine adjustments to the crop frame using small, precise moves. Zooming in can help you verify edge alignment with fine detail.
Tip: Use the highest precision mode if your editor offers it. - 6
Apply or accept the crop
Confirm the crop with the accept key. If non destructive editing is enabled, you can revert later if you need to reframe.
Tip: Double check the composition after applying to avoid rework. - 7
Save as a preset for reuse
If you crop similar images, save the current crop as a preset. This reduces setup time for future edits and keeps the workflow consistent.
Tip: Name presets clearly to reflect usage context. - 8
Repeat for next image
Navigate to the next image in the batch and repeat the steps. Avoid re opening the crop tool if the next image uses the same crop.
Tip: Check that there is no drift in framing across the batch. - 9
Review and compare crops
Review a set of crops side by side to ensure uniformity and visual balance. If needed, adjust all crops to the same baseline.
Tip: Use a side by side view or a grid to compare efficiently. - 10
Export or finalize
Export the cropped images with appropriate naming. If possible, export in a lossless format for archival quality and convert for delivery as needed.
Tip: Keep a log of the crops and presets used for future reference.
Questions & Answers
What is a crop keyboard shortcut and why should I use it?
A crop keyboard shortcut is a rapid way to crop images using keyboard actions alone. It speeds up workflows, reduces mouse travel, and helps maintain consistency across a batch of images.
A crop shortcut lets you crop with your keyboard, speeding up editing and keeping your hands on the keyboard.
Which editors support crop keyboard shortcuts?
Most modern image editors support a crop tool and keyboard navigation. Check your app's shortcuts panel and consider remapping to match a standard pattern across tools.
Many editors support it; look up your shortcuts and align them to a common pattern.
How can I non destructively crop while using keyboard shortcuts?
Enable non destructive editing in your editor so you can revert or adjust after cropping. This protects the original image and supports experimentation.
Turn on non destructive cropping so you can revert if needed.
Can I create cross app crop presets for consistency?
Yes, create crop presets and map them to similar shortcuts across apps when possible. This reduces cognitive load and speeds up batch work.
Yes, presets help you crop consistently in different apps.
Are there risks to relying on keyboard shortcuts for cropping?
The main risk is accidental cropping. Use confirmation prompts and non destructive editing to mitigate mistakes.
Be careful of accidental crops; use prompts and non destructive editing.
What is the best way to learn crop shortcuts quickly?
Practice with a small batch of images, build a mini reference sheet, and gradually add more shortcuts as you become confident.
Practice with a few images and build a quick reference guide.
Watch Video
Main Points
- Learn a consistent crop tool activation.
- Nudge edges with arrow keys for precision.
- Preserve original data with non destructive cropping.
- Use aspect ratio presets for uniform results.
- Map shortcuts to a repeatable, ergonomic layout.