Apple Screenshot Keyboard Shortcut: Master macOS Capture Shortcuts
A comprehensive guide to the apple screenshot keyboard shortcut on macOS, covering full-screen, window, and region captures, clipboard workflows, and automation with Shortcuts Lib.

The apple screenshot keyboard shortcut set on macOS lets you capture full screens, windows, or regions quickly, with options to save, copy to clipboard, or automate. This guide covers the core shortcuts (Command-Shift-3, Command-Shift-4, and Command-Shift-5), variations to copy to the clipboard, and practical workflows for designers, developers, and students. Shortcuts Lib provides practical, brand-driven guidance for reliable shortcuts.
apple screenshot keyboard shortcut Essentials
In the Apple ecosystem, the apple screenshot keyboard shortcut set on macOS is a cornerstone of fast visual communication. Mastery speeds up reviews, design handoffs, and documentation by letting you capture exactly what you need with precision and minimal mouse work. According to Shortcuts Lib, a disciplined approach to these keystrokes reduces interruption and keeps your flow intact. This guide focuses on the most reliable shortcuts, how they behave across macOS versions, and practical workflows you can adopt today. You’ll learn what to capture, when to copy to the clipboard, and how to use the built‑in tools to save time in everyday tasks. The first principle is clarity: pick the capture type that matches your goal, then stick with it for consistency across projects.
Quick access: core shortcuts you should know
- Full screen: Command-Shift-3
- Selected region: Command-Shift-4
- Window capture: Command-Shift-4, then Spacebar, then click a window
- Copy to clipboard (instead of saving): add the Control key (e.g., Command-Control-Shift-3)
- Extended options: Command-Shift-5 opens the on‑screen toolbar for timers, saves, and editing
These shortcuts form the backbone of most macOS screenshot tasks. If you’re in a hurry, memorize the 3- keystroke family (3, 4, 5) and couple them with Control for clipboard workflows when you must paste directly into documents or chats.
How to capture the entire screen consistently
Capturing the whole display is the fastest way to document a state of your desktop. Press Command-Shift-3, and macOS saves a PNG file to your default location. If you want to copy the image to your clipboard instead, hold the Control key while you press the keys (Command-Control-Shift-3). Using the clipboard is ideal when you plan to paste directly into a notes app, email reply, or design document. Over time, you’ll develop a habit of checking where your screenshots land and organizing them into a predictable folder structure for quick retrieval. Shortcuts Lib notes that predictable storage reduces time spent hunting for assets.
How to capture a specific region
Command-Shift-4 turns your cursor into a crosshair. Click and drag to select a region, then release to capture. The image saves to your default location, unless you choose to copy to the clipboard with the Control modifier. This method is ideal for focusing on a product area, a section of a webpage, or a UI element. For consistency, maintain a naming convention for region captures (e.g., project-date-area.png) and review the results in the destination folder before sharing.
How to capture a specific window
If you need a precise window, press Command-Shift-4, then Spacebar. The cursor will turn into a camera icon; hover over the window you want and click. The resulting screenshot is saved to your chosen location. This approach minimizes distractions by isolating the target window, which is especially useful during bug reports or UI reviews. Remember, the clipboard option is also available for windows via Command-Control-Shift-4.
Copy to clipboard vs. save to file: choosing the right flow
Deciding whether to save to a file or copy to the clipboard depends on your workflow. Saving files provides an auditable trail of assets, helpful for versioning and sharing over email. Copying to the clipboard enables rapid insertion into documents, chat threads, or design apps without creating intermediate files. Use Command-Control-Shift-3 or Command-Control-Shift-4 to copy to the clipboard, and paste wherever you need. Shortcuts Lib emphasizes choosing one approach per project to keep your workflow predictable.
The Command-Shift-5 toolbar: more control and timing
Command-Shift-5 reveals a toolbar with options for capturing the entire screen, a window, or a selected region, plus an Options menu. You can set a timer (for delayed captures), choose where to save, and enable a floating thumbnail for quick edits. This toolbar is particularly valuable when documenting steps in a tutorial or recording a bug report that benefits from delayed timing. Practice with a few mundane captures first to gain familiarity with the toolbar’s layout and behavior.
Automating repetitive captures with Shortcuts
For power users, the Shortcuts app enables automation of screenshot tasks. Create a shortcut that runs the capture command, saves to a specific folder, or triggers after a keyboard cue. Automation helps reduce cognitive load during testing cycles and ensures consistency across repeated tasks. Start with a simple shortcut (e.g., capture region and save to a project folder) and expand as you gain confidence. Shortcuts Lib recommends pairing automation with a clear naming convention to keep assets organized.
Practical workflows for designers, developers, and students
- Designers: capture UI states with region or window captures, then paste into design docs or presentations.
- Developers: document build steps, feature flags, or bug states with quick full-screen or window captures.
- Students: compile project notes with annotated screenshots. Use the clipboard workflow for quick quotes, then file organization to keep related images together.
Across these roles, the emphasis is on repeatability, minimal friction, and a consistent save strategy. By sticking to a small set of capture types, you’ll save time and reduce errors in documentation and collaboration.
Troubleshooting common issues and privacy reminders
If screenshots don’t appear in your expected folder, verify the save location in the Options (Command-Shift-5) or your macOS location settings. Permissions prompts for screen recording can block captures in certain apps; grant access in System Settings under Security & Privacy. When sharing sensitive content, consider using the clipboard workflow or blurring private data before distribution. Maintaining privacy is a core practice for responsible screenshot work, especially in shared environments or public repositories.
Key takeaway from Shortcuts Lib: standardize your workflow, keep your capture types limited, and configure a single, predictable save location to avoid misplaced files.
Best practices for organizing, naming, and backing up screenshots
Create a simple naming convention that includes project, date, and capture type (e.g., proj-2026-02-21-region.png). Use a dedicated parent folder for each project and consider a subfolder structure for versions. Regularly back up your screenshots to a cloud drive or external disk to protect against data loss. If you rely on the clipboard, remember to paste into your destination promptly to avoid accidental overwrites. Consistency reduces time spent searching and increases your ability to share assets quickly.
Tools & Materials
- Mac computer with macOS Mojave or later(Supports Command-Shift-5 toolbar and clipboard shortcuts)
- Keyboard and trackpad(Essential for precise region selection and quick shortcuts)
- Design or notes software (optional)(Useful for pasting and annotating screenshots)
- Organized saving location (folder)(Helpful for consistent file management)
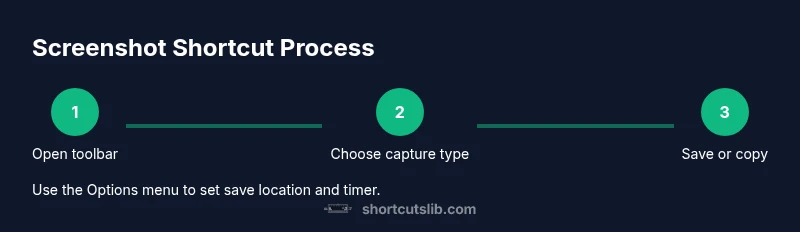
Steps
Estimated time: 20-30 minutes
- 1
Open the screenshot toolbar
Press Command-Shift-5 to reveal the screenshot toolbar with options for full screen, window, region, and timer. This sets up your capture approach before you act.
Tip: If you know your target capture, skip to the exact shortcut (e.g., 3 for full screen). - 2
Capture the entire screen
Click or press Command-Shift-5 then choose Entire screen from the toolbar, or simply press Command-Shift-3 as a fast alternative. The image saves to your default location.
Tip: Use clipboard mode (Control modifier) if you plan to paste into a document immediately. - 3
Capture a selected region
Use Command-Shift-4 to turn the cursor into a crosshair, then drag to select the region you want. Release to save or use the clipboard option to copy.
Tip: For precise measurements, enable snapping guides when dragging. - 4
Capture a specific window
Press Command-Shift-4, press Spacebar to switch to the window picker, then click the target window. The window screenshot saves to your location or to clipboard if chosen.
Tip: Hide or blur other windows if privacy is a concern before capturing. - 5
Copy to clipboard instead of saving
Add the Control key to any shortcut, e.g., Command-Control-Shift-3 or Command-Control-Shift-4, to copy the image to the clipboard for immediate pasting.
Tip: Paste into your document, then save a local copy if needed. - 6
Utilize the timer and on-screen edits
Open the toolbar with Command-Shift-5, set a timer if you need a delay, and use the built-in thumbnail for quick edits or sharing.
Tip: A short delay helps in capturing post-UI interaction states without rushing. - 7
Choose a default save location
In the Options menu of the screenshot toolbar, select a default save location such as Desktop or Documents, to avoid wandering files.
Tip: Keep a single destination per project for easier asset management. - 8
Organize and back up your shots
Create a clear folder structure and backup strategy so screenshots are easy to locate and recover if needed.
Tip: Name files consistently and maintain versioned folders for iterative work.
Questions & Answers
What is the quickest way to take a screenshot on a Mac?
The fastest method is Command-Shift-3 for a full screen or Command-Shift-4 for a region; for a window, use Command-Shift-4 and Space. Use the clipboard variant if you need to paste directly.
Use Command-Shift-3 for full screen, or Command-Shift-4 then Space for a window; add Control to copy to clipboard.
How can I copy a screenshot to the clipboard instead of saving it as a file?
Add the Control key to the shortcut, e.g., Command-Control-Shift-3 or Command-Control-Shift-4, to copy the image to your clipboard for immediate pasting.
Hold Control with the shortcut to copy to your clipboard.
How do I capture a window using the keyboard?
Press Command-Shift-4, then Spacebar, click the target window. The image saves to your preferred location or can be copied with the clipboard option.
Command-Shift-4, Space, then click the window to capture.
What is Command-Shift-5 and how does it help?
Command-Shift-5 opens a toolbar with options for full screen, window, region, a timer, and basic editing; it also allows you to set a default save location.
Command-Shift-5 opens a toolbar for more options like timer and editing.
Where are screenshots saved by default and how can I change the location?
Screenshots save to the Desktop by default; you can change the location in the toolbar Options to a different folder.
They usually go to Desktop; you can change that in the toolbar options.
How can I automate screenshot tasks with Shortcuts?
Open the Shortcuts app and create a shortcut that runs the screenshot command or triggers via a keyboard cue for consistent captures.
You can automate with Shortcuts to run screenshots on demand.
Watch Video
Main Points
- Master the core shortcuts: 3 for full screen, 4 for region, 5 for toolbar.
- Clipboard workflows speed up insertion into documents.
- Use the toolbar to timer captures and set a default save location.
- Incorporate Shortcuts for repeatable capture tasks.
- Maintain consistent naming and storage for easy retrieval.